Vertical Cake
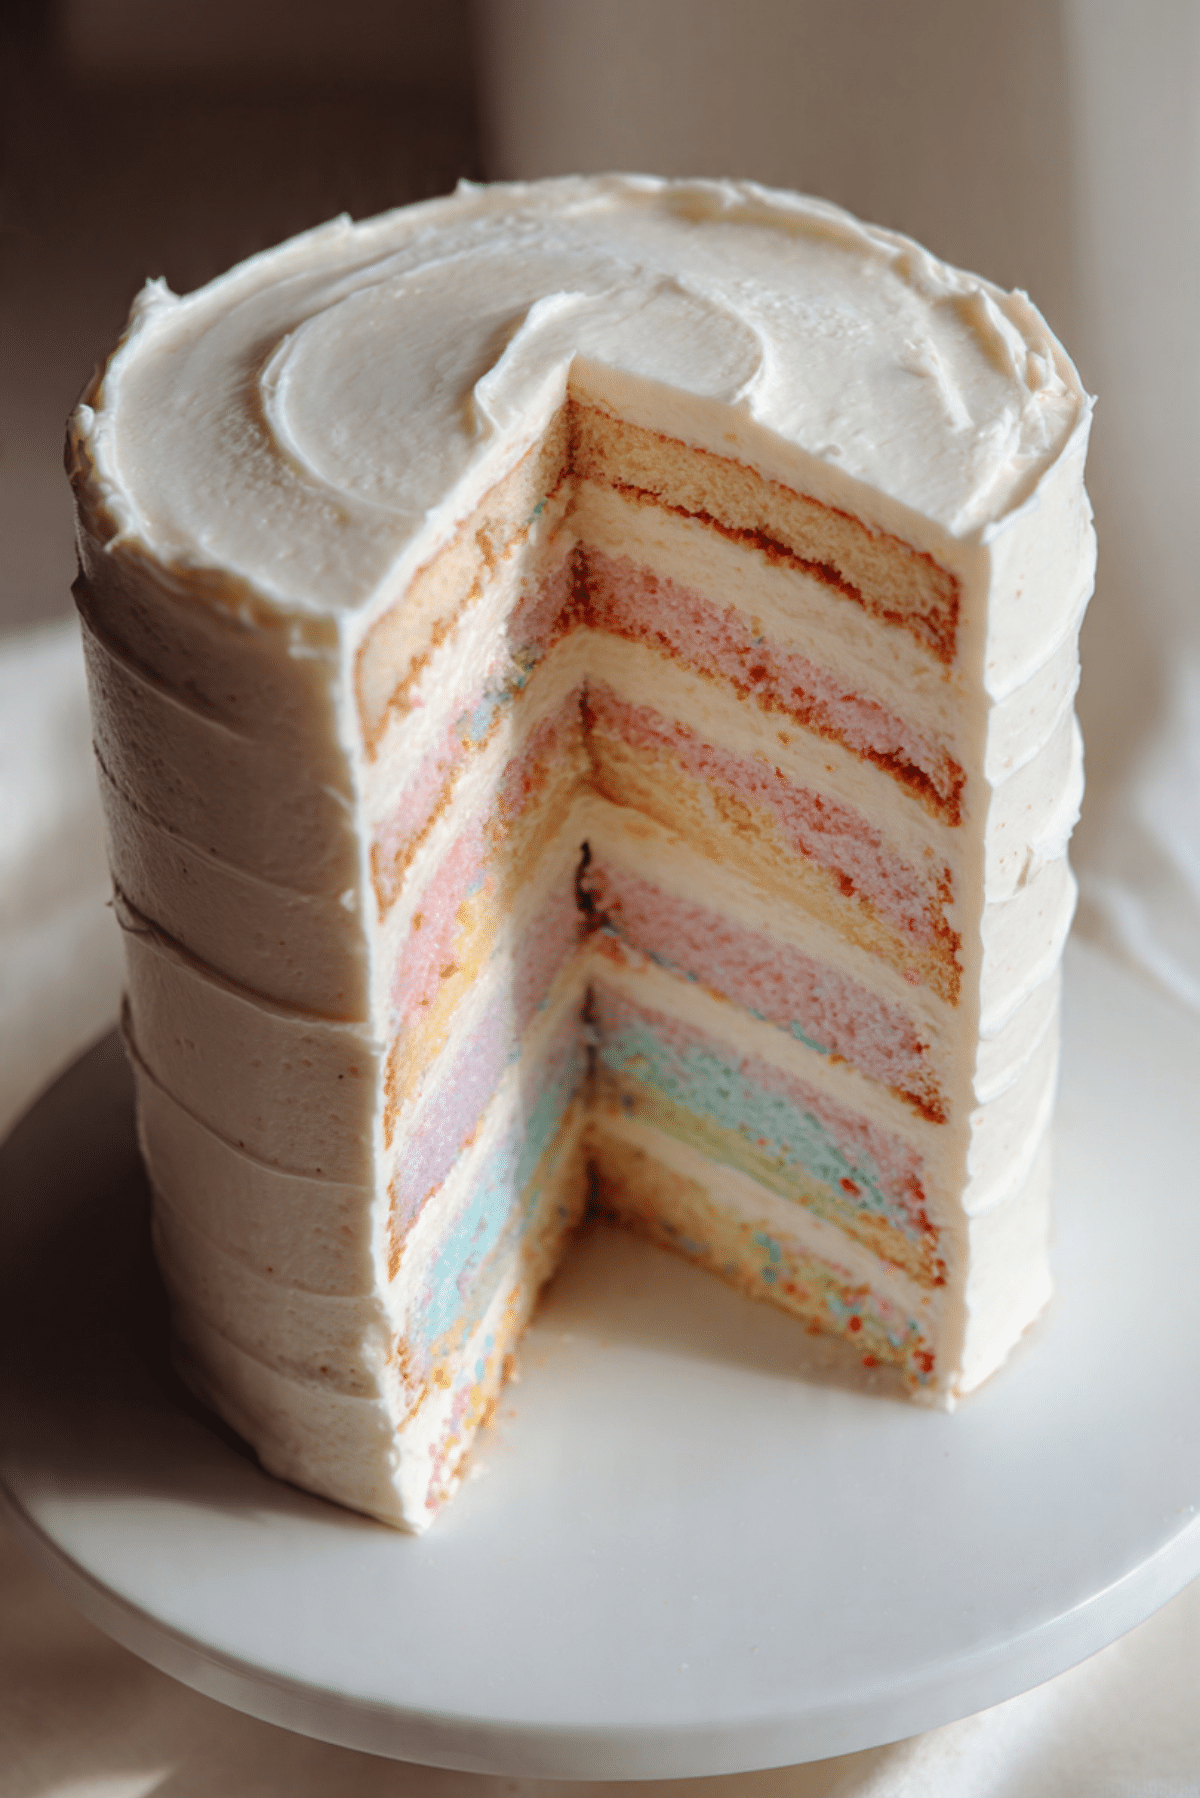
The first time you see a vertical cake sliced open, it feels a little magical. From the outside it looks calm and classic, but once the knife goes through, those tall colorful layers tell a whole different story. This is the kind of dessert that makes people lean in closer, eyes wide, already smiling before the first bite. Trust me, you’re going to love this one, not just for how it looks, but for how surprisingly doable it feels once you start.
A Cake That Turns Heads Before the First Bite
There is something undeniably special about a cake that reveals its beauty from the inside out. Each slice feels intentional, almost artistic, and it instantly upgrades any celebration table. This style of cake brings drama without needing fancy decorations, letting the layers themselves do all the talking.
Where the Vertical Layer Idea Comes From
While traditional layer cakes stack upward, this approach flips the idea sideways. Bakers began experimenting with rolled sponge cakes and buttercream fillings, eventually realizing that slicing the roll created tall, elegant stripes. Over time, it became a show stopping technique used for birthdays, weddings, and moments when a little extra wow factor is needed.
Why This Cake Always Delivers
This cake is not just about looks, it is also reliable, flexible, and deeply satisfying to make and serve.
Versatile: It works beautifully for birthdays, showers, and even casual gatherings when you want something memorable.
Budget-Friendly: The ingredients are pantry staples, and the visual impact comes from technique, not expensive extras.
Quick and Easy: While it looks advanced, the steps are simple and approachable with a bit of patience.
Customizable: You can change colors, flavors, and fillings to match any theme or craving.
Crowd-Pleasing: Guests love the surprise reveal, and the soft crumb keeps everyone happy.
Make-Ahead Friendly: The cake can be assembled ahead of time and chilled without losing quality.
Great for Leftovers: Slices stay moist and tender for days when stored properly.
Insider Tips From the Kitchen
Before we dive into mixing bowls and spatulas, a few expert tips can make all the difference.
- Roll the sponge while it is still warm to prevent cracking later.
- Use an even layer of frosting so the vertical lines stay clean.
- Chill the rolled cake briefly before slicing to make assembly easier.
- Measure and trim edges for uniform height and a polished finish.
Essential Tools You Will Need
A smooth process starts with the right tools on hand.
Mixing Bowls: Needed for separating and combining batter components evenly.
Electric Mixer: Helps create a light, airy sponge texture.
Offset Spatula: Perfect for spreading frosting smoothly and evenly.
Parchment Paper: Ensures easy release and clean rolling.
Sharp Knife: Essential for clean slices that show off the layers.
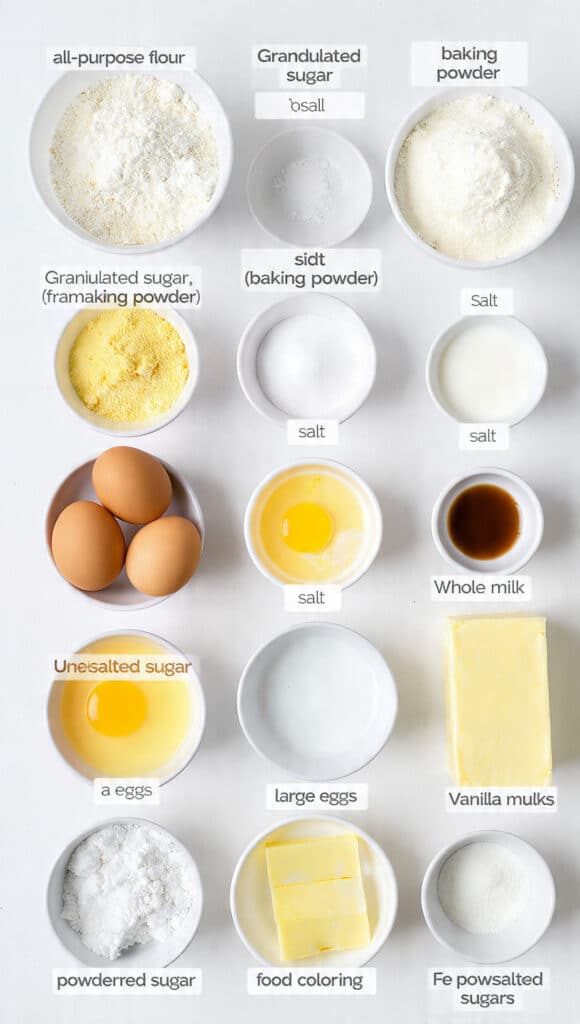
Ingredients You Will Need For This Cake
Each ingredient plays a role in creating structure, flavor, and that signature soft bite.
- All-Purpose Flour: 1 cup, provides structure while keeping the sponge tender.
- Granulated Sugar: 1 cup, adds sweetness and helps create a light crumb.
- Baking Powder: 1 teaspoon, gives the sponge gentle lift.
- Salt: 0.5 teaspoon, balances sweetness and enhances flavor.
- Large Eggs: 4, bring richness and help the cake hold its shape.
- Whole Milk: 0.5 cup, keeps the batter smooth and moist.
- Vanilla Extract: 2 teaspoons, adds warm background flavor.
- Unsalted Butter: 1 cup, softened, forms the base of the frosting.
- Powdered Sugar: 3 cups, creates a smooth and creamy frosting.
- Food Coloring: As needed, creates the signature vertical stripes.
Easy Ingredient Swaps You Can Try
Flexibility is part of the fun.
Whole Milk: Can be replaced with almond milk or oat milk.
Vanilla Extract: Swap with almond extract for a subtle twist.
Food Coloring: Use natural coloring powders or skip for a classic look.
Ingredients That Make This Cake Shine
Eggs: They give the sponge its elasticity, which is crucial for rolling without breaking.
Butter: Creates a rich, silky frosting that holds the layers together beautifully.
Let’s Start Baking Together
Now let’s dive into the process, step by step, so everything feels clear and enjoyable.
- Preheat Your Equipment: Set the oven to 350°F and line a large baking pan with parchment paper.
- Combine Ingredients: Whisk flour, baking powder, and salt in one bowl, then beat eggs and sugar until pale and fluffy.
- Prepare Your Cooking Vessel: Gently fold dry ingredients into the egg mixture, followed by milk and vanilla.
- Assemble the Dish: Spread batter evenly into the pan and bake until lightly golden and springy.
- Cook to Perfection: While warm, roll the sponge carefully with parchment and let it cool.
- Finishing Touches: Unroll, spread frosting evenly, re roll tightly, and chill briefly.
- Serve and Enjoy: Slice to reveal those stunning vertical layers and enjoy every bite.
Texture and Flavor in Every Slice
Each bite delivers soft sponge paired with creamy frosting, creating a contrast that feels light yet indulgent. The gentle vanilla aroma carries through, while the frosting adds richness without overpowering the cake itself.
Helpful Tips and Tricks
A few extra pointers can make the experience even smoother.
- Chill the cake before slicing for cleaner edges.
- Use a ruler to guide even cuts if presentation matters.
- Wipe the knife between slices for sharp, defined layers.
Common Mistakes and How to Avoid Them
Even simple recipes have a few pitfalls.
- Overbaking the sponge, which can cause cracking.
- Using too much frosting, which can blur the layers.
- Skipping the chilling step, which helps everything set.
Nutrition Facts You Should Know
Servings: 10
Calories per serving: Approximately 320
Note: These values are estimates and may vary based on ingredients used.
Time Breakdown at a Glance
Prep Time: 30 minutes
Cook Time: 15 minutes
Total Time: 45 minutes
Make-Ahead and Storage Tips
This cake is a planner’s dream. You can prepare and assemble it a day in advance, then store it tightly wrapped in the refrigerator. Leftover slices keep well for up to three days, staying moist and flavorful. Freezing is also an option, just wrap slices individually and thaw gently.
Serving Ideas to Elevate the Moment
Serve slices on simple plates to let the layers stand out. A light dusting of powdered sugar or a small dollop of whipped cream on the side complements the cake without stealing the spotlight.
Fun Ways to Use Leftovers
Leftover slices can be turned into mini parfaits, layered with fruit and cream, or cubed and folded into a trifle for a second life dessert.
Extra Tips for Best Results
Keep colors soft and coordinated for a more elegant look. Bold contrasts are fun, but subtle tones photograph beautifully and feel timeless.
Make It Truly Unforgettable
A smooth outer frosting and clean slices are all you need. Sometimes less decoration lets the inside be the star, and this cake proves that perfectly.
Variations to Explore
Try a chocolate sponge with vanilla frosting, or add citrus zest for brightness. You can also flavor the frosting with cocoa, coffee, or fruit extracts for endless combinations.
FAQ’s
1. Can I make this cake ahead of time?
Yes, it actually benefits from chilling before serving.
2. Does the sponge crack easily?
Not if rolled while warm and handled gently.
3. Can I use boxed cake mix?
You can, but a homemade sponge gives better flexibility.
4. How do I get clean slices?
Chill the cake and wipe the knife between cuts.
5. Can I skip food coloring?
Absolutely, it will still taste wonderful.
6. What frosting works best?
Buttercream holds shape and spreads smoothly.
7. Can kids help with this recipe?
Yes, especially with coloring and spreading frosting.
8. How thick should the frosting be?
Even and thin, enough to hold layers together.
9. Can I freeze the cake?
Yes, slice and wrap individually for best results.
10. Is this cake very sweet?
It is balanced, sweet but not overwhelming.
Conclusion
This vertical cake is proof that baking can be both fun and impressive without being intimidating. Every slice tells a story, and let me tell you, it’s worth every bite. Once you try it, you’ll find yourself dreaming up new colors and flavors for the next occasion.
Print
Vertical Cake
- Prep Time: 30 minutes
- Cook Time: 15 minutes
- Total Time: 45 minutes
- Yield: 10 servings 1x
- Category: Dessert
- Method: Baking
- Cuisine: American
- Diet: Vegetarian
Description
A soft vanilla sponge cake rolled and sliced to reveal stunning vertical layers of creamy buttercream, simple to make and impressive to serve.
Ingredients
- 1 cup all-purpose flour
- 1 cup granulated sugar
- 1 teaspoon baking powder
- 0.5 teaspoon salt
- 4 large eggs
- 0.5 cup whole milk
- 2 teaspoons vanilla extract
- 1 cup unsalted butter, softened
- 3 cups powdered sugar
- Food coloring, as needed
Instructions
- Preheat the oven to 350°F and line a large baking pan with parchment paper.
- In a bowl, whisk together flour, baking powder, and salt.
- In another bowl, beat eggs and granulated sugar until pale and fluffy.
- Gently fold the dry ingredients into the egg mixture.
- Add milk and vanilla extract and mix until smooth.
- Spread the batter evenly into the prepared pan and bake until lightly golden and springy.
- While warm, roll the cake carefully with the parchment paper and allow it to cool.
- Beat butter and powdered sugar until smooth and creamy, then divide and color as desired.
- Unroll the cooled cake, spread an even layer of frosting, then re roll tightly.
- Chill briefly, slice to reveal vertical layers, and serve.
Notes
- Roll the cake while warm to prevent cracking.
- Chill before slicing for cleaner layers.
- Wipe the knife between cuts for neat slices.
Nutrition
- Serving Size: 1 slice
- Calories: 320
- Sugar: 28g
- Sodium: 180mg
- Fat: 18g
- Saturated Fat: 11g
- Unsaturated Fat: 6g
- Trans Fat: 0g
- Carbohydrates: 38g
- Fiber: 1g
- Protein: 5g
- Cholesterol: 95mg
Keywords: vertical cake, vanilla cake, layered cake, buttercream cake, celebration dessert