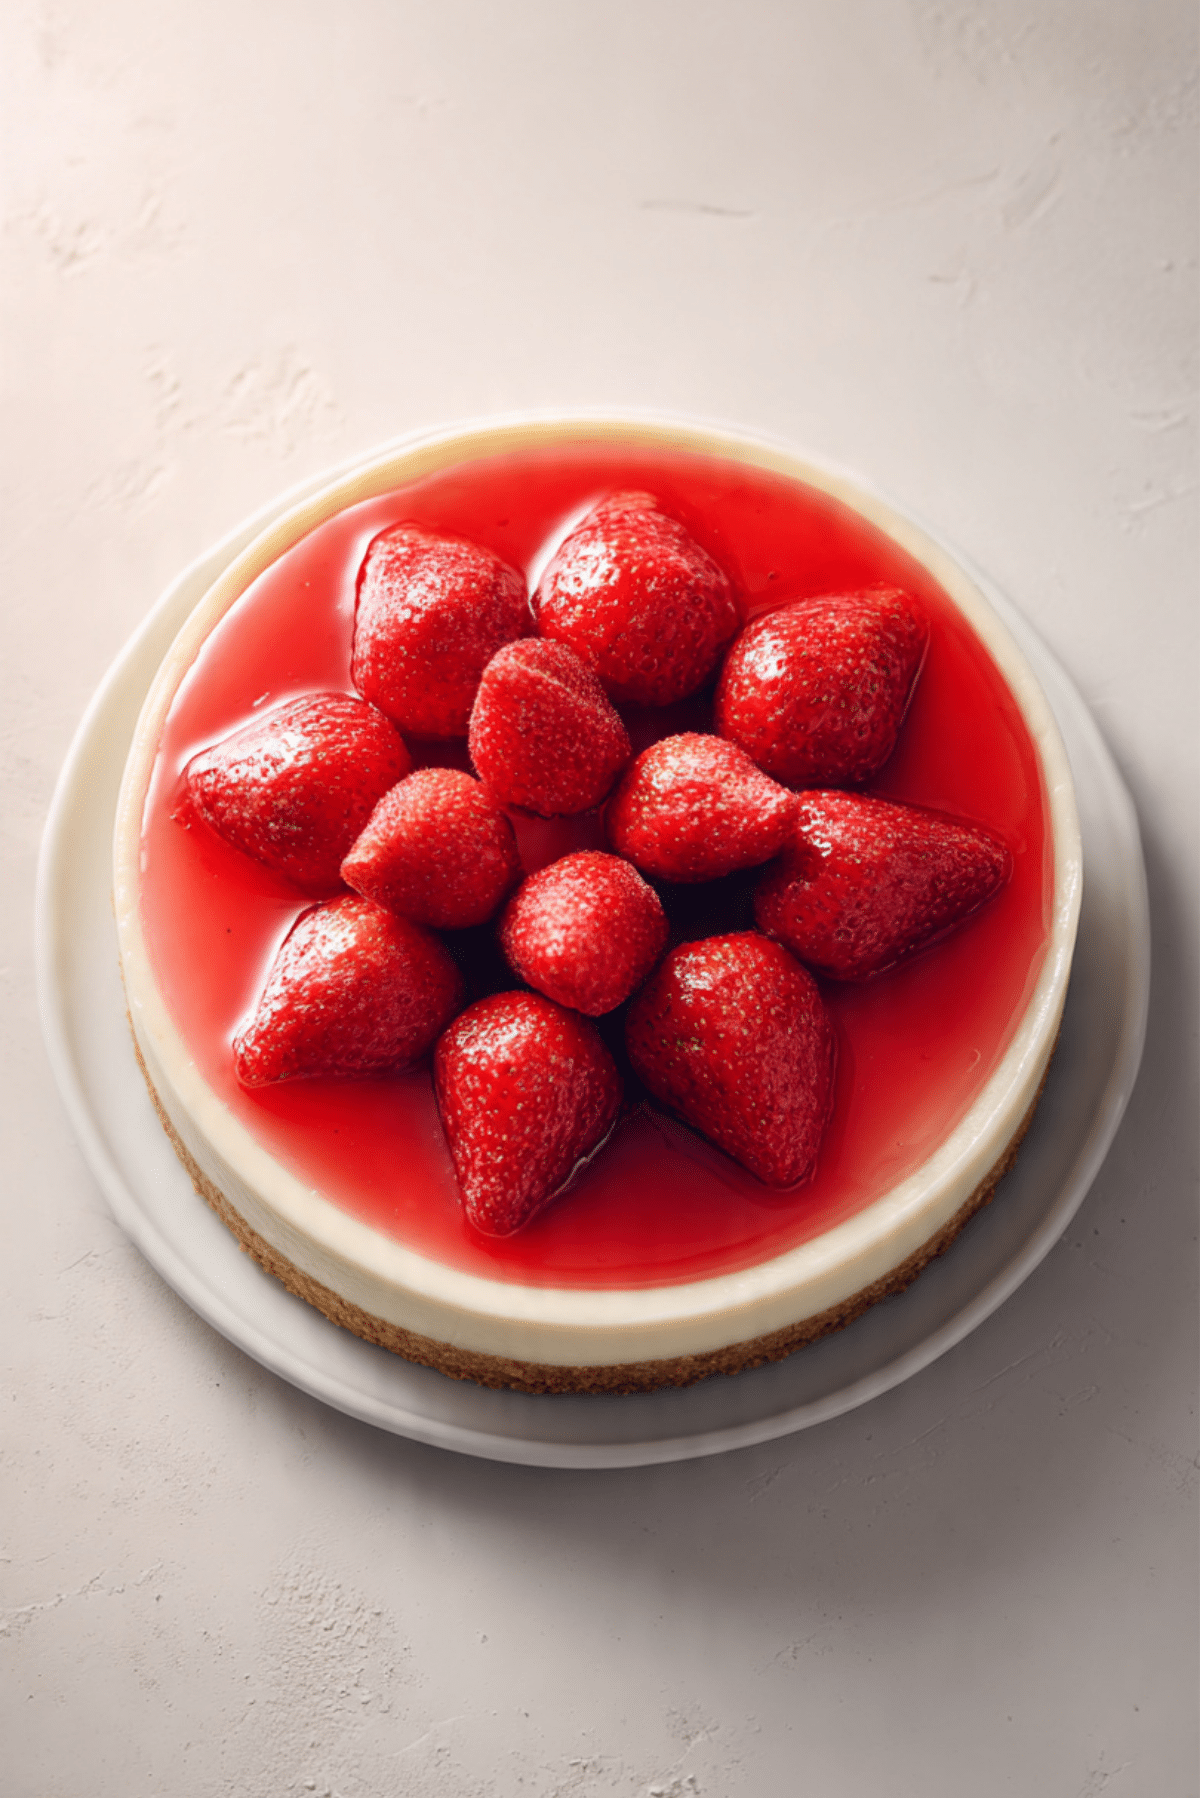
Strawberry Cheesecake
There is something about a creamy slice of strawberry cheesecake that instantly makes a day feel special. The buttery crust, the silky smooth filling, and that glossy layer of sweet strawberries on top, it all comes together in the most comforting way. Trust me, you’re going to love this. It is the kind of dessert that makes people close their eyes after the first bite.
And now, let’s dive into what makes this beauty so irresistible.
A Dessert That Feels Like a Celebration
Some desserts are good, and then some desserts feel like an event. This one belongs to the second category. The contrast between the crunchy biscuit base and the creamy center creates a texture that keeps every bite interesting. The fresh strawberries on top add a bright, slightly tangy note that balances the richness perfectly.
Let me tell you, it’s worth every bite. Whether it is for a birthday, a weekend gathering, or simply because you are craving something sweet, this dessert never disappoints.
A Little Story Behind This Classic Treat
Cheesecake has a surprisingly long history. Versions of it date back to ancient times, but the creamy style we know today became popular in Europe and later in America. The addition of fruit toppings, especially strawberries, brought a fresh and colorful twist that quickly became a favorite.
Over time, this version became a staple in bakeries and home kitchens alike. It blends old tradition with a modern love for fruity desserts, which is probably why it still feels timeless.
Why This Recipe Always Works
Before we step into the kitchen, let me tell you why this one is such a reliable favorite.
Versatile: It works for casual dinners, holidays, or elegant celebrations. You can dress it up or keep it simple.
Budget-Friendly: The ingredients are simple and easy to find, which means you do not need anything fancy to create something impressive.
Quick and Easy: The steps are straightforward and beginner-friendly, even if you have never baked a cheesecake before.
Customizable: You can swap the fruit topping or adjust the sweetness to match your taste.
Crowd-Pleasing: Creamy filling and sweet strawberries, who can say no to that combination?
Make-Ahead Friendly: It actually tastes better after chilling, which makes it perfect to prepare in advance.
Great for Leftovers: A slice straight from the fridge the next day is pure bliss.
Chef Tips for the Creamiest Results
Every great dessert has a few little secrets behind it.
- Use room temperature cream cheese so the filling blends smoothly without lumps.
- Mix gently once you add the eggs to avoid adding too much air.
- Bake the cake in a water bath to prevent cracks and keep the texture silky.
- Let it cool slowly inside the oven with the door slightly open.
These small details make a big difference in the final texture.
Essential Tools for a Smooth Baking Experience
Before we gather ingredients, make sure you have the right tools.
Springform Pan: This makes it easy to remove the cake without damaging the sides.
Mixing Bowls: You will need separate bowls for the crust and the filling.
Hand or Stand Mixer: Helps achieve a creamy, lump-free texture.
Baking Tray: For the water bath method.
Spatula: To scrape every bit of that creamy filling into the pan.
Ingredients That Make Magic Happen
Now we are getting to the heart of it. Each ingredient plays an important role in creating that perfect balance.
- Digestive Biscuits: 200 grams, crushed, these form the crunchy and buttery base.
- Unsalted Butter: 100 grams, melted, binds the biscuit crumbs together.
- Cream Cheese: 600 grams, softened, the star that gives the filling its rich and creamy texture.
- Granulated Sugar: 150 grams, adds sweetness and balances the tanginess.
- Eggs: 3 large, room temperature, help set the filling while keeping it smooth.
- Vanilla Extract: 1 teaspoon, enhances the overall flavor.
- Heavy Cream: 120 milliliters, adds extra silkiness to the filling.
- Fresh Strawberries: 300 grams, sliced, bring freshness and natural sweetness to the topping.
- Strawberry Jam: 150 grams, gently warmed, creates that glossy finish on top.
Easy Ingredient Swaps If Needed
Sometimes you work with what you have, and that is perfectly fine.
Digestive Biscuits: Graham crackers work just as well.
Heavy Cream: Full fat plain yogurt can be used for a slightly tangy twist.
Strawberry Jam: You can use raspberry or mixed berry jam for a different flavor profile.
Spotlight on the Stars of the Show
Cream Cheese: This is the foundation of the filling. Its smooth texture and mild tang create the signature flavor and consistency.
Fresh Strawberries: They add color, brightness, and a juicy contrast to the dense and creamy base.
Let’s Bake This Together
Now comes the fun part. Put on your apron, and let’s go step by step.
- Preheat Your Equipment: Preheat your oven to 160 degrees Celsius. Prepare a springform pan by lining the base with parchment paper.
- Combine Ingredients: In a bowl, mix the crushed biscuits with melted butter until the texture resembles wet sand.
- Prepare Your Cooking Vessel: Press the biscuit mixture firmly into the base of the pan. Chill it in the fridge for 20 minutes to set.
- Assemble the Dish: In a large bowl, beat the cream cheese and sugar until smooth. Add eggs one at a time, mixing gently. Stir in vanilla extract and heavy cream until fully combined. Pour the filling over the chilled crust.
- Cook to Perfection: Place the pan in a larger tray filled with hot water. Bake for 50 minutes until the center is slightly jiggly but set around the edges.
- Finishing Touches: Turn off the oven and let the cake cool inside with the door slightly open. Once cooled, refrigerate for at least 4 hours. Spread warmed strawberry jam over the top and arrange sliced strawberries beautifully.
- Serve and Enjoy: Slice with a warm knife for clean cuts. Serve chilled and watch everyone fall in love with the creamy texture.
Texture and Flavor in Every Bite
The crust is firm and buttery, giving a satisfying crunch before you reach the soft center. The filling is dense yet silky, melting gently on your tongue. Then comes the strawberry topping, sweet, slightly tangy, and glossy. This contrast is what makes it a total game-changer.
Helpful Tips for Best Results
- Always chill the cake thoroughly before slicing.
- Run a knife around the edge before removing the pan ring.
- Use fresh, ripe strawberries for the best flavor.
Common Mistakes and How to Avoid Them
- Overmixing the batter can cause cracks, mix gently once eggs are added.
- Skipping the water bath can lead to a dry texture.
- Not chilling long enough will result in messy slices.
Nutritional Overview at a Glance
Servings: 12
Calories per serving: 420
Note: These are approximate values.
Time Needed to Create This Dessert
Prep Time: 30 minutes
Cook Time: 50 minutes
Total Time: 1 hour 20 minutes plus chilling time
Make Ahead and Storage Guide
This dessert is perfect for preparing a day in advance. Store it covered in the refrigerator for up to 4 days. You can freeze individual slices wrapped tightly for up to 2 months. Thaw overnight in the fridge before serving.
Serving Ideas That Elevate the Experience
Serve each slice with a few extra fresh strawberries on the side. A light dusting of powdered sugar adds elegance. You can even pair it with a cup of coffee or tea for a cozy finish.
Creative Ways to Use Leftovers
Leftover slices can be turned into parfaits layered with whipped cream. You can also crumble a slice over vanilla yogurt for a quick indulgent breakfast.
Extra Tips for Flavor and Freshness
Always use full fat cream cheese for the richest texture. Taste your strawberries before topping, if they are very sweet, you can slightly reduce the jam.
Make It Look Bakery Worthy
Use a palette knife to smooth the topping evenly. Arrange strawberry slices in a circular pattern for a professional finish. Clean the knife between cuts for neat slices.
Fun Variations to Explore
- Add a hint of lemon zest to the filling for brightness.
- Use a chocolate biscuit crust for a deeper flavor.
- Swirl strawberry puree directly into the filling before baking.
- Top with mixed berries for extra color and texture.
FAQ’s
Q1: Can I make this without a water bath?
Yes, but the texture may be slightly less creamy and small cracks can appear.
Q2: How do I know when it is done baking?
The edges should be set while the center still has a slight jiggle.
Q3: Can I use frozen strawberries?
Yes, but thaw and drain them well before using.
Q4: Why did my cheesecake crack?
Overmixing or rapid cooling can cause cracks.
Q5: Can I reduce the sugar?
You can reduce it slightly, but it may affect the overall sweetness balance.
Q6: How long should it chill?
At least 4 hours, overnight is even better.
Q7: Can I make it gluten free?
Yes, use gluten free biscuits for the crust.
Q8: What is the best way to slice it cleanly?
Use a warm knife and wipe it between cuts.
Q9: Can I use low fat cream cheese?
You can, but the texture will be less rich.
Q10: How should I store leftovers?
Keep it covered in the refrigerator for up to 4 days.
Conclusion
Strawberry cheesecake is one of those desserts that feels both classic and special at the same time. Creamy, fruity, and perfectly balanced, it brings comfort with every slice. This one’s a total game-changer for your dessert table. Go ahead and give it a try, you might just find yourself making it again and again.
Print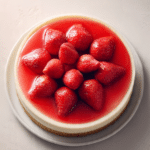
Strawberry Cheesecake
- Prep Time: 30 minutes
- Cook Time: 50 minutes
- Total Time: 1 hour 20 minutes plus chilling time
- Yield: 12 servings 1x
- Category: Dessert
- Method: Baking
- Cuisine: International
- Diet: Vegetarian
Description
A rich and creamy strawberry cheesecake with a buttery biscuit crust, smooth vanilla-infused filling, and a glossy strawberry topping made with fresh berries. Perfect for celebrations or an indulgent weekend dessert.
Ingredients
- 200 grams digestive biscuits, crushed
- 100 grams unsalted butter, melted
- 600 grams cream cheese, softened
- 150 grams granulated sugar
- 3 large eggs, room temperature
- 1 teaspoon vanilla extract
- 120 milliliters heavy cream
- 300 grams fresh strawberries, sliced
- 150 grams strawberry jam, gently warmed
Instructions
- Preheat oven to 160 degrees Celsius and line the base of a springform pan with parchment paper.
- Mix crushed digestive biscuits with melted butter until the texture resembles wet sand.
- Press the mixture firmly into the base of the pan and chill in the refrigerator for 20 minutes.
- Beat cream cheese and sugar until smooth. Add eggs one at a time, mixing gently. Stir in vanilla extract and heavy cream until fully combined.
- Pour the filling over the chilled crust and smooth the top.
- Place the pan in a larger tray filled with hot water and bake for 50 minutes until the edges are set and the center is slightly jiggly.
- Turn off the oven and let the cheesecake cool inside with the door slightly open. Refrigerate for at least 4 hours.
- Spread warmed strawberry jam over the top and arrange sliced fresh strawberries before serving.
Notes
- Use room temperature cream cheese for a smooth filling.
- Do not overmix after adding the eggs to prevent cracks.
- Chill thoroughly before slicing for clean cuts.
- Store covered in the refrigerator for up to 4 days or freeze slices for up to 2 months.
Nutrition
- Serving Size: 1 slice
- Calories: 420
- Sugar: 28 grams
- Sodium: 320 milligrams
- Fat: 30 grams
- Saturated Fat: 18 grams
- Unsaturated Fat: 10 grams
- Trans Fat: 0 grams
- Carbohydrates: 32 grams
- Fiber: 1 gram
- Protein: 7 grams
- Cholesterol: 120 milligrams
Keywords: strawberry cheesecake, baked cheesecake, creamy cheesecake, strawberry dessert, classic cheesecake recipe