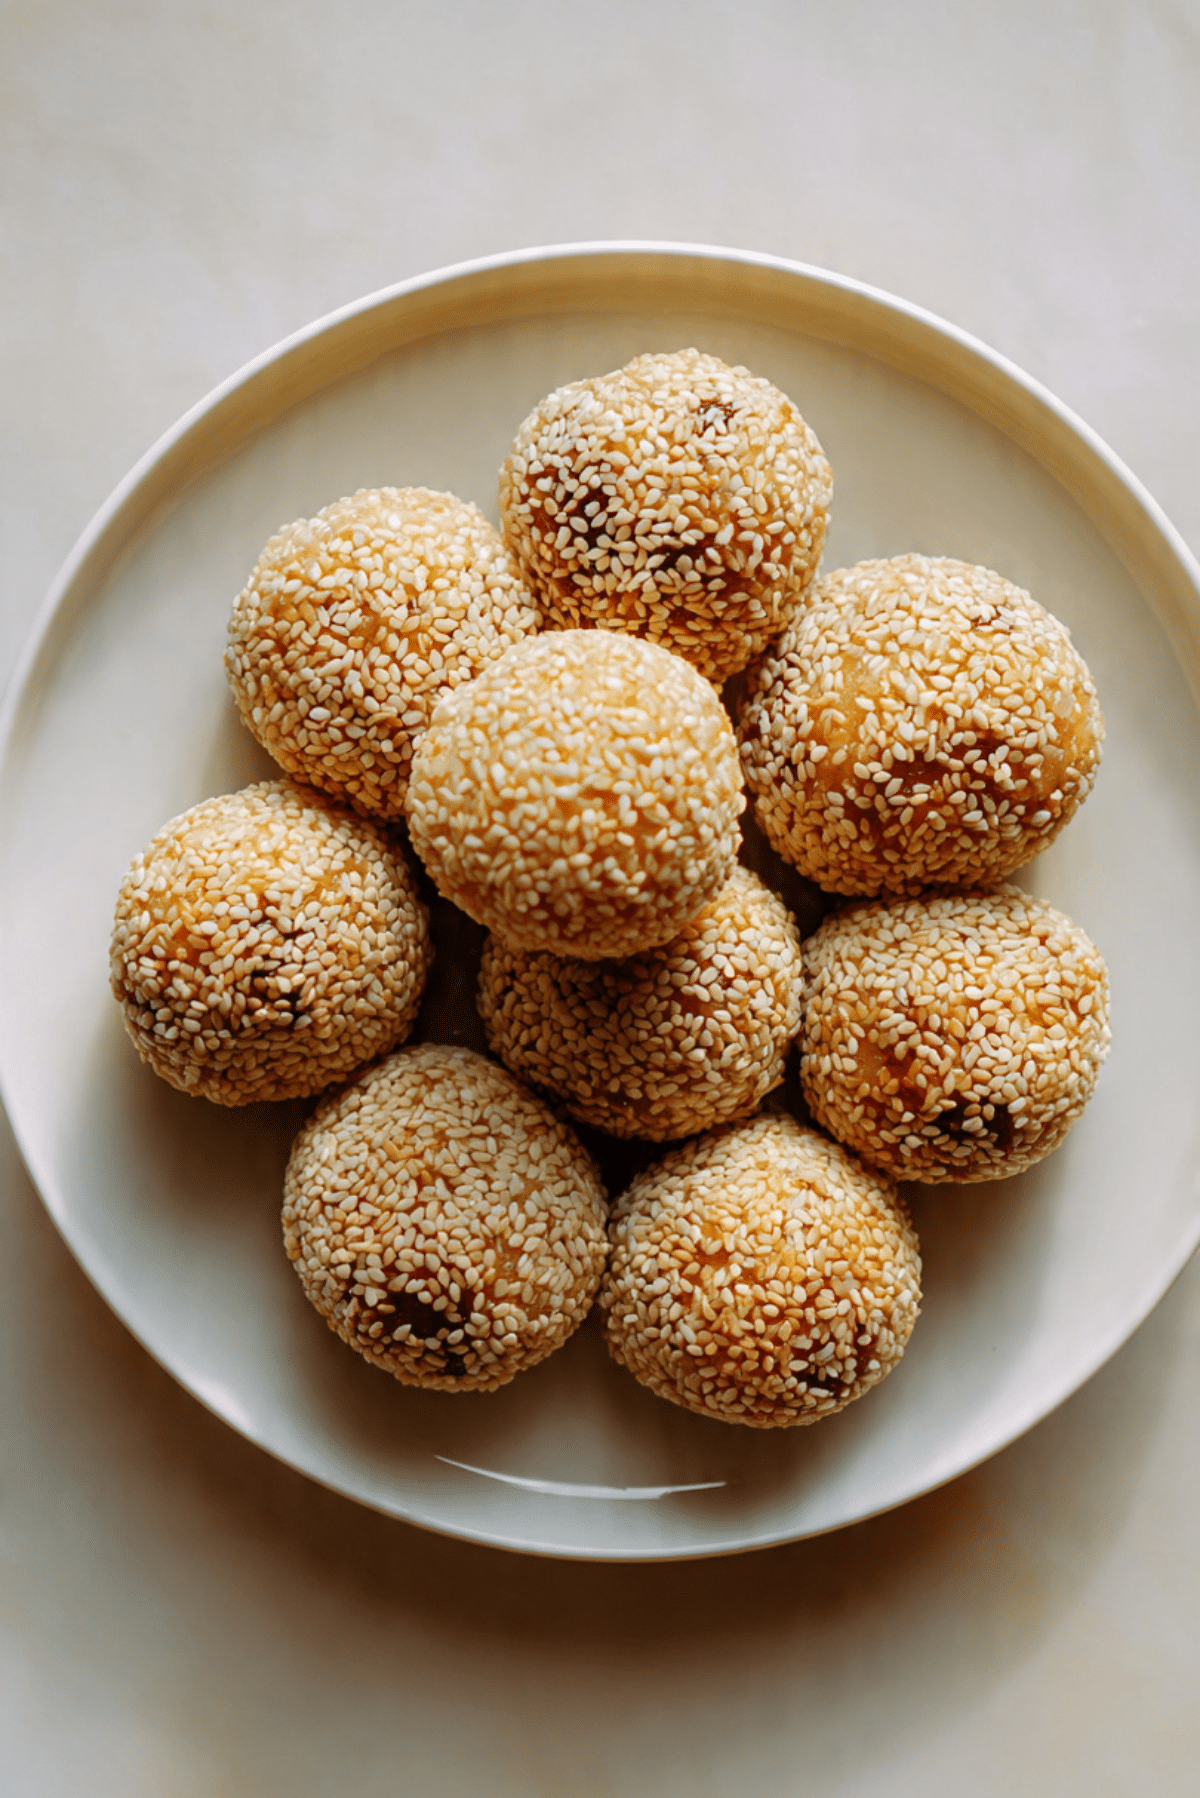
Sesame Balls with Taro
There is something magical about biting into a crisp golden shell and discovering a soft, lightly sweet center waiting inside. That is exactly what happens when you sink your teeth into sesame balls with taro. The outer layer crackles gently, coated in nutty sesame seeds, and then you reach that creamy purple filling that feels smooth and comforting. Trust me, you are going to love this. It is the kind of treat that makes you pause for a second just to enjoy the texture contrast.
A Crispy Treat That Hides a Sweet Surprise
The beauty of these little delights is all about contrast. The outside is lightly crisp and chewy at the same time, thanks to glutinous rice flour. Then inside, you get that naturally sweet taro filling, soft and velvety with a subtle earthy note. The sesame seeds toast as they fry, releasing a warm aroma that fills your kitchen. This one is a total game changer if you enjoy desserts that are not overly sugary but still deeply satisfying.
A Little Bite of Tradition and Celebration
Sesame balls have long been enjoyed across many Asian cuisines, often served during festivals, family gatherings, and special occasions. They symbolize happiness and togetherness because they puff up beautifully when fried. The taro filling adds a regional twist that brings in a lovely purple hue and a delicate sweetness. Let me tell you, it is worth every bite, especially when shared fresh and warm with family.
Why This Recipe Always Works
Before we dive into the kitchen, let me share why this is one you will come back to again and again.
Versatile: You can serve these as dessert, tea time snacks, or even as part of a festive spread.
Budget-Friendly: The ingredients are simple pantry staples, and taro is often affordable and filling.
Quick and Easy: The process is straightforward once you understand the dough texture.
Customizable: You can adjust the sweetness of the filling or even swap it with other pastes.
Crowd-Pleasing: Crispy outside and creamy inside, it wins over both kids and adults.
Make-Ahead Friendly: The filling can be prepared in advance and stored in the fridge.
Great for Leftovers: Reheat gently and they regain that lovely chew and warmth.
Secrets from My Kitchen to Yours
Now let us talk like real cooks for a second. Getting the perfect sesame balls with taro is all about balance.
- Make sure your dough is soft but not sticky. It should feel smooth and pliable.
- Fry on medium low heat so they cook through without burning the sesame seeds.
- Gently roll the balls while frying so they expand evenly.
- Do not overcrowd the pan, give them space to puff up beautifully.
The Tools That Make It Easier
You do not need fancy equipment, just a few basics.
Mixing Bowl: For combining the dough ingredients smoothly.
Pot or Deep Pan: Wide enough for frying so the balls can move freely.
Slotted Spoon: To lift them out safely while draining excess oil.
Paper Towels: To absorb extra oil after frying.
Ingredients That Bring It All Together
Now let us gather everything before we begin. Each ingredient has its own little role to play in creating that perfect bite.
- Glutinous Rice Flour: 1 cup, forms the chewy outer shell.
- Granulated Sugar: 2 tablespoons, lightly sweetens the dough.
- Warm Water: ½ cup, helps bind the dough into a smooth texture.
- Cooked Taro: 1 cup, mashed smoothly for the creamy filling.
- Powdered Sugar: 3 tablespoons, sweetens the taro filling gently.
- White Sesame Seeds: ½ cup, for coating and adding nutty crunch.
- Vegetable Oil: 2 cups, for deep frying.
Flexible Swaps If You Need Them
Sometimes you work with what you have, and that is perfectly fine.
Cooked Taro: Sweet potato puree for a slightly different sweetness.
Powdered Sugar: Fine granulated sugar blended until smooth.
White Sesame Seeds: Black sesame seeds for a more dramatic look.
The Star of the Show
Let us highlight what really makes these special.
Taro: Naturally creamy with a subtle sweetness and beautiful purple color, it creates a filling that feels luxurious yet comforting.
Let Us Start Cooking Together
Now comes the fun part. Tie your apron and let us move step by step.
- Preheat Your Equipment: Pour vegetable oil into a deep pot and begin heating it over medium low heat.
- Combine Ingredients: In a mixing bowl, combine glutinous rice flour and granulated sugar. Gradually add warm water and mix until a soft dough forms.
- Prepare Your Cooking Vessel: Ensure the oil reaches about 160 degrees Celsius, hot but not smoking.
- Assemble the Dish: Mix mashed taro with powdered sugar. Form small balls of filling. Flatten a piece of dough, place taro in the center, seal tightly, then roll in sesame seeds until fully coated.
- Cook to Perfection: Gently lower the balls into the oil. Fry slowly, turning occasionally, until golden brown and slightly puffed, about 6 to 8 minutes.
- Finishing Touches: Remove with a slotted spoon and drain on paper towels.
- Serve and Enjoy: Let them cool slightly before serving, so the filling sets beautifully inside.
The Texture and Flavor Journey
When fried slowly, the outer layer becomes lightly crisp yet chewy. The sesame seeds toast and release a nutty fragrance. Inside, the taro turns soft and creamy, slightly sweet with a mellow earthiness. The contrast between crisp shell and smooth center is what makes each bite so memorable.
Helpful Tips for Perfect Results
Here are a few extra pointers to keep in mind.
- Keep the oil temperature steady so they cook evenly.
- Seal the dough carefully to prevent leaks.
- Fry in small batches for consistent puffing.
Common Mistakes and How to Fix Them
It happens to all of us, but these are easy to avoid.
- Oil too hot, which causes burning before cooking through. Lower the heat.
- Dough too dry, which leads to cracking. Add a little more warm water.
- Overcrowding the pan, which prevents even cooking. Fry in batches.
A Quick Look at Nutrition
Servings: 4
Calories per serving: 320
Note: These are approximate values.
Time Needed from Start to Finish
Prep Time: 20 minutes
Cook Time: 15 minutes
Total Time: 35 minutes
Planning Ahead and Storing Properly
You can prepare the taro filling a day in advance and store it in an airtight container in the fridge. Once fried, these are best enjoyed fresh, but you can store leftovers in the refrigerator for up to two days. Reheat gently in an oven at low temperature until warm. Freezing before frying also works well, just fry directly from frozen at a slightly lower heat.
Serving Ideas That Make It Extra Special
Serve them warm with green tea for a comforting afternoon treat. Arrange them on a simple white plate so the golden color stands out. You can even dust lightly with powdered sugar for a delicate finish.
Creative Ways to Use Leftovers
If you have extras, slice them and add to a dessert platter. You can also warm them and serve with a scoop of vanilla ice cream for a playful twist.
Extra Little Tips for Success
Let the fried balls rest for a few minutes before eating. This allows the inside to settle and prevents burning your mouth. Also, keep the dough covered while working so it does not dry out.
Make Them Look Bakery Worthy
For a stunning presentation, stack them in a small pyramid on a white plate. The golden sesame coating and soft purple center create a beautiful color contrast that catches the eye immediately.
Fun Variations to Explore
- Add a touch of coconut milk to the taro filling for extra richness.
- Mix a little matcha powder into the dough for a subtle green hue.
- Use black sesame seeds for a bold look.
- Add a tiny pinch of salt to the filling to enhance sweetness.
FAQ’s
Q1: Can I bake them instead of frying?
Baking will not give the same chewy and crisp texture, frying works best.
Q2: Why did my sesame balls collapse?
The oil may not have been hot enough, or the dough was too thin.
Q3: Can I reduce the sugar?
Yes, adjust the filling sweetness to your taste.
Q4: How do I know the oil is ready?
Drop a small piece of dough in, it should rise slowly to the surface.
Q5: Can I prepare the dough in advance?
It is best used fresh, but you can rest it for up to one hour covered.
Q6: Why are mine cracking?
The dough may be too dry or not sealed properly.
Q7: Can I use frozen taro?
Yes, just cook and mash it until smooth before mixing with sugar.
Q8: Do they stay crispy?
They are best fresh, but reheating helps restore texture.
Q9: Can I air fry them?
Air frying may dry them out, traditional frying gives better results.
Q10: Are they very sweet?
They are mildly sweet with a balanced flavor.
Conclusion
Sesame balls with taro are one of those treats that bring comfort and joy in every bite. From the crisp golden shell to the creamy purple center, they offer texture, warmth, and a hint of sweetness that feels just right. Once you try making them at home, you will see how simple and rewarding the process can be. Trust me, you are going to come back to this again and again.
Print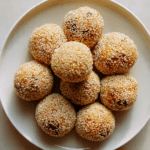
Sesame Balls with Taro
- Prep Time: 20 minutes
- Cook Time: 15 minutes
- Total Time: 35 minutes
- Yield: 4 servings 1x
- Category: Dessert
- Method: Deep Frying
- Cuisine: Asian
- Diet: Vegetarian
Description
Golden and crisp on the outside with a creamy taro center, these sesame balls are a delightful treat perfect for sharing.
Ingredients
- 1 cup glutinous rice flour
- 2 tablespoons granulated sugar
- 1/2 cup warm water
- 1 cup cooked taro, mashed
- 3 tablespoons powdered sugar
- 1/2 cup white sesame seeds
- 2 cups vegetable oil for frying
Instructions
- In a bowl, combine glutinous rice flour and granulated sugar. Gradually add warm water and mix until a soft dough forms.
- In another bowl, mix mashed taro with powdered sugar until smooth. Shape into small balls.
- Flatten a piece of dough, place taro filling in the center, seal tightly, and roll into a smooth ball.
- Roll each ball in white sesame seeds until fully coated.
- Heat vegetable oil to about 160 degrees Celsius over medium low heat.
- Fry the balls in batches for 6 to 8 minutes, turning gently until golden brown and puffed.
- Remove and drain on paper towels. Serve warm.
Notes
- Keep oil temperature steady for even cooking.
- Seal dough carefully to prevent filling leaks.
- Fry in small batches for best texture.
Nutrition
- Serving Size: 1 serving
- Calories: 320
- Sugar: 12g
- Sodium: 40mg
- Fat: 18g
- Saturated Fat: 3g
- Unsaturated Fat: 13g
- Trans Fat: 0g
- Carbohydrates: 36g
- Fiber: 2g
- Protein: 4g
- Cholesterol: 0mg
Keywords: sesame balls with taro, taro dessert, glutinous rice balls, fried sesame balls