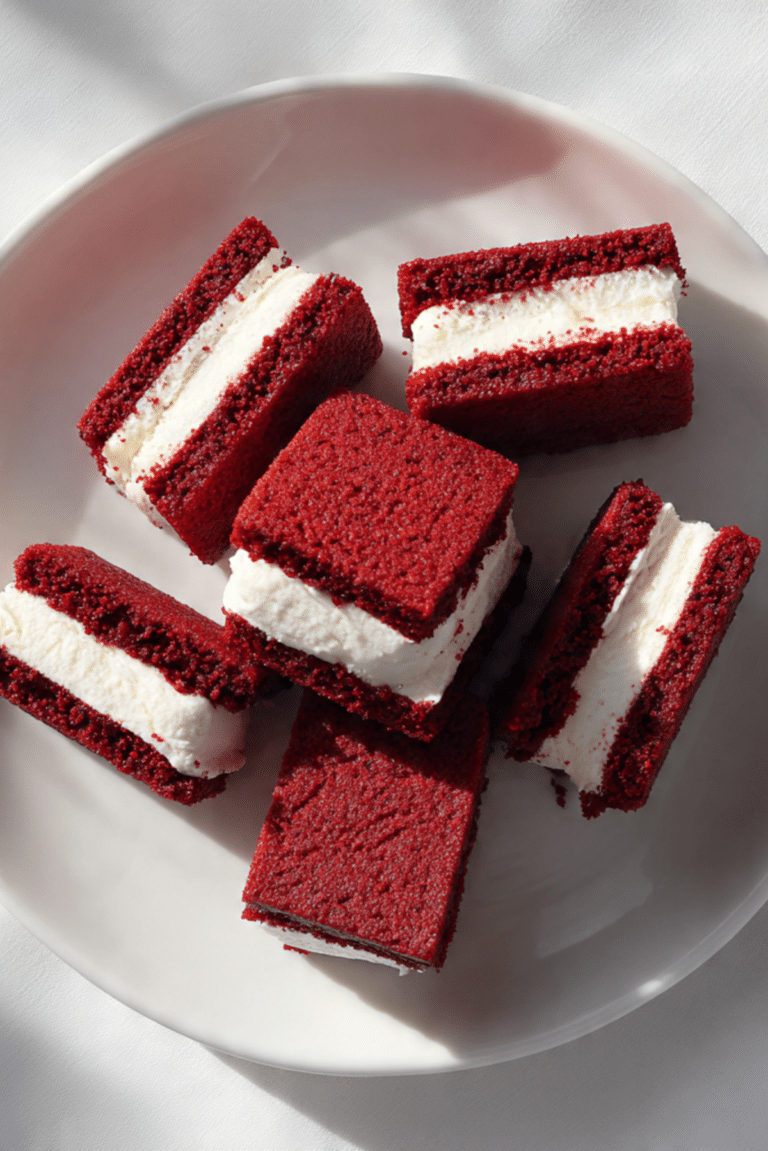
Red Velvet Sandwich Cookies
There is something instantly comforting about these cookies, the deep red color, the soft crumb, and that creamy center that pulls everything together. The first time I made them, the kitchen smelled faintly of cocoa and vanilla, and I knew right away they would not last long on the counter. Trust me, you are going to love this from the first bite to the very last crumb.
What Makes These Cookies So Irresistible
These cookies bring together everything we love in a dessert, a tender texture, gentle cocoa flavor, and a creamy filling that balances the sweetness. They feel nostalgic and special at the same time, like something you would bake for holidays, birthdays, or just because you need a treat.
A Little Backstory Behind This Classic Treat
Red velvet desserts have roots in early American baking, where cocoa was used to soften flour and create a subtle chocolate flavor. Over time, that signature red color became iconic, especially in Southern kitchens. Turning that flavor into a sandwich cookie feels like a fun twist on tradition while keeping the soul of the original idea alive.
Why This Recipe Always Works
Versatile: These cookies fit any occasion, from casual afternoons to festive dessert tables, and they travel well too.
Budget-Friendly: The ingredients are simple pantry staples, which makes this an easy bake without extra cost.
Quick and Easy: The dough comes together smoothly and bakes fast, perfect when you want something homemade without spending all day.
Customizable: You can adjust the filling sweetness or add a hint of citrus or spice if you like experimenting.
Crowd-Pleasing: The color alone draws people in, and the flavor keeps them coming back for another.
Make-Ahead Friendly: Both the cookies and filling can be prepared in advance and assembled later.
Great for Leftovers: They stay soft for days when stored properly, making them ideal for enjoying over time.
Pro Baker Secrets You Will Be Glad to Know
Before we jump into baking, let me share a few tips that make a real difference. Chilling the dough slightly helps the cookies keep their shape. Measuring flour carefully keeps the texture soft instead of dry. And letting the cookies cool fully before filling keeps the cream smooth and neat.
Kitchen Tools You Will Need
Mixing bowls: One for the dough and one for the filling keeps everything organized.
Hand mixer or stand mixer: This helps achieve a light and creamy texture.
Baking sheets: Use lined sheets for even baking and easy cleanup.
Parchment paper: Prevents sticking and promotes even browning.
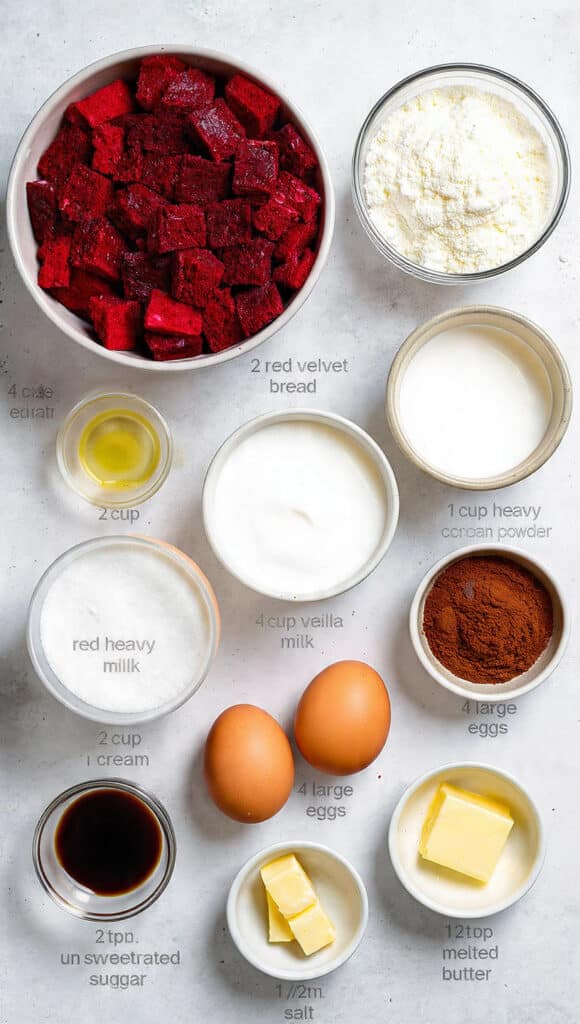
Ingredients You Will Need For This Recipe
Each ingredient plays a role, and together they create that classic look and flavor we all recognize.
- All-purpose flour: 2 and 1/2 cups, forms the structure while staying tender.
- Unsweetened cocoa powder: 2 tablespoons, adds subtle chocolate depth.
- Baking soda: 1 teaspoon, helps the cookies rise gently.
- Salt: 1/2 teaspoon, balances sweetness and enhances flavor.
- Unsalted butter: 3/4 cup, softened, gives richness and softness.
- Granulated sugar: 1 cup, sweetens and helps create a tender crumb.
- Large egg: 1, binds the dough and adds moisture.
- Vanilla extract: 1 teaspoon, rounds out the flavors.
- Red food coloring: 1 tablespoon, creates the signature color.
- Cream cheese: 8 ounces, softened, forms the creamy filling base.
- Powdered sugar: 2 cups, sweetens and thickens the filling.
Easy Ingredient Swaps If Needed
All-purpose flour: A gluten free blend designed for baking can work.
Cream cheese: Mascarpone offers a slightly richer filling.
Vanilla extract: Vanilla bean paste adds deeper aroma.
Spotlight On Key Ingredients
Cocoa powder: Even a small amount brings warmth and depth without overpowering.
Cream cheese: This is what makes the filling tangy, smooth, and irresistible.
Let’s Bake These Step by Step
Now let’s dive into the process, and I promise it is easier than it looks.
- Preheat Your Equipment: Preheat the oven to 350°F and line baking sheets with parchment paper.
- Combine Ingredients: Whisk flour, cocoa powder, baking soda, and salt in a bowl.
- Prepare Your Cooking Vessel: In another bowl, cream butter and sugar until light, then mix in egg, vanilla, and food coloring.
- Assemble the Dish: Gradually mix dry ingredients into wet ingredients until just combined.
- Cook to Perfection: Scoop dough onto baking sheets and bake for 10 to 12 minutes.
- Finishing Touches: Let cookies cool completely, then beat cream cheese and powdered sugar until smooth.
- Serve and Enjoy: Sandwich filling between cookies and gently press together.
Texture and Flavor That Hit Just Right
The cookies bake up soft with slightly crisp edges, while the filling stays creamy and smooth. The mild cocoa flavor blends perfectly with the tangy sweetness of the filling, creating a balanced bite every time.
Helpful Baking Tips to Keep in Mind
- Chill the dough briefly if it feels too soft.
- Use a cookie scoop for even sizes.
- Let cookies cool fully before filling.
What to Avoid While Baking
- Overbaking, which can dry out the cookies.
- Skipping parchment paper, which may cause sticking.
- Overmixing the dough, which affects texture.
Nutrition Facts to Know
Servings: 12
Calories per serving: 320
Note: These are approximate values.
Preparation Time Breakdown
Prep Time: 25 minutes
Cook Time: 12 minutes
Total Time: 37 minutes
Make-Ahead and Storage Tips
You can bake the cookies a day ahead and store them unfilled in an airtight container. Once assembled, keep them refrigerated for up to three days. Let them sit at room temperature before serving for best texture.
How to Serve Them Beautifully
Arrange them on a simple platter, stack them gently, or wrap them individually for gifting. They pair wonderfully with milk, coffee, or tea.
Creative Leftover Ideas
Crumble leftover cookies over ice cream. Turn them into a layered dessert with whipped cream. Or freeze them for a sweet surprise later.
Extra Tips for Best Results
Use room temperature ingredients for smoother mixing. Taste the filling and adjust sweetness if needed. And always bake with patience, it makes a difference.
Make It a Showstopper
Dust lightly with powdered sugar or drizzle with white chocolate for an extra visual pop. Presentation matters, and these cookies love the spotlight.
Fun Variations to Try
Add a hint of orange zest to the filling. Swap vanilla for almond extract. Make mini versions for bite sized treats. Tint the filling lightly pink for a playful look.
FAQ’s
1. Can I freeze these cookies?
Yes, they freeze well, especially before filling.
2. Do I need food coloring?
No, but it gives the classic look.
3. Can I use salted butter?
Yes, just reduce added salt slightly.
4. How long do they stay fresh?
About three days refrigerated.
5. Can I make them smaller?
Absolutely, just reduce baking time slightly.
6. Is the cocoa flavor strong?
No, it is subtle and balanced.
7. Can kids help with this recipe?
Yes, it is a fun and safe bake.
8. Can I pipe the filling?
Yes, piping makes assembly neat.
9. Should I chill the filling?
A short chill helps if it feels too soft.
10. Are these good for parties?
They are always a hit.
Conclusion
These cookies are one of those treats that feel special every single time you make them. Soft, colorful, and filled with creamy goodness, they are worth every bite. Give them a try, and let me tell you, they disappear fast.
Print
Red Velvet Sandwich Cookies
- Prep Time: 25 minutes
- Cook Time: 12 minutes
- Total Time: 37 minutes
- Yield: 12 sandwich cookies 1x
- Category: Dessert
- Method: Baking
- Cuisine: American
- Diet: Vegetarian
Description
Soft red cookies with a hint of cocoa and a smooth cream cheese filling sandwiched in between, these cookies are tender, colorful, and perfect for sharing or gifting.
Ingredients
- 2 and 1/2 cups all-purpose flour
- 2 tablespoons unsweetened cocoa powder
- 1 teaspoon baking soda
- 1/2 teaspoon salt
- 3/4 cup unsalted butter, softened
- 1 cup granulated sugar
- 1 large egg
- 1 teaspoon vanilla extract
- 1 tablespoon red food coloring
- 8 ounces cream cheese, softened
- 2 cups powdered sugar
Instructions
- Preheat the oven to 350°F and line baking sheets with parchment paper.
- In a bowl, whisk together flour, cocoa powder, baking soda, and salt.
- In another bowl, beat butter and sugar until light and fluffy.
- Add the egg, vanilla extract, and red food coloring, then mix until combined.
- Gradually add the dry ingredients to the wet ingredients and mix until just combined.
- Scoop dough onto prepared baking sheets, spacing evenly.
- Bake for 10 to 12 minutes, then let cookies cool completely.
- In a clean bowl, beat cream cheese and powdered sugar until smooth.
- Spread or pipe filling onto half of the cookies, then top with remaining cookies to form sandwiches.
Notes
- Let cookies cool fully before filling to prevent melting.
- Chill the dough briefly if it feels too soft.
- Store assembled cookies in the refrigerator for best freshness.
Nutrition
- Serving Size: 1 sandwich cookie
- Calories: 320
- Sugar: 28g
- Sodium: 210mg
- Fat: 16g
- Saturated Fat: 9g
- Unsaturated Fat: 6g
- Trans Fat: 0g
- Carbohydrates: 40g
- Fiber: 1g
- Protein: 4g
- Cholesterol: 55mg
Keywords: red velvet cookies, sandwich cookies, cream cheese filling, holiday cookies, homemade dessert