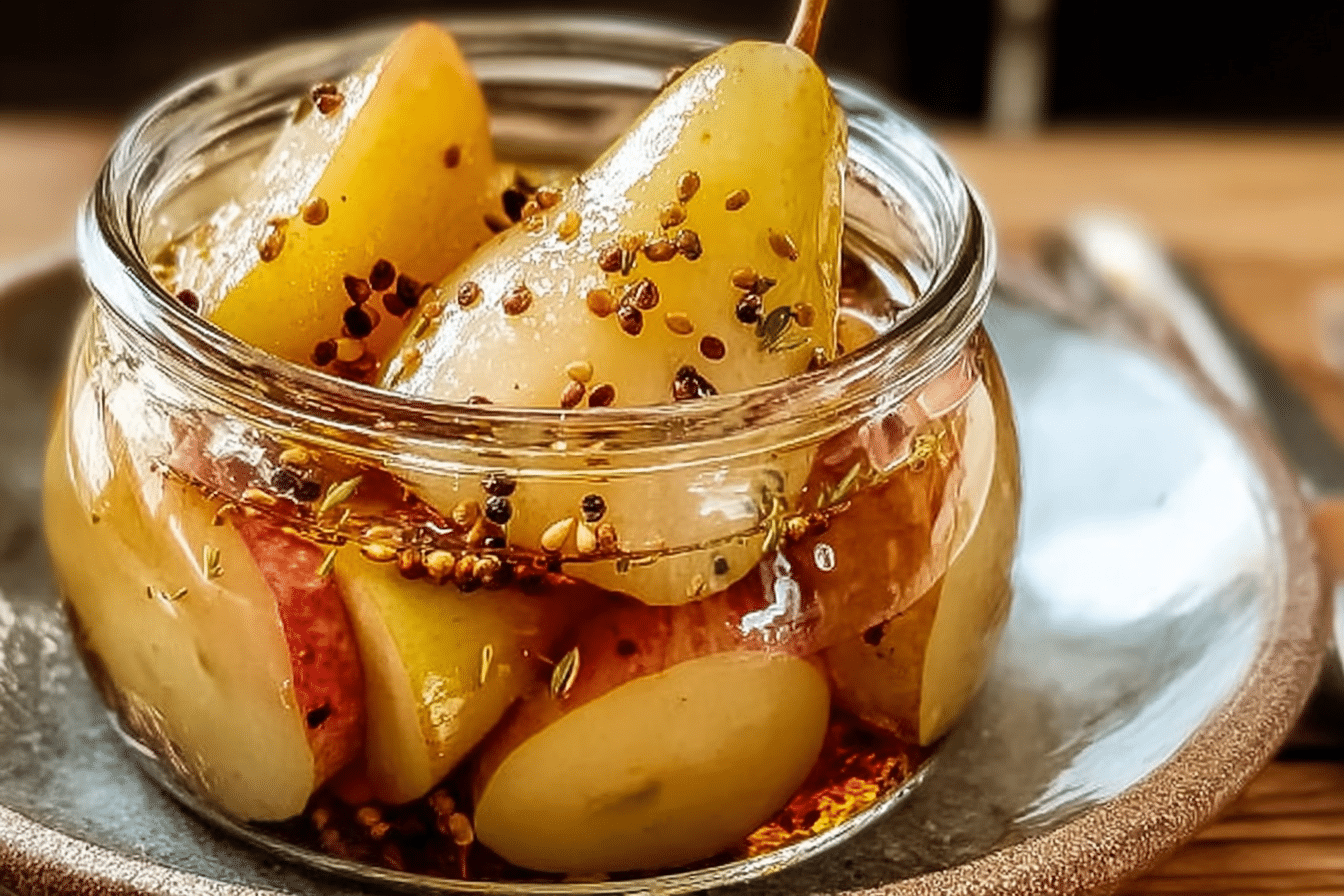
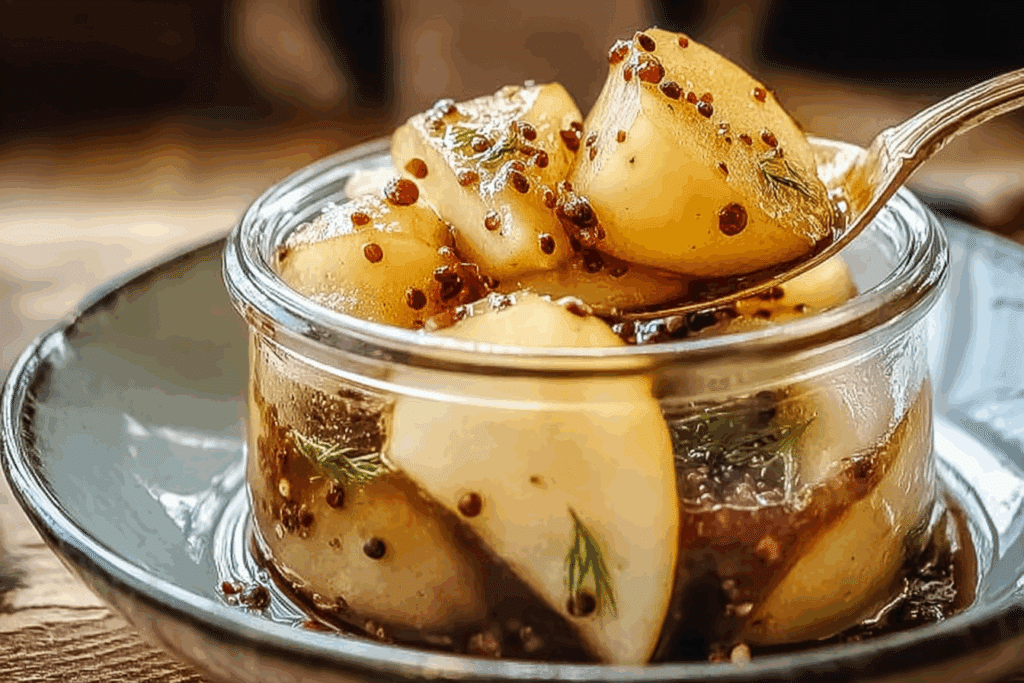
Quick Pickled Pears
There’s something truly magical about transforming simple, ripe pears into a jar of glistening, tangy perfection. Quick Pickled Pears are one of those recipes that feel nostalgic yet refreshingly modern, a little sweet, a little tart, and incredibly versatile. Whether you spoon them over roasted meats, mix them into salads, or just enjoy them straight from the jar, their bright flavor will surprise you every time.
Behind the Recipe
This recipe was born out of the desire to preserve the fleeting sweetness of fall pears. I remember standing in my grandmother’s kitchen, the air filled with the comforting scent of vinegar, sugar, and warm spices. She would pickle just about anything, but the pears were always special, capturing the cozy taste of autumn in every bite. Today, I’ve adapted that old family trick into a quick and easy version that anyone can master.
Recipe Origin or Trivia
Pickling fruits is not new—it dates back centuries as a way to extend the shelf life of seasonal produce. Pears, with their natural sweetness, became a favorite for pairing with tangy vinegars and aromatic spices. From European kitchens to Asian preserves, variations of pickled fruit have always found a place at the table. Quick Pickled Pears are a modern twist on that heritage, offering a balance of flavor that fits effortlessly into contemporary dishes.
Why You’ll Love Quick Pickled Pears
Versatile: Perfect for salads, cheese boards, or even as a sweet-tart side for savory mains.
Budget-Friendly: Uses simple ingredients you probably already have at home.
Quick and Easy: Ready in under 30 minutes from start to finish.
Customizable: Add different spices or vinegars to match your taste.
Crowd-Pleasing: They look beautiful and taste even better, making them perfect for entertaining.
Make-Ahead Friendly: The flavor deepens as they sit, so they’re even better the next day.
Great for Leftovers: Keep them in the fridge for up to two weeks to brighten up weekday meals.
Chef’s Pro Tips for Perfect Results
Pick ripe but firm pears to prevent mushiness.
Don’t skip the cooling step—letting the brine cool slightly before pouring helps maintain texture.
Slice pears evenly for consistent flavor absorption.
Use whole spices like cloves and peppercorns for a more balanced aroma.
Always store in a clean, sterilized jar to keep your pickles fresh longer.
Kitchen Tools You’ll Need
Cutting Board: To safely slice the pears.
Chef’s Knife: For precise, even cuts.
Medium Saucepan: To heat and combine your brine.
Wooden Spoon: To stir the mixture without altering flavors.
Glass Jar: For storing the pickled pears once they’re cooled.
Ingredients in Quick Pickled Pears
Before diving in, let’s take a look at the simple yet harmonious ingredients that make this recipe shine.
- Pears: 3 medium ripe but firm pears, sliced thinly. They bring the natural sweetness and body to the pickle.
- White Vinegar: 1 cup, for the tangy backbone of the brine.
- Water: 1/2 cup, to balance the acidity of the vinegar.
- Granulated Sugar: 1/3 cup, to round out the sharpness of the vinegar.
- Salt: 1 teaspoon, which enhances all the flavors.
- Cinnamon Stick: 1 whole stick, for a touch of warm spice.
- Whole Cloves: 4 to 5 pieces, adding depth and aromatic notes.
- Black Peppercorns: 1 teaspoon, giving a subtle spicy kick.
- Lemon Zest: From 1 lemon, brightening the overall taste.
Ingredient Substitutions
White Vinegar: Apple cider vinegar for a fruitier tone.
Granulated Sugar: Use honey or maple syrup for a richer sweetness.
Cinnamon Stick: A pinch of ground cinnamon can substitute if needed.
Black Peppercorns: Use pink peppercorns for a softer flavor.
Lemon Zest: Orange zest works beautifully for a more floral note.
Ingredient Spotlight
Pears: Choose firm varieties like Bosc or Anjou which hold their shape in brine and absorb flavors beautifully.
Cinnamon Stick: Adds a cozy, aromatic warmth that complements the pears’ natural sweetness.
Instructions for Making Quick Pickled Pears
Let’s get started on turning those fresh pears into a jar of bright, flavorful magic. Here are the steps you’ll follow:
- Preheat Your Equipment:
Clean and sterilize your jar in hot water, then set it aside to air dry. - Combine Ingredients:
In a medium saucepan, mix vinegar, water, sugar, salt, cinnamon stick, cloves, peppercorns, and lemon zest. Bring it to a gentle boil. - Prepare Your Cooking Vessel:
Once the brine starts simmering, stir until the sugar and salt fully dissolve. Let it cool for about 5 minutes. - Assemble the Dish:
Arrange the pear slices neatly in your jar, layering them evenly. - Cook to Perfection:
Pour the slightly cooled brine over the pears, making sure they are fully submerged. - Finishing Touches:
Seal the jar and let it rest at room temperature for an hour before refrigerating. - Serve and Enjoy:
Once chilled, your Quick Pickled Pears are ready to enjoy! The flavors will continue to deepen over the next few days.
Texture & Flavor Secrets
The beauty of this recipe lies in the balance of texture and flavor. The pears stay slightly crisp, offering a satisfying bite, while the brine infuses each slice with a tangy sweetness and subtle spice. The longer they sit, the more the flavors mingle, creating layers of warmth and brightness.
Cooking Tips & Tricks
- Always use firm pears for better texture.
- Let the brine cool slightly before pouring to prevent over-softening.
- The flavor develops beautifully after 24 hours, so patience pays off.
What to Avoid
- Don’t use overripe pears; they’ll turn mushy.
- Avoid metal containers for storage, as vinegar reacts with metal.
- Don’t skip sterilizing your jar; cleanliness ensures longevity.
Nutrition Facts
Servings: 4
Calories per serving: 90
Note: These are approximate values.
Preparation Time
Prep Time: 10 minutes
Cook Time: 10 minutes
Total Time: 20 minutes
Make-Ahead and Storage Tips
These pears actually taste better the next day, so don’t hesitate to make them ahead of time. Store them in the refrigerator for up to 2 weeks. For longer storage, you can freeze the brine and pears separately, though fresh is always best.
How to Serve Quick Pickled Pears
They pair beautifully with cheese platters, roasted meats, and fresh salads. Try serving them alongside brie or goat cheese for an elegant appetizer, or dice them into grain bowls for a sweet-tangy contrast.
Creative Leftover Transformations
- Chop and mix into slaws or grain salads.
- Blend the syrup into salad dressings.
- Use slices as a garnish for cocktails or sparkling water.
Additional Tips
If your pears float above the brine, weigh them down with a small piece of parchment paper. The flavors will continue to evolve, so taste and adjust sweetness or acidity as needed.
Make It a Showstopper
Serve in a clear glass jar so those golden slices and floating spices can shine. Add a sprig of rosemary or a cinnamon stick for a beautiful rustic touch.
Variations to Try
- Spiced Pears: Add star anise and a few cardamom pods for a deeper spice.
- Ginger Pears: Toss in a few slices of fresh ginger for a zesty edge.
- Vanilla Pears: Use a split vanilla bean for a subtle sweetness.
- Berry Brined Pears: Add a handful of cranberries for a pink hue.
- Savory Pears: Add a small clove of garlic and thyme for a herby twist.
FAQ’s
Q1: How long do Quick Pickled Pears last in the fridge?
They stay fresh for up to 2 weeks when stored properly in a sealed jar.
Q2: Can I use brown sugar instead of white?
Yes, but it will add a deeper caramel flavor to the brine.
Q3: Can I peel the pears?
You can, but leaving the skin adds color and texture.
Q4: What type of vinegar is best?
White vinegar or apple cider vinegar works best for a balanced flavor.
Q5: Do I need to refrigerate them immediately?
Yes, after cooling at room temperature for about an hour, refrigerate them.
Q6: Can I reuse the brine?
It’s best to make a fresh batch each time for safety and flavor consistency.
Q7: How do I make the pears less tart?
Add a little more sugar or a drizzle of honey.
Q8: Can I use this recipe for other fruits?
Absolutely! Try apples, peaches, or even plums.
Q9: Are pickled pears healthy?
Yes, they’re low in fat and packed with antioxidants from the spices.
Q10: What can I serve them with?
Cheeses, roasted meats, sandwiches, or even desserts for a sweet-sour twist.
Conclusion
Quick Pickled Pears are a little jar of sunshine, balancing sweet, tangy, and aromatic notes in every slice. They’re easy to make, incredibly versatile, and truly elevate any meal. Trust me, once you’ve made your first batch, you’ll find yourself reaching for them again and again.
Print
Quick Pickled Pears
- Prep Time: 10 minutes
- Cook Time: 10 minutes
- Total Time: 20 minutes
- Yield: 4 servings 1x
- Category: Condiments
- Method: Pickling
- Cuisine: Global
- Diet: Vegan
Description
Quick Pickled Pears are a sweet, tangy, and aromatic treat that captures the warmth of fall in every bite. Perfect for salads, cheese boards, or as a flavorful side dish, these pears bring a beautiful balance of sweetness and spice in under 30 minutes.
Ingredients
- 3 medium ripe but firm pears, thinly sliced
- 1 cup white vinegar
- 1/2 cup water
- 1/3 cup granulated sugar
- 1 teaspoon salt
- 1 cinnamon stick
- 4 to 5 whole cloves
- 1 teaspoon black peppercorns
- Zest from 1 lemon
Instructions
- Sterilize a glass jar by washing it in hot water and letting it air dry.
- In a medium saucepan, combine vinegar, water, sugar, salt, cinnamon stick, cloves, peppercorns, and lemon zest.
- Bring the mixture to a gentle boil, stirring until sugar and salt dissolve completely.
- Remove from heat and let the brine cool for about 5 minutes.
- Arrange pear slices neatly in the sterilized jar.
- Pour the slightly cooled brine over the pears, ensuring they are fully submerged.
- Seal the jar and let it sit at room temperature for 1 hour, then refrigerate.
- Once chilled, enjoy the pears as a snack, side, or garnish.
Notes
- Use firm pears like Bosc or Anjou to prevent mushiness.
- Flavor deepens after 24 hours, so prepare a day ahead for best taste.
- Store in the fridge for up to 2 weeks.
Nutrition
- Serving Size: 1/2 cup
- Calories: 90
- Sugar: 18g
- Sodium: 120mg
- Fat: 0g
- Saturated Fat: 0g
- Unsaturated Fat: 0g
- Trans Fat: 0g
- Carbohydrates: 22g
- Fiber: 2g
- Protein: 0g
- Cholesterol: 0mg
Keywords: quick pickled pears, easy pickled fruit, pickled pears recipe, fall preserves, pear condiment