No-Bake Yogurt Cheesecake
There is something quietly magical about a dessert that feels luxurious yet takes almost no effort to make. This No-Bake Yogurt Cheesecake is one of those treats that surprises you in the best way. It is creamy, lightly tangy, gently sweet, and chilled to perfection. Trust me, you are going to love this. It tastes like summer afternoons and slow weekends, and let me tell you, it is worth every bite.
A Creamy Dream That Requires No Oven
What makes this cheesecake so irresistible is its simplicity. No water baths, no cracked tops, no worrying about overbaking. Just smooth yogurt blended with cream cheese, gently sweetened and set over a buttery biscuit base. The texture is light yet rich, and the tang from the yogurt balances everything beautifully.
It is the kind of dessert you pull from the fridge and instantly feel proud of. It looks elegant, slices cleanly, and tastes like something from a café. This one is a total game changer for anyone who loves cheesecake but wants something fresher and lighter.
A Modern Twist on a Classic Favorite
Cheesecake has been around for centuries, with roots that trace back to ancient Greece. Over time, it evolved into the baked versions we know today, especially in New York style kitchens.
This chilled version is a more modern adaptation. By combining yogurt with cream cheese, we get a dessert that feels lighter and slightly tangy. It is perfect for warmer seasons and gatherings where you want something refreshing rather than heavy.
Why This Cheesecake Always Delivers
Before we dive into the details, let me tell you why this dessert deserves a permanent spot in your kitchen.
Versatile: You can top it with berries, citrus zest, or even a simple fruit glaze, and it always works beautifully.
Budget-Friendly: The ingredients are simple and easy to find, making it affordable without sacrificing flavor.
Quick and Easy: No baking means less stress and less time in the kitchen.
Customizable: Swap toppings, adjust sweetness, or experiment with flavored yogurt.
Crowd-Pleasing: Creamy texture and balanced sweetness make it a hit with both kids and adults.
Make-Ahead Friendly: It actually tastes better after chilling overnight.
Great for Leftovers: The texture stays firm and delicious for days when stored properly.
Chef Secrets for the Perfect Set
A chilled dessert like this depends on small details. Here are a few insider tips that make all the difference.
- Use full fat cream cheese for a rich and stable texture.
- Dissolve the gelatin completely so there are no lumps.
- Let the base chill before adding the filling.
- Chill the assembled cake for at least 4 hours for a clean slice.
Tools That Make It Effortless
Having the right tools keeps everything smooth and stress free.
Springform Pan: Makes removing the cheesecake easy and keeps edges clean.
Mixing Bowls: For combining crust and filling ingredients separately.
Electric Mixer: Helps achieve a silky smooth filling.
Saucepan: Needed to gently warm and dissolve the gelatin.
Spatula: Ensures every bit of filling is evenly spread.
Ingredients That Work in Perfect Harmony
Now let’s take a look at what brings this dessert together.
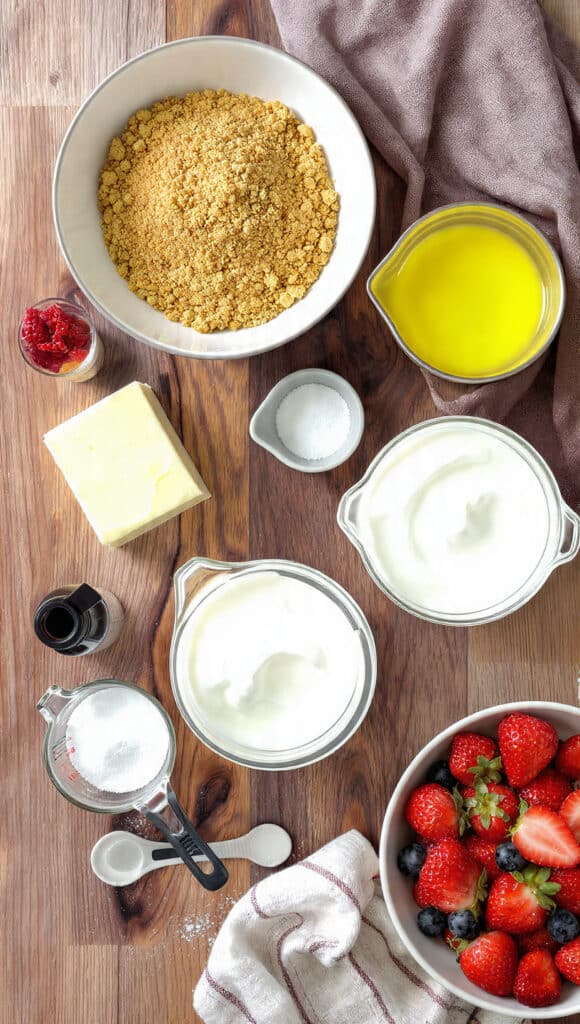
- Digestive Biscuits: 200 grams, crushed finely, form the buttery base.
- Unsalted Butter: 100 grams, melted, binds the crust together.
- Cream Cheese: 400 grams, softened, creates the rich creamy body.
- Plain Greek Yogurt: 300 grams, full fat, adds tang and lightness.
- Granulated Sugar: 100 grams, balances the tang with sweetness.
- Vanilla Extract: 1 teaspoon, enhances overall flavor.
- Gelatin Powder: 10 grams, dissolved in 3 tablespoons warm water, helps the filling set.
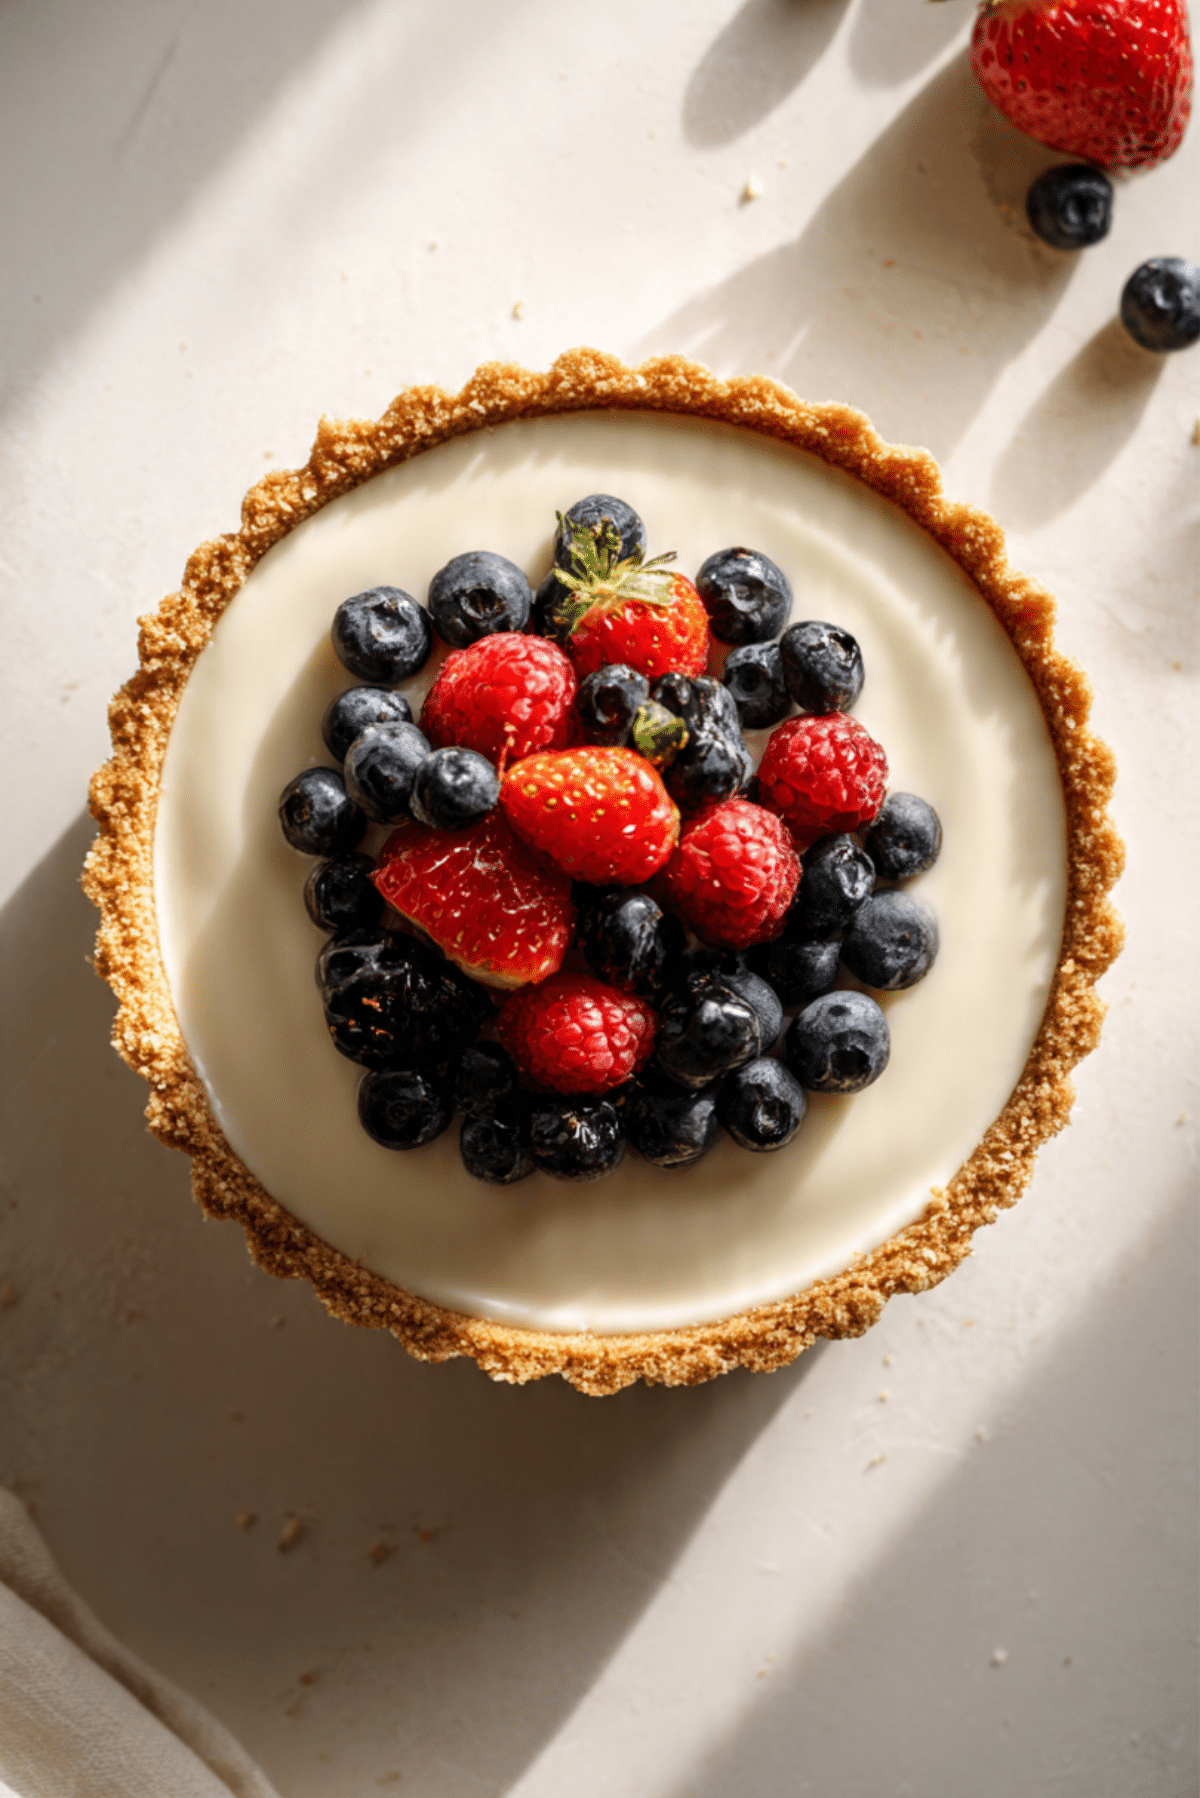
- Fresh Berries: 150 grams, for topping and a burst of freshness.
Flexible Swaps If Needed
Sometimes you work with what you have, and that is perfectly fine.
Digestive Biscuits: Graham crackers.
Plain Greek Yogurt: Full fat natural yogurt.
Granulated Sugar: Honey, adjusted to taste.
Fresh Berries: Sliced mango or kiwi.
Spotlight on Key Ingredients
Greek Yogurt: This is what makes the texture lighter and slightly tangy. It prevents the cheesecake from feeling too heavy.
Gelatin: The quiet hero that allows the cake to set without baking.
Let’s Bring It All Together
Now that we have everything ready, and now let’s dive into the process.
- Preheat Your Equipment: There is no oven needed, but line the base of a 20 cm springform pan with parchment paper.
- Combine Ingredients: Mix the crushed biscuits with melted butter until evenly coated.
- Prepare Your Cooking Vessel: Press the biscuit mixture firmly into the pan base. Chill for 30 minutes.
- Assemble the Dish: Beat cream cheese and sugar until smooth. Add yogurt and vanilla, mixing until creamy. Dissolve gelatin in warm water, let it cool slightly, then fold into the mixture. Pour over the chilled crust.
- Cook to Perfection: Refrigerate for at least 4 hours, or until fully set.
- Finishing Touches: Top with fresh berries just before serving.
- Serve and Enjoy: Slice with a warm knife for clean edges and enjoy every creamy bite.
Texture and Flavor in Every Bite
The base is slightly crumbly yet firm, giving a buttery contrast to the silky filling. The yogurt brings a gentle tang that keeps the sweetness balanced. Fresh berries add a juicy burst that lifts every forkful.
Helpful Kitchen Tricks for Success
- Chill overnight for the best texture.
- Run a thin knife around the edge before releasing the springform.
- Use room temperature cream cheese to avoid lumps.
Mistakes to Avoid for a Perfect Result
- Not dissolving gelatin fully can create uneven texture.
- Skipping chill time will prevent proper setting.
- Overmixing after adding gelatin may reduce structure.
Nutritional Snapshot
Servings: 8
Calories per serving: 320
Note: These are approximate values.
Time Breakdown at a Glance
Prep Time: 20 minutes
Cook Time: 0 minutes
Total Time: 4 hours 20 minutes
Plan Ahead and Store with Ease
This dessert is perfect for making a day in advance. Store it covered in the refrigerator for up to 3 days. It is not ideal for freezing as the texture may change once thawed.
Serving Ideas That Elevate the Experience
Serve chilled with extra berries on the side or a light drizzle of honey. It pairs beautifully with fresh mint and a cup of tea or coffee.
Transforming Leftovers Creatively
Turn leftover slices into mini parfaits layered with granola. You can also crumble a slice into a dessert glass with extra fruit for a quick treat.
Extra Pointers for Best Results
Keep ingredients at room temperature before mixing. Always chill the crust properly before adding filling.
Make It Visually Stunning
Arrange berries neatly in the center or create a simple circular pattern. A light dusting of powdered sugar can add elegance.
Fun Twists to Experiment With
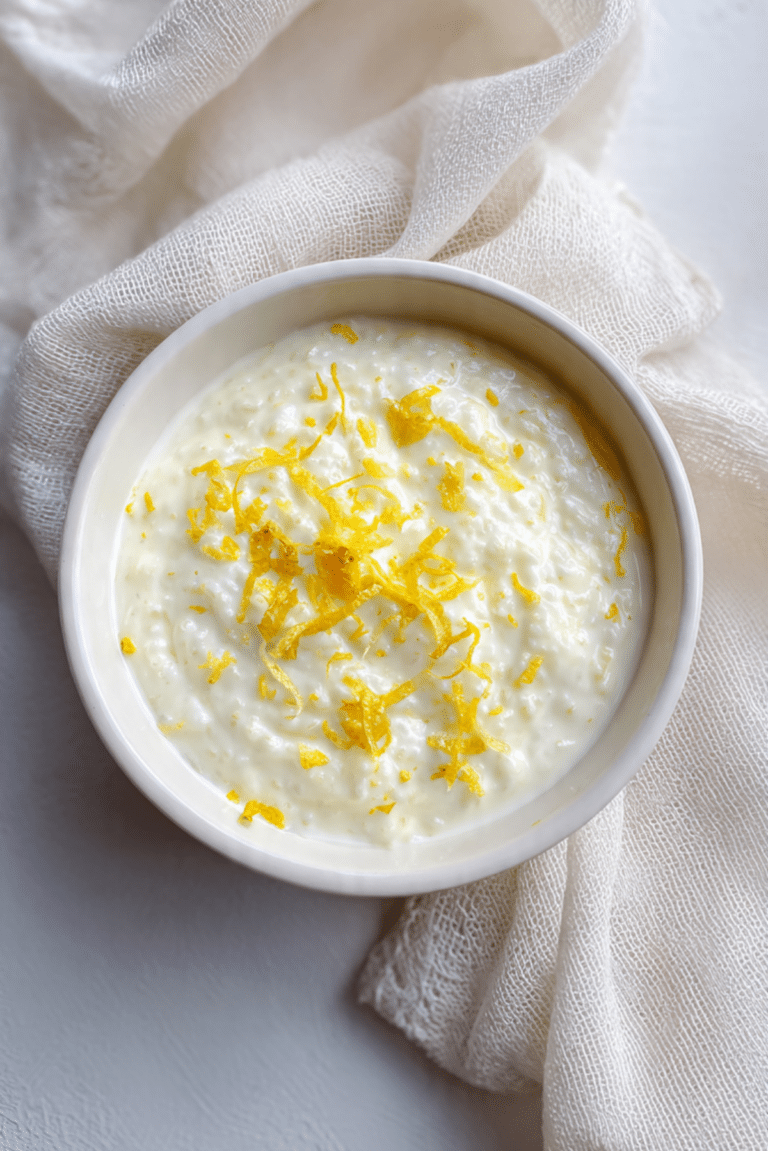
- Add lemon zest to the filling for citrus brightness.
- Swirl in berry puree before chilling.
- Use chocolate biscuit crust for deeper flavor.
- Add a thin layer of fruit jelly on top once set.
FAQ’s
Q1: Can I skip gelatin?
You can try agar agar as an alternative, but the texture may differ slightly.
Q2: How long does it need to chill?
At least 4 hours, but overnight is best.
Q3: Can I use low fat yogurt?
Yes, though the texture may be slightly softer.
Q4: What size pan works best?
A 20 cm springform pan gives ideal thickness.
Q5: Can I make it sweeter?
Yes, adjust sugar to taste before adding gelatin.
Q6: Why is my filling not setting?
The gelatin may not have dissolved properly.
Q7: Can I add fruit inside?
Yes, fold small fruit pieces into the filling.
Q8: How do I slice cleanly?
Use a knife dipped in warm water.
Q9: Can I use flavored yogurt?
Yes, but reduce added sugar accordingly.
Q10: How long does it last?
Up to 3 days refrigerated.
Conclusion
This No-Bake Yogurt Cheesecake is creamy, refreshing, and surprisingly simple to make. It brings together smooth texture, gentle sweetness, and a buttery base in the most satisfying way. Give it a try, share it with someone you love, and enjoy every chilled, creamy slice.
Print
No-Bake Yogurt Cheesecake
- Prep Time: 20 minutes
- Cook Time: 0 minutes
- Total Time: 4 hours 20 minutes
- Yield: 8 servings 1x
- Category: Dessert
- Method: No Bake
- Cuisine: International
- Diet: Vegetarian
Description
A creamy, refreshing no-bake yogurt cheesecake with a buttery biscuit base and fresh berry topping. Lightly tangy, perfectly sweet, and easy to prepare.
Ingredients
- 200 grams digestive biscuits, crushed
- 100 grams unsalted butter, melted
- 400 grams cream cheese, softened
- 300 grams plain Greek yogurt, full fat
- 100 grams granulated sugar
- 1 teaspoon vanilla extract
- 10 grams gelatin powder dissolved in 3 tablespoons warm water
- 150 grams fresh berries
Instructions
- Line the base of a 20 cm springform pan with parchment paper.
- Mix crushed biscuits with melted butter until evenly combined.
- Press the mixture firmly into the pan base and chill for 30 minutes.
- Beat cream cheese and sugar until smooth, then add yogurt and vanilla and mix until creamy.
- Dissolve gelatin in warm water, let cool slightly, then fold into the filling.
- Pour filling over chilled crust and smooth the top.
- Refrigerate for at least 4 hours until fully set.
- Top with fresh berries before serving and slice with a warm knife.
Notes
- Chill overnight for best texture.
- Use room temperature cream cheese for a smooth filling.
- Run a knife around the edge before releasing the pan.
Nutrition
- Serving Size: 1 slice
- Calories: 320
- Sugar: 18g
- Sodium: 190mg
- Fat: 22g
- Saturated Fat: 13g
- Unsaturated Fat: 7g
- Trans Fat: 0g
- Carbohydrates: 24g
- Fiber: 1g
- Protein: 6g
- Cholesterol: 65mg
Keywords: no bake cheesecake, yogurt cheesecake, easy dessert, chilled cheesecake