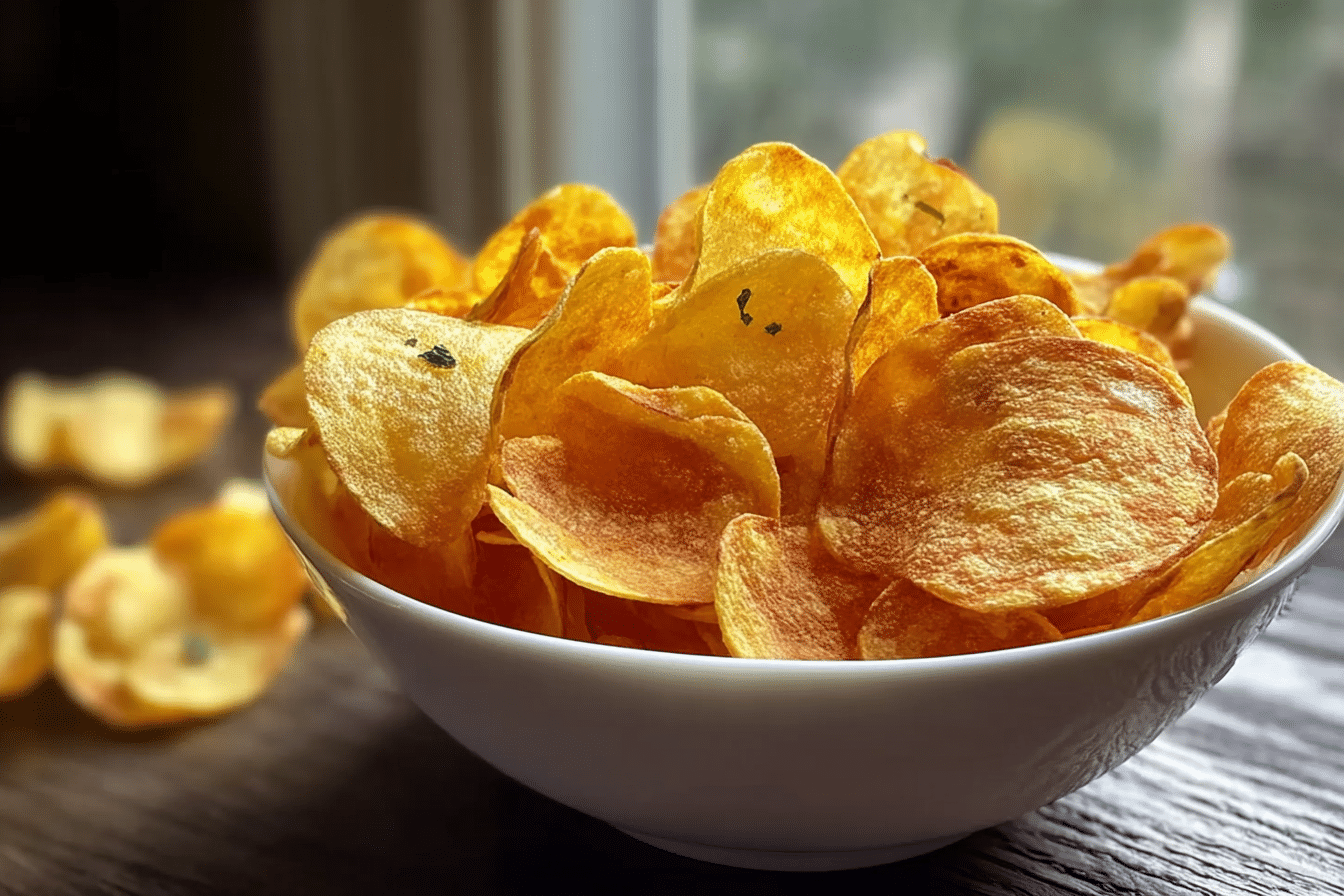
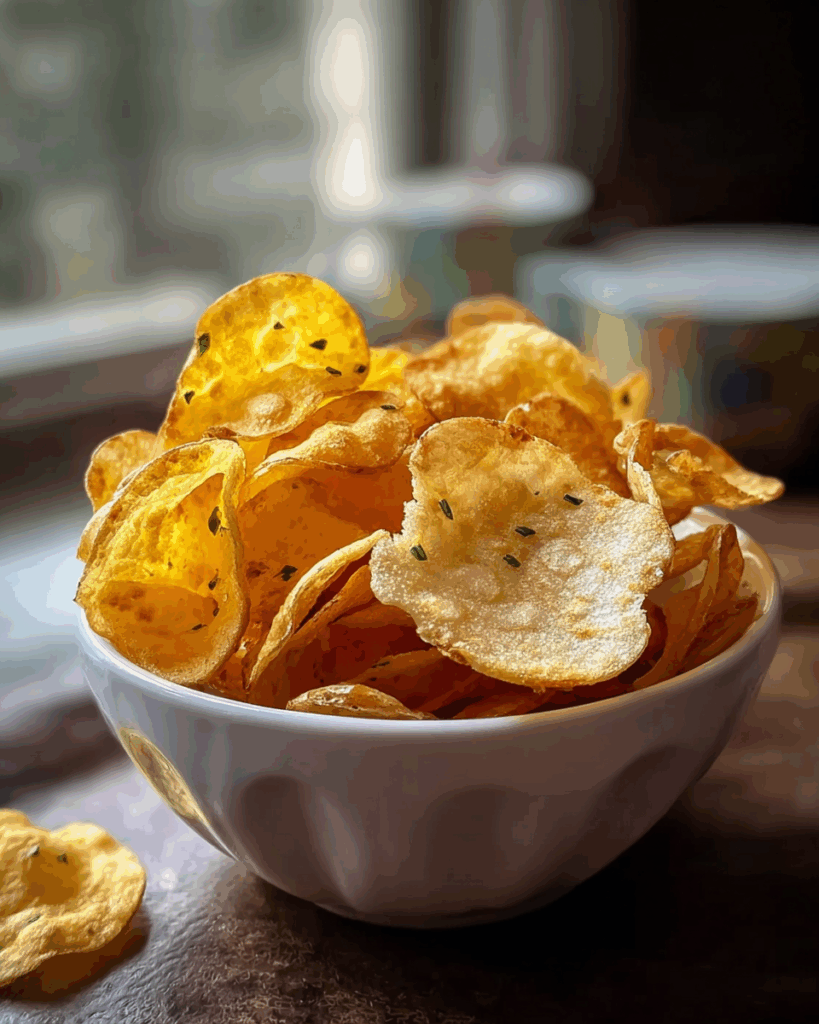
Homemade Potato Crisps
There’s something magical about the first bite of a perfectly crisp potato chip. The light crunch, the golden hue, and that irresistible salty aroma instantly transport you to a place of pure comfort and joy. Making potato crisps at home is more than just cooking, it’s about creating a snack that feels fresh, warm, and crafted with love right in your own kitchen. Trust me, you’re going to love this.
Behind the Recipe
This recipe was born from the simple joy of wanting to elevate an everyday snack into something special. I remember as a child watching my grandmother slice potatoes with care, dropping them into hot oil, and pulling them out golden and shimmering. Those moments weren’t just about food, they were about togetherness, laughter, and the little traditions that bring families closer.
Recipe Origin or Trivia
Potato crisps, or chips as they’re often called, have a fun backstory. Legend has it they were invented in Saratoga Springs, New York, in the mid-1800s when a chef sliced potatoes paper-thin to satisfy a picky diner. Since then, they’ve become a global favorite, with every culture putting its own spin on seasonings, oils, and cuts. In Britain, crisps are a classic pub snack, while in Asia, you’ll find them flavored with seaweed, chili, or even wasabi.
Why You’ll Love Homemade Potato Crisps
There are plenty of reasons why these crisps deserve a place in your kitchen.
Versatile: They pair beautifully with dips, sandwiches, or can be savored all on their own.
Budget-Friendly: A bag of potatoes transforms into a big bowl of chips for just pennies compared to store-bought.
Quick and Easy: With only a handful of steps, you’ll have hot, crunchy crisps in under an hour.
Customizable: Add your favorite seasonings, from smoky paprika to tangy vinegar, to suit your taste.
Crowd-Pleasing: Set them on the table at a party, and watch them disappear in minutes.
Make-Ahead Friendly: You can fry them in batches and store them in airtight containers for days.
Great for Leftovers: Any extra crisps can be crumbled over salads or casseroles for extra crunch.
Chef’s Pro Tips for Perfect Results
To get that restaurant-style crispiness at home, here are a few insider secrets:
- Always soak sliced potatoes in cold water to remove excess starch for better crunch.
- Use a mandoline for even, thin slices that cook consistently.
- Fry in small batches to avoid soggy chips and keep oil temperature stable.
- Season immediately after frying while crisps are still hot for the best flavor.
Kitchen Tools You’ll Need
Before you dive in, make sure your kitchen is equipped with a few essentials.
Mandoline slicer: For thin, uniform slices.
Large mixing bowl: To soak the potatoes.
Heavy-bottomed pot or deep fryer: Ensures steady heat while frying.
Slotted spoon or frying spider: Makes it easy to lift crisps out of the oil.
Paper towels or wire rack: For draining excess oil.
Ingredients in Homemade Potato Crisps
The beauty of this recipe lies in its simplicity. Each ingredient plays its part in creating that golden crunch.
- Russet Potatoes: 4 medium (about 1.5 pounds) give the crisps their classic starchy texture.
- Vegetable Oil: 4 cups provides a neutral frying base that allows the potato flavor to shine.
- Sea Salt: 1 teaspoon (or more to taste) enhances the natural flavor of the potato.
- Optional Seasonings: 1 teaspoon each (paprika, garlic powder, chili flakes, or dried herbs) let you create exciting variations.
Ingredient Substitutions
Sometimes you may not have the exact items, but don’t worry, here are easy swaps.
Russet Potatoes: Yukon Gold or sweet potatoes for a different flavor.
Vegetable Oil: Sunflower oil, canola oil, or peanut oil.
Sea Salt: Kosher salt or flavored salts for a fun twist.
Ingredient Spotlight
Russet Potatoes: These are the ideal choice because of their starchy nature, which leads to that perfect crispy bite.
Sea Salt: A finishing touch that elevates the flavor while keeping it clean and simple.
Instructions for Making Homemade Potato Crisps
Making these crisps is a fun and rewarding process. Here’s the step-by-step journey.
- Preheat Your Equipment: Heat the oil in a heavy-bottomed pot to 350°F (175°C).
- Combine Ingredients: Slice potatoes thinly using a mandoline and soak them in a bowl of cold water for at least 20 minutes. Drain and pat dry completely.
- Prepare Your Cooking Vessel: Line a tray with paper towels or set up a wire rack for draining fried crisps.
- Assemble the Dish: Working in batches, carefully place slices into the hot oil without overcrowding.
- Cook to Perfection: Fry for 2 to 3 minutes until golden and crisp, stirring gently to prevent sticking.
- Finishing Touches: Remove with a slotted spoon and place on the paper towels. Sprinkle with salt and any desired seasonings immediately.
- Serve and Enjoy: Let cool slightly, then enjoy them fresh and crunchy.
Texture & Flavor Secrets
The magic of these crisps lies in contrast. Each bite begins with a sharp crunch followed by the warm, comforting taste of potato. The golden edges carry a toasty note while the middle stays light and airy. Seasonings like paprika or garlic powder add layers of flavor without overshadowing the potato’s natural charm.
Cooking Tips & Tricks
Here are a few extra nuggets of wisdom to ensure success:
- Keep a thermometer handy to maintain the oil temperature.
- Use parchment paper between layers if storing crisps to prevent sticking.
- Add a squeeze of lemon zest for a bright finishing flavor.
What to Avoid
Even the simplest recipes can go sideways, but here’s how to avoid common pitfalls:
- Overcrowding the oil, which lowers the temperature and results in soggy chips.
- Skipping the soak, leaving too much starch and reducing crispiness.
- Frying at too low a temperature, which makes greasy crisps.
Nutrition Facts
Servings: 4
Calories per serving: ~200
Note: These are approximate values.
Preparation Time
Prep Time: 20 minutes
Cook Time: 20 minutes
Total Time: 40 minutes
Make-Ahead and Storage Tips
These crisps can easily be made ahead of time. Store them in an airtight container at room temperature for up to 5 days. To refresh, pop them in a low oven at 300°F for 5 minutes. If you plan to freeze, spread them out in a single layer before sealing in a freezer bag.
How to Serve Homemade Potato Crisps
Potato crisps are the perfect sidekick to sandwiches, burgers, or charcuterie boards. They also shine when paired with creamy dips like sour cream and chive, tangy salsa, or even guacamole. Serve them in parchment-lined bowls for a rustic touch.
Creative Leftover Transformations
Don’t let leftovers go to waste, turn them into something new.
- Crush and sprinkle over casseroles for a crunchy topping.
- Use as a base layer in nachos instead of tortilla chips.
- Mix into salads for an unexpected crunch.
Additional Tips
For extra flavor, toss hot crisps with a pinch of smoked paprika or truffle salt. Always store them in a cool, dry place to prevent sogginess. And remember, thinner slices equal crispier chips.
Make It a Showstopper
Presentation makes all the difference. Serve your crisps in a tall glass jar with parchment for a chic snack display, or layer them in a basket lined with colorful cloth for a more rustic, homey feel.
Variations to Try
- Salt and Vinegar: Toss hot crisps with malt vinegar powder for a tangy twist.
- Spicy Kick: Add cayenne or chili powder for heat lovers.
- Herb Infusion: Sprinkle with rosemary or thyme right after frying.
- Sweet Potato Crisps: Swap russets for sweet potatoes for natural sweetness.
- Cheesy Flavor: Dust with nutritional yeast for a dairy-free cheesy taste.
FAQ’s
Q1: Can I bake these instead of frying?
Yes, slice and soak potatoes, pat dry, then bake at 400°F with a light oil spray until crisp.
Q2: How thin should I slice the potatoes?
About 1/16 of an inch works best for that classic crispness.
Q3: Can I use olive oil for frying?
It’s best to avoid olive oil since it has a lower smoke point, but you can drizzle it on after cooking for flavor.
Q4: How do I keep crisps crunchy after storing?
Keep them in an airtight container with a little parchment paper between layers.
Q5: Can I season them with sugar for a sweet snack?
Absolutely, cinnamon sugar makes a delightful dessert version.
Q6: What type of potato works best?
Russet potatoes are ideal, but Yukon Golds offer a creamier bite.
Q7: Do I need a deep fryer?
Not at all, a heavy pot with enough oil works perfectly.
Q8: How do I avoid soggy crisps?
Always fry in small batches and keep the oil hot.
Q9: Can I use an air fryer?
Yes, air fry at 375°F, shaking the basket every few minutes until golden.
Q10: What’s the best way to slice without a mandoline?
A sharp knife works, just slice as evenly and thinly as possible.
Conclusion
Homemade potato crisps are one of those simple pleasures that never disappoint. With just a few ingredients, a little patience, and a sprinkle of creativity, you can turn humble potatoes into golden, crunchy delights. So grab a bag of spuds and let your kitchen be filled with the sound of sizzling oil and the irresistible aroma of fresh crisps. Let me tell you, it’s worth every bite.
Print
Homemade Potato Crisps
- Prep Time: 20 minutes
- Cook Time: 20 minutes
- Total Time: 40 minutes
- Yield: 4 servings
- Category: Snack
- Method: Frying
- Cuisine: American
- Diet: Vegetarian
Description
Golden, ultra-crispy homemade potato crisps made from thinly sliced russet potatoes, fried to perfection and seasoned to taste. A simple, budget-friendly snack that delivers restaurant-quality crunch right from your kitchen.
Ingredients
- Russet Potatoes: 4 medium (about 1.5 pounds)
- Vegetable Oil: 4 cups (for frying)
- Sea Salt: 1 teaspoon, plus more to taste
- Cold Water: enough to soak potato slices (about 4 cups)
- Optional Seasonings: 1 teaspoon each (paprika, garlic powder, chili flakes, or dried herbs)
- Paper Towels or Wire Rack: for draining
Instructions
- Preheat Your Equipment: Heat the oil in a heavy-bottomed pot or deep fryer to 350°F (175°C).
- Combine Ingredients: Wash and peel potatoes if desired, then slice very thinly (about 1/16 inch) using a mandoline or sharp knife. Place slices in a large bowl of cold water and soak for at least 20 minutes to remove excess starch. Drain and pat slices completely dry with paper towels.
- Prepare Your Cooking Vessel: Line a tray with paper towels or set up a wire rack over a sheet pan to drain cooked crisps. Keep a thermometer handy to monitor oil temperature.
- Assemble the Dish: Working in small batches, gently add dried potato slices to the hot oil without overcrowding. Stir occasionally to prevent sticking and ensure even cooking.
- Cook to Perfection: Fry each batch 2 to 3 minutes, or until slices are golden and crisp. Maintain oil at 350°F (175°C) for consistent results.
- Finishing Touches: Use a slotted spoon to remove crisps and transfer to the paper towel or wire rack. Immediately sprinkle with sea salt and any optional seasonings while the crisps are still hot so the flavors adhere.
- Serve and Enjoy: Let crisps cool slightly to reach maximum crunch, then serve fresh. Store extras in an airtight container at room temperature.
Notes
- Soaking the potato slices removes excess starch and produces a better crunch.
- Fry in small batches to keep oil temperature steady and avoid soggy crisps.
- Season immediately after frying so salt and spices stick to the hot surface.
- To refresh stored crisps, warm them in a 300°F oven for 4 to 6 minutes.
Nutrition
- Serving Size: 1 serving (about 1 cup)
- Calories: 200
- Sugar: 0 g
- Sodium: 300 mg
- Fat: 12 g
- Saturated Fat: 1.5 g
- Unsaturated Fat: 10 g
- Trans Fat: 0 g
- Carbohydrates: 24 g
- Fiber: 2 g
- Protein: 2 g
- Cholesterol: 0 mg
Keywords: homemade potato crisps, potato chips, crunchy snack, fried potato, party snack, easy snack