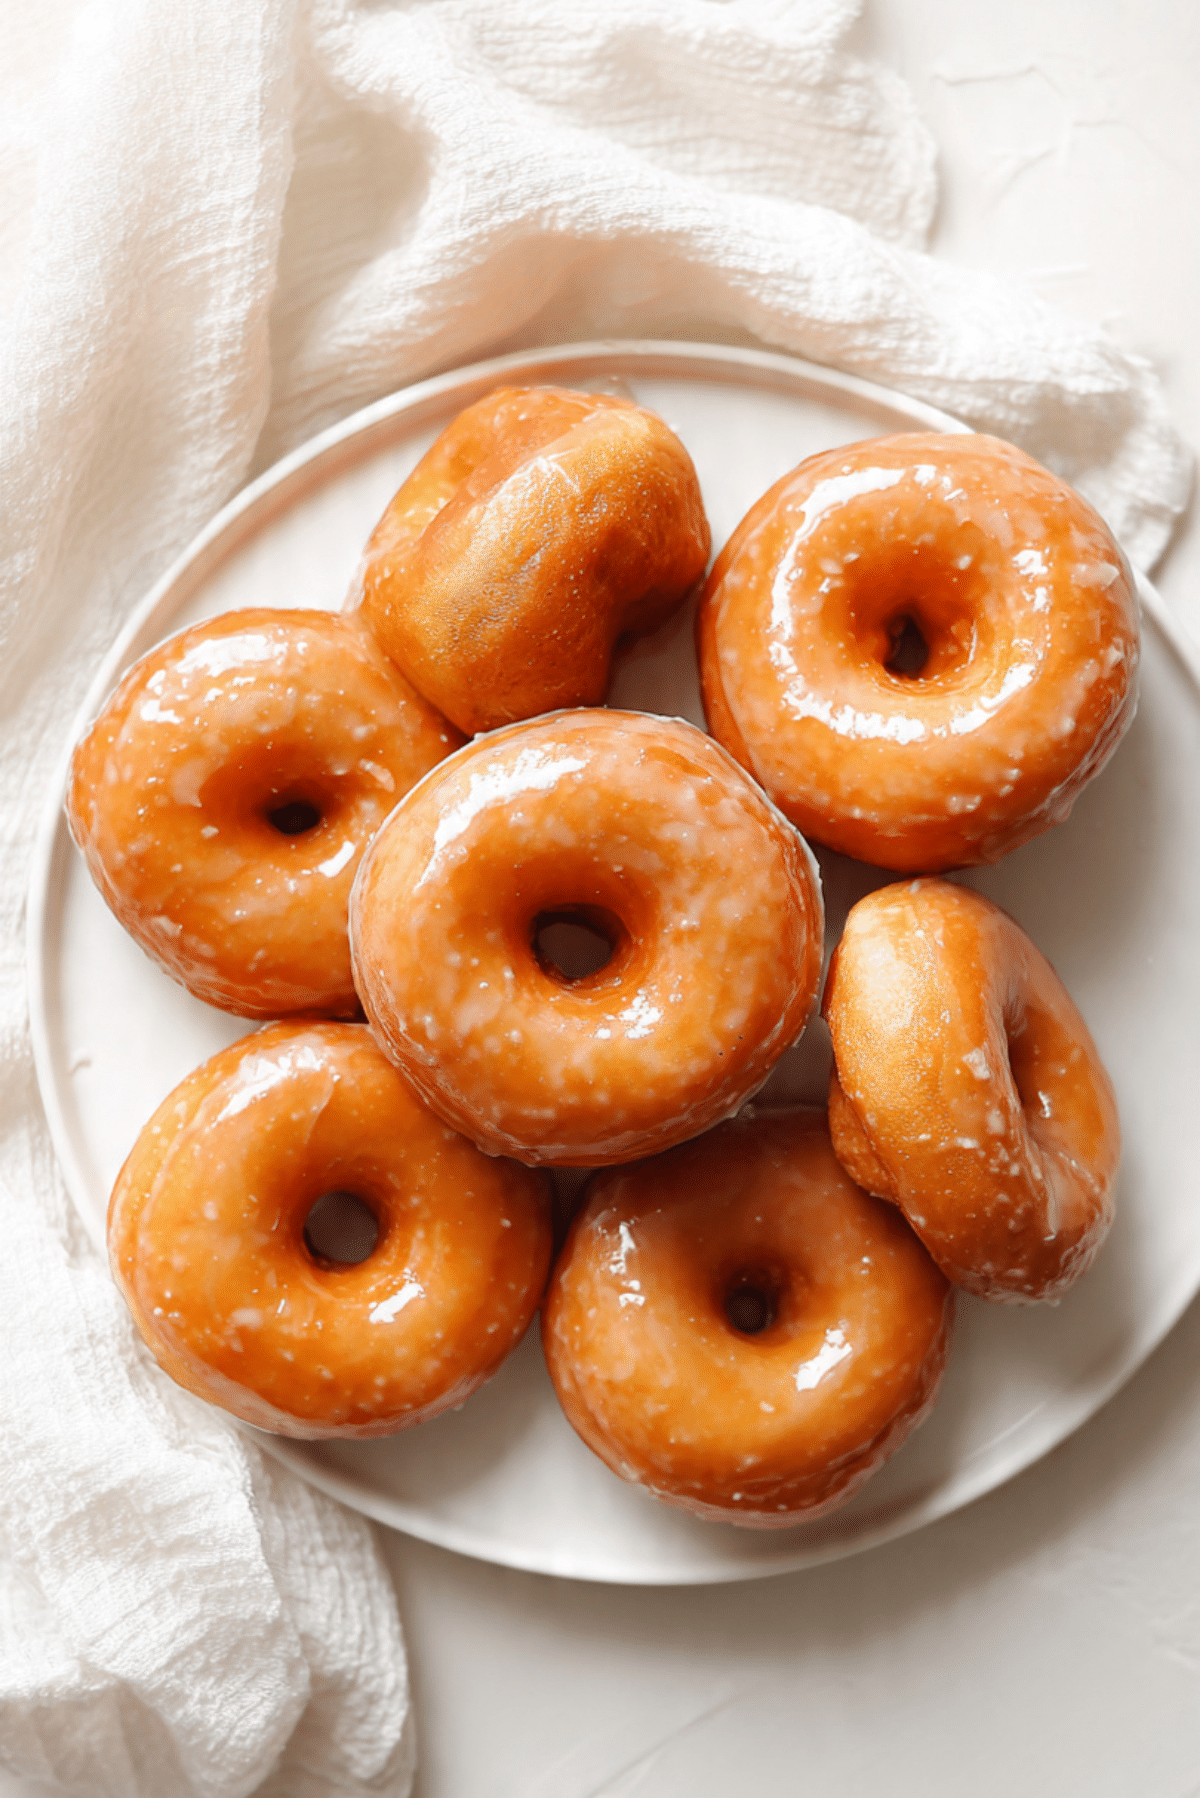
Homemade Glazed Doughnuts
There is something truly special about the smell of fresh dough frying, filling the kitchen with warmth and promise. These homemade glazed doughnuts bring that cozy bakery feeling straight into your home. Soft on the inside, lightly crisp on the outside, and finished with a glossy sweet glaze, this is the kind of treat that makes people hover near the stove, waiting for the next batch. Trust me, you’re going to love this from the very first bite.
Why These Doughnuts Always Steal the Show
What makes these doughnuts so irresistible is their balance. They are rich but not heavy, sweet but not overwhelming, and incredibly satisfying without being complicated. They feel like a weekend project, yet they come together easier than you might expect, which makes them perfect for both special mornings and casual cravings.
A Little Background and Sweet Trivia
Doughnuts have a long and comforting history, often tied to home kitchens and small bakeries rather than fancy restaurants. The glazed version became especially popular for its simple finish, just sugar, a touch of liquid, and that signature shine. Over time, this classic became a symbol of comfort food, enjoyed fresh, warm, and shared with others.
What Makes This Recipe a Keeper
This is where things really start to shine, and now let’s dive into why this version works so well every single time.
Versatile: These doughnuts fit breakfast, dessert, or an afternoon treat with coffee.
Budget-Friendly: Simple pantry staples come together without any fancy ingredients.
Quick and Easy: The steps are clear and manageable, even for first-time dough makers.
Customizable: You can change the glaze flavor or add toppings without changing the base.
Crowd-Pleasing: Few things disappear faster than a plate of warm doughnuts.
Make-Ahead Friendly: The dough can be prepared ahead for smoother mornings.
Great for Leftovers: They reheat beautifully and still taste amazing the next day.
Pro-Level Tips From the Kitchen
Before we get flour on our hands, here are a few insider notes that make all the difference. A relaxed dough gives softer results, steady oil temperature prevents greasiness, and glazing while warm helps that shiny coating settle just right.
Tools You’ll Want Nearby
Having the right tools ready makes the whole process feel calm and enjoyable.
Mixing Bowl: Large enough to let the dough rise comfortably.
Rolling Pin: Helps achieve even thickness for uniform cooking.
Heavy Pot: Keeps oil temperature stable during frying.
Thermometer: Ensures perfectly cooked doughnuts, not oily or raw.
Slotted Spoon: Makes lifting doughnuts safe and easy.
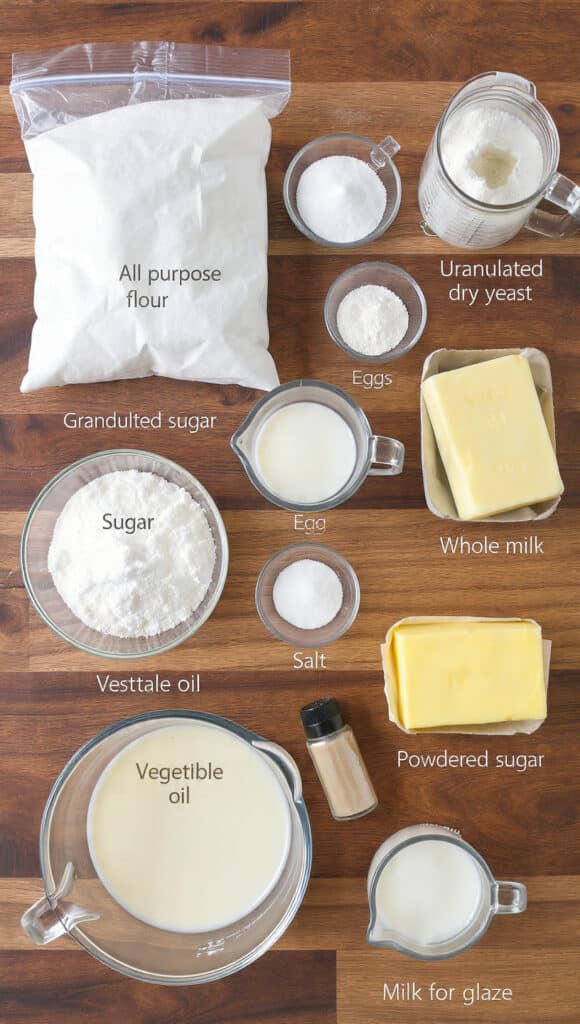
Ingredients You Will Need For This Recipe
Every ingredient here plays a role, and together they create that classic texture and flavor we all crave.
- All-Purpose Flour: 3 1/2 cups, provides structure while keeping the dough tender.
- Granulated Sugar: 1/4 cup, adds gentle sweetness to the dough.
- Active Dry Yeast: 2 1/4 teaspoons, gives the dough its airy lift.
- Whole Milk: 3/4 cup, warmed, creates a soft and rich crumb.
- Unsalted Butter: 1/4 cup, melted, adds flavor and moisture.
- Eggs: 2 large, help bind and enrich the dough.
- Salt: 1 teaspoon, balances sweetness and enhances flavor.
- Vegetable Oil: For frying, ensures even golden cooking.
- Powdered Sugar: 2 cups, forms the smooth glaze.
- Vanilla Extract: 1 teaspoon, gives the glaze warmth and depth.
- Milk for Glaze: 3 tablespoons, thins the glaze to the right consistency.
Easy Ingredient Swaps
Sometimes you need flexibility, and now let’s dive into a few easy adjustments.
Whole Milk: Can be replaced with low fat milk if needed.
Unsalted Butter: Margarine works in a pinch, though flavor may vary.
Vanilla Extract: Almond extract creates a fun twist.
Spotlight on Key Ingredients
A couple of elements truly define the final result.
Active Dry Yeast: This is what gives the doughnuts their light, fluffy interior.
Powdered Sugar: Creates that smooth, classic glaze that sets beautifully.
Let’s Start Cooking Together
This is where the fun really begins, and now let’s dive into the process step by step.
- Preheat Your Equipment: Warm the milk gently and prepare a clean workspace for rising dough.
- Combine Ingredients: Mix warm milk, yeast, and sugar, then add eggs, butter, salt, and flour.
- Prepare Your Cooking Vessel: Heat oil in a heavy pot to a steady frying temperature.
- Assemble the Dish: Roll out the dough and cut into classic doughnut shapes.
- Cook to Perfection: Fry until golden on both sides, turning carefully.
- Finishing Touches: Whisk glaze ingredients until smooth.
- Serve and Enjoy: Dip warm doughnuts into glaze and let set briefly.
Texture and Flavor You Can Feel
The outside develops a gentle crisp while frying, locking in a pillowy interior. As the warm doughnuts meet the glaze, the surface turns glossy and sweet, soaking slightly into the crust. Let me tell you, it’s worth every bite.
Helpful Cooking Tips
A few small details can elevate the final result.
- Keep oil temperature steady for even frying.
- Do not overcrowd the pot, fry in batches.
- Glaze while doughnuts are still warm.
What to Avoid for Best Results
Even simple recipes have small pitfalls.
- Overworking the dough, which makes it tough.
- Frying at low temperature, which causes oil absorption.
- Glazing fully cooled doughnuts, which prevents proper coating.
Nutrition Facts to Know
Servings: 12 doughnuts
Calories per serving: 280
Note: These values are approximate.
Time Breakdown at a Glance
Prep Time: 25 minutes
Cook Time: 20 minutes
Total Time: 45 minutes
Make-Ahead and Storage Tips
You can prepare the dough and let it rise overnight in the fridge. Cooked doughnuts store well in an airtight container for up to two days. Reheat briefly to restore softness, and glaze fresh if possible.
Serving Ideas to Make Them Shine
Serve warm with coffee, tea, or a cold glass of milk. Stack them on a simple plate for a cozy breakfast spread, or arrange on a stand for gatherings.
Creative Leftover Transformations
Slice leftover doughnuts and toast lightly for a sweet base under fruit. They also make an indulgent bread pudding when cubed and baked.
Extra Tips for Best Results
Work patiently with the dough, trust the process, and enjoy each step. A calm pace leads to better texture and flavor.
Make It a Showstopper
For visual appeal, double-dip the tops in glaze or add a light dusting of powdered sugar once set. Simple details make them bakery-worthy.
Fun Variations to Try
Try a chocolate glaze using cocoa powder. Add citrus zest to the glaze for brightness. Roll warm doughnuts in cinnamon sugar for a classic twist.
FAQ’s
1. Can I bake these instead of frying?
Yes, but frying gives the classic texture and flavor most people love.
2. Why didn’t my dough rise?
The milk may have been too hot or the yeast inactive.
3. Can I freeze the dough?
Yes, after the first rise, freeze tightly wrapped.
4. How do I keep them soft?
Store in an airtight container once cooled.
5. Can I flavor the glaze?
Absolutely, extracts and citrus zest work well.
6. What oil is best for frying?
Neutral oils like vegetable oil work best.
7. Can I make mini doughnuts?
Yes, just reduce frying time slightly.
8. How thick should I roll the dough?
About half an inch works perfectly.
9. Why is my glaze too thin?
Add more powdered sugar gradually.
10. Are these good the next day?
They are best fresh but still enjoyable the next day.
Conclusion
Making these at home feels rewarding from start to finish. From mixing the dough to that first glazed bite, it’s a cozy, satisfying experience that never gets old. This one’s a total game-changer, and once you try it, you’ll understand why they disappear so fast.
Print
Homemade Glazed Doughnuts
- Prep Time: 25 minutes
- Cook Time: 20 minutes
- Total Time: 45 minutes
- Yield: 12 doughnuts
- Category: Dessert
- Method: Frying
- Cuisine: American
- Diet: Vegetarian
Description
Soft, fluffy homemade doughnuts fried until golden and dipped in a smooth, sweet glaze that sets with a glossy finish. Perfect for cozy mornings or special treats.
Ingredients
- All-purpose flour, 3 1/2 cups
- Granulated sugar, 1/4 cup
- Active dry yeast, 2 1/4 teaspoons
- Whole milk, 3/4 cup, warmed
- Unsalted butter, 1/4 cup, melted
- Eggs, 2 large
- Salt, 1 teaspoon
- Vegetable oil, for frying
- Powdered sugar, 2 cups
- Vanilla extract, 1 teaspoon
- Milk for glaze, 3 tablespoons
Instructions
- Warm the milk gently and mix it with yeast and granulated sugar until foamy.
- Add eggs, melted butter, salt, and flour, then mix until a soft dough forms.
- Knead lightly, cover, and let the dough rise until doubled in size.
- Roll out the dough and cut into doughnut shapes.
- Heat vegetable oil and fry doughnuts until golden on both sides.
- Whisk powdered sugar, vanilla extract, and milk to form a smooth glaze.
- Dip warm doughnuts into the glaze and let set before serving.
Notes
- Keep oil temperature steady for even frying.
- Glaze doughnuts while warm for best coating.
- Do not overcrowd the pot when frying.
Nutrition
- Serving Size: 1 doughnut
- Calories: 280
- Sugar: 18 g
- Sodium: 210 mg
- Fat: 14 g
- Saturated Fat: 6 g
- Unsaturated Fat: 7 g
- Trans Fat: 0 g
- Carbohydrates: 34 g
- Fiber: 1 g
- Protein: 5 g
- Cholesterol: 55 mg
Keywords: homemade doughnuts, glazed doughnuts, fried doughnuts, classic doughnuts