Homemade Crunch Bars
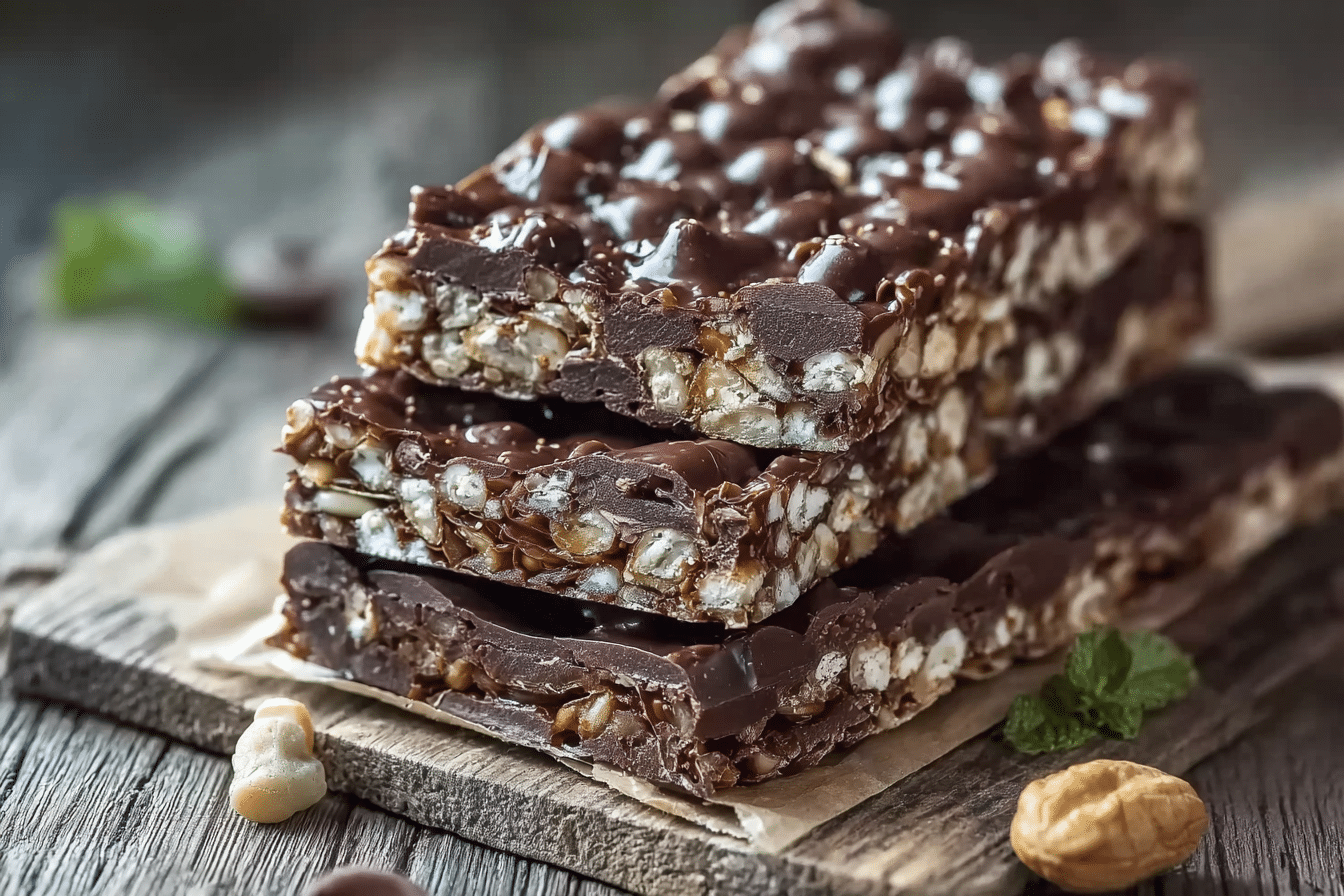
There’s something about biting into a crunchy, chocolatey bar that brings a wave of comfort and joy. Imagine the snap of the chocolate, the gentle crackle of puffed rice, and the way it all melts in your mouth with just the right balance of sweetness and texture. Homemade crunch bars capture that nostalgic candy-shop charm, but with a freshness that only comes from your own kitchen. Trust me, you’re going to love this.
Behind the Recipe
This recipe takes me straight back to school lunchboxes and after-school snacks, when crunch bars were the little treat you’d savor slowly, hoping it would last longer than it ever did. Making them at home brings that same sense of delight, but it also adds a layer of satisfaction—you’re in control of the ingredients, the thickness, and the sweetness. It’s simple, cozy, and a little magical.
Recipe Origin or Trivia
Crunch bars, in their most famous form, rose to popularity as a commercial candy bar in the United States, particularly in the mid-20th century. What made them unique was the addition of puffed rice inside chocolate, giving each bite a delightful crackle. Variations of chocolate mixed with crisped grains have existed worldwide for decades, from Japanese rice treats to European chocolate crisp confections. This homemade version is inspired by that tradition, allowing you to recreate the classic right in your kitchen.
Why You’ll Love Homemade Crunch Bars
These bars aren’t just candy, they’re little bites of happiness. Here’s why they’ll quickly become a favorite:
Versatile: Perfect for lunchboxes, parties, or a late-night sweet craving.
Budget-Friendly: Just a few pantry staples turn into a whole batch of bars.
Quick and Easy: Minimal effort and no baking required.
Customizable: Add nuts, dried fruits, or different chocolates to suit your taste.
Crowd-Pleasing: Loved by kids and adults alike.
Make-Ahead Friendly: They can be made days in advance and still taste fresh.
Great for Leftovers: Leftovers (if you have any) stay crisp and delicious.
Homemade Crunch Bars
- Prep Time: 10 minutes
- Cook Time: 5 minutes
- Total Time: 15 minutes
- Yield: 16 squares 1x
- Category: Snack
- Method: No-bake
- Cuisine: American
- Diet: Vegetarian
Description
Crispy puffed rice folded into silky melted chocolate, chilled until set, for an easy no-bake treat that delivers a satisfying snap in every bite.
Ingredients
- 2 cups chocolate chips (semi-sweet or milk)
- 3 cups puffed rice cereal
- 2 tablespoons butter or coconut oil
- 1 teaspoon vanilla extract
- Pinch of sea salt, optional
Instructions
- Line the pan: Line an 8×8-inch baking pan with parchment paper and set aside.
- Melt chocolate and fat: In a double boiler or microwave-safe bowl, gently melt 2 cups chocolate chips with 2 tablespoons butter or coconut oil until smooth, stirring often.
- Add flavor: Stir 1 teaspoon vanilla extract into the melted chocolate until fully combined.
- Fold in cereal: Pour the melted chocolate into a large mixing bowl and gently fold in 3 cups puffed rice cereal until every piece is evenly coated.
- Transfer to pan: Pour the mixture into the prepared pan and spread it evenly with a spatula, pressing gently to compact.
- Chill to set: Sprinkle a pinch of sea salt on top if using, then refrigerate until completely firm, about 30 to 60 minutes.
- Slice and serve: Lift the set slab from the pan using the parchment, slice into 16 squares, and enjoy. Store leftovers in an airtight container in the fridge.
Notes
- For clean slices, dip a sharp knife in hot water and wipe dry between cuts.
- Use high-quality chocolate for the best flavor, choose darker chocolate to reduce sweetness.
- Do not freeze if you want to keep a glossy chocolate finish; refrigerate instead.
Nutrition
- Serving Size: 1 square (approx)
- Calories: 180
- Sugar: 14 g
- Sodium: 40 mg
- Fat: 10 g
- Saturated Fat: 6 g
- Unsaturated Fat: 3 g
- Trans Fat: 0 g
- Carbohydrates: 20 g
- Fiber: 1 g
- Protein: 2 g
- Cholesterol: 10 mg
Keywords: homemade crunch bars, no-bake chocolate bars, puffed rice chocolate, easy snack, crunchy chocolate bars
Chef’s Pro Tips for Perfect Results
Getting that ideal crunch and smooth chocolate finish takes just a little know-how:
- Always melt your chocolate gently to avoid seizing. A double boiler or microwave in short bursts works best.
- Use fresh puffed rice for maximum crunch, stale cereal will give a soft bite.
- Line your pan with parchment so you can lift the bars out easily for clean slicing.
- Chill until fully set, but don’t freeze—freezing can dull the chocolate’s shine.
Kitchen Tools You’ll Need
You don’t need a fancy kitchen setup for these bars, just a few basics:
- Mixing Bowl: To combine the melted chocolate with the cereal.
- Spatula: Helps fold everything together without crushing the puffed rice.
- Saucepan or Microwave-Safe Bowl: For melting chocolate gently.
- Baking Pan: An 8×8-inch pan works perfectly.
- Parchment Paper: Keeps things mess-free and makes slicing easy.
Ingredients in Homemade Crunch Bars
Part of the magic is in how simple the ingredient list is. Just a few staples come together in perfect harmony.
- Chocolate Chips: 2 cups (semi-sweet or milk, depending on your preference). Brings the rich, melty sweetness that holds everything together.
- Puffed Rice Cereal: 3 cups. Adds the light, airy crunch in every bite.
- Butter or Coconut Oil: 2 tablespoons. Helps the chocolate set smoothly and adds a silky finish.
- Vanilla Extract: 1 teaspoon. Rounds out the flavor with a gentle warmth.
- Sea Salt (optional): A pinch. Enhances the chocolate’s depth and balances sweetness.
Ingredient Substitutions
Don’t worry if you’re missing something—there are easy swaps:
- Chocolate Chips: Use chopped chocolate bars or dark chocolate.
- Puffed Rice Cereal: Swap for puffed quinoa or cornflakes for a twist.
- Butter or Coconut Oil: Try ghee or a neutral vegetable oil.
- Vanilla Extract: Almond extract adds a nutty flair.
Ingredient Spotlight
Chocolate Chips: The soul of this recipe. The quality of your chocolate determines how indulgent your bars taste, so choose a variety you enjoy eating straight.
Puffed Rice Cereal: The star that creates the signature crunch. Its airy texture makes every bite playful and light.
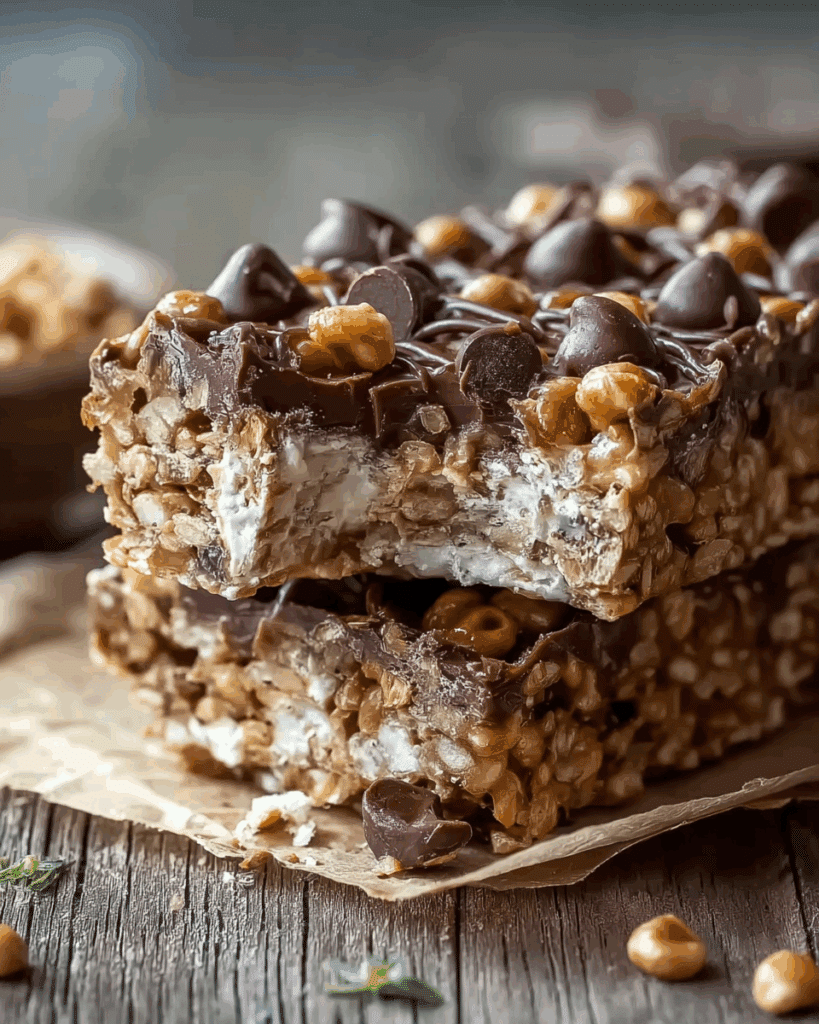
Instructions for Making Homemade Crunch Bars
The process is as satisfying as the first bite. Here’s how you’ll bring it all together:
- Preheat Your Equipment: Line an 8×8-inch baking pan with parchment paper and set aside.
- Combine Ingredients: Melt chocolate with butter or coconut oil until smooth. Stir in vanilla.
- Prepare Your Cooking Vessel: Have your mixing bowl ready to fold in the puffed rice cereal.
- Assemble the Dish: Gently fold puffed rice into melted chocolate mixture until evenly coated.
- Cook to Perfection: Pour mixture into lined baking pan, spreading evenly with a spatula.
- Finishing Touches: Sprinkle a pinch of sea salt on top for extra flavor.
- Serve and Enjoy: Refrigerate until firm, then slice into squares and enjoy that first glorious crunch.
Texture & Flavor Secrets
The beauty of these bars lies in contrasts: the glossy smoothness of chocolate against the airy crispness of puffed rice. As you bite, you first taste the rich cocoa flavor, then the crunch follows, creating a playful rhythm that keeps you coming back. The salt, if added, heightens every note, making each square feel indulgent yet light.
Cooking Tips & Tricks
A few little tweaks can make your bars extra special:
- Store them in the fridge to keep the chocolate firm and crisp.
- For neat edges, dip your knife in hot water before slicing.
- Add mix-ins like dried cherries or chopped nuts for flavor variety.
What to Avoid
Even simple recipes have pitfalls—here’s what to steer clear of:
- Using old cereal, which leads to a soggy crunch.
- Overheating chocolate, which can seize or become grainy.
- Freezing the bars, which ruins the texture.
Nutrition Facts
Servings: 16 squares
Calories per serving: ~180
Note: These are approximate values.
Preparation Time
Prep Time: 10 minutes
Cook Time: 5 minutes
Total Time: 15 minutes
Make-Ahead and Storage Tips
These bars are ideal for planning ahead. You can whip up a batch and let them chill overnight. Store them in an airtight container in the fridge for up to a week. For longer storage, freeze them in a sealed container, separating layers with parchment paper, then thaw in the fridge before serving.
How to Serve Homemade Crunch Bars
Serve them as a sweet snack with coffee, pack them in lunchboxes, or arrange them on a dessert tray at parties. They pair beautifully with a scoop of vanilla ice cream or a drizzle of caramel sauce for an indulgent twist.
Creative Leftover Transformations
If you happen to have leftovers (lucky you), chop them up and:
- Sprinkle over ice cream sundaes.
- Mix into cookie dough for a crunchy surprise.
- Use as a topping for yogurt parfaits.
Additional Tips
For an extra glossy finish, temper your chocolate before mixing in the cereal. Want thinner bars? Use a larger pan. Thicker, chunkier bars? Stick with the smaller pan.
Make It a Showstopper
Presentation is half the fun. Slice them into neat squares, stack them on a cake stand, and sprinkle with a dusting of cocoa powder. Wrap them individually in wax paper for gifting—they look charming and stay fresh.
Variations to Try
- Peanut Butter Crunch Bars: Stir in ½ cup of creamy peanut butter with the chocolate.
- Dark Chocolate Sea Salt: Use dark chocolate and top with flaky salt.
- Holiday Crunch Bars: Add red and green sprinkles for a festive touch.
- Fruity Crunch Bars: Mix in dried cranberries or cherries.
- Nutty Crunch Bars: Fold in chopped almonds or hazelnuts.
FAQ’s
Q1: Can I use white chocolate instead?
Yes, but keep in mind it will be sweeter and softer, so balance with a pinch of salt.
Q2: Do these need to be refrigerated?
Yes, refrigeration helps them stay firm and crisp.
Q3: Can I make these dairy-free?
Absolutely, use dairy-free chocolate and coconut oil instead of butter.
Q4: What size pan works best?
An 8×8-inch pan creates the perfect thickness. Larger pans make thinner bars.
Q5: How long do they last?
Up to one week in the fridge or two months in the freezer.
Q6: Can I make them less sweet?
Yes, opt for dark chocolate with higher cocoa content.
Q7: Can I double the recipe?
Of course, just use a larger pan or two smaller ones.
Q8: Can kids help make this?
Definitely! It’s a safe, fun, no-bake recipe perfect for little hands.
Q9: Why add oil or butter to the chocolate?
It makes the texture silkier and prevents overly hard chocolate.
Q10: Can I skip the vanilla?
Yes, but it adds a subtle warmth that enhances the flavor.
Conclusion
Homemade crunch bars are proof that simple ingredients can create something truly magical. They’re quick, delightful, and versatile enough to suit any occasion. So the next time you crave a nostalgic sweet, skip the store-bought and whip up a batch yourself. Let me tell you, it’s worth every bite.

