Homemade Bread Bowls
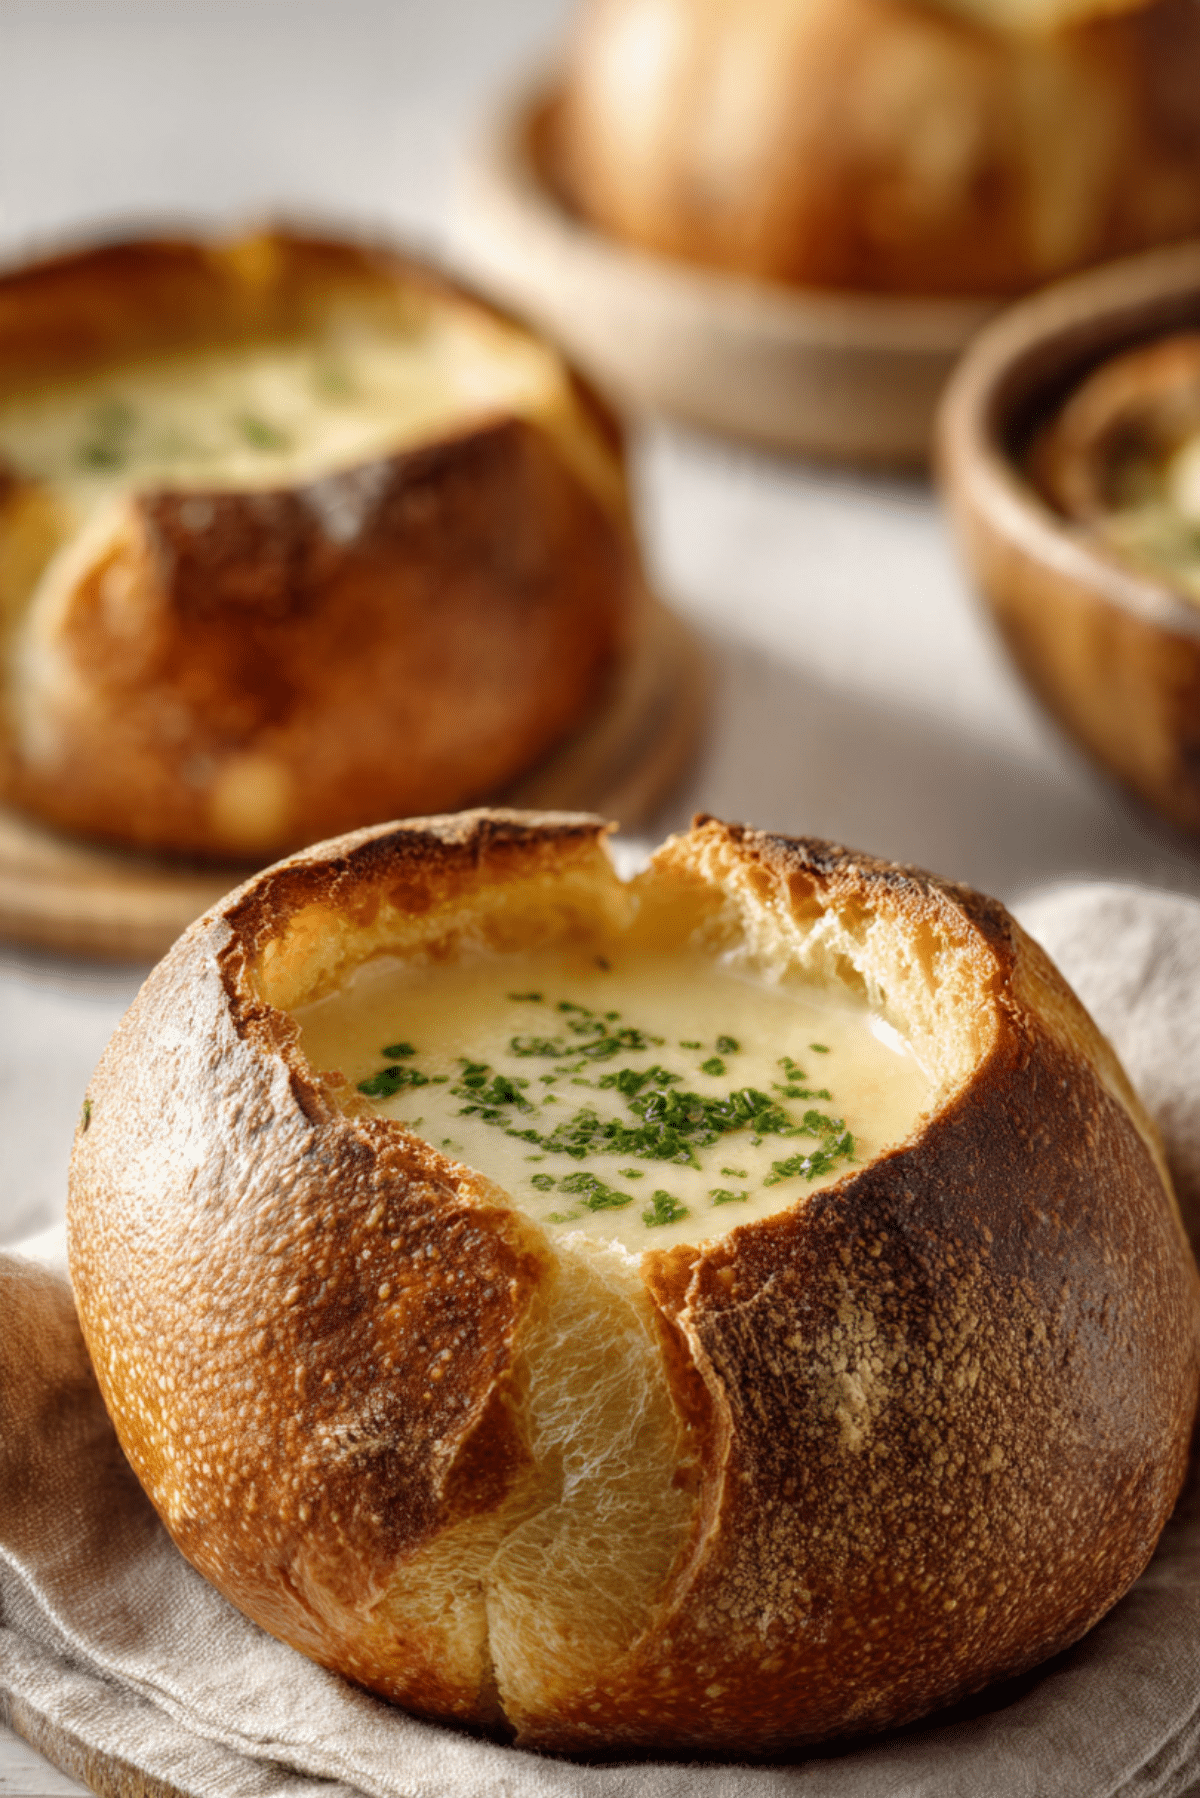
There is something deeply comforting about setting a warm bowl of soup on the table and realizing the bowl itself is just as inviting as what is inside. Homemade bread bowls bring that feeling to life, crusty on the outside, soft and fluffy on the inside, and perfect for holding your favorite soup. Trust me, you are going to love this from the first warm, bready aroma that fills the kitchen to the last bite soaked with flavor.
Why These Bread Bowls Steal the Show
What makes this recipe so special is how simple ingredients turn into something that feels bakery worthy. The crust bakes up golden and sturdy, while the inside stays tender enough to tear apart and dip. This one’s a total game changer for cozy dinners, casual gatherings, or even when you just want to make a weeknight meal feel extra special.
A Little Background and Bread Bowl Love
Bread bowls have been around for centuries, especially in European baking traditions where hearty loaves were used as edible serving vessels. They were practical, filling, and comforting, especially during colder months. Over time, they became a fun and satisfying way to serve soups and stews, and today they are a favorite for home cooks who love mixing tradition with a bit of flair.
What Makes This Recipe a Keeper
These bowls are reliable, approachable, and honestly hard to mess up, which is always a win.
Versatile: They pair beautifully with creamy soups, chunky stews, or even thick chili.
Budget-Friendly: Made with pantry staples, so no specialty ingredients needed.
Quick and Easy: The steps are straightforward, even if you are new to bread baking.
Customizable: You can adjust the size or shape depending on what you plan to serve.
Crowd-Pleasing: Everyone loves an edible bowl, especially when it is homemade.
Make-Ahead Friendly: The bowls can be baked earlier in the day and reheated.
Great for Leftovers: Any extra bread makes amazing toast or croutons.
Pro Baker Tips Before You Start
Before we get our hands into the dough, let me share a few tips that make all the difference. Good bread is all about feel and patience, not perfection. Pay attention to the dough texture, give it time to rise properly, and do not rush the baking. Those small details are worth every bite.
Essential Tools You Will Need
A smooth baking experience starts with the right tools.
Large Mixing Bowl: Gives the dough plenty of room to come together.
Measuring Cups and Spoons: Accuracy matters for consistent results.
Baking Sheet: Provides even heat for a golden crust.
Sharp Knife: Helpful for shaping and cutting the tops after baking.
Clean Kitchen Towel: Keeps the dough cozy while it rises.
Ingredients You Will Need For This Recipe
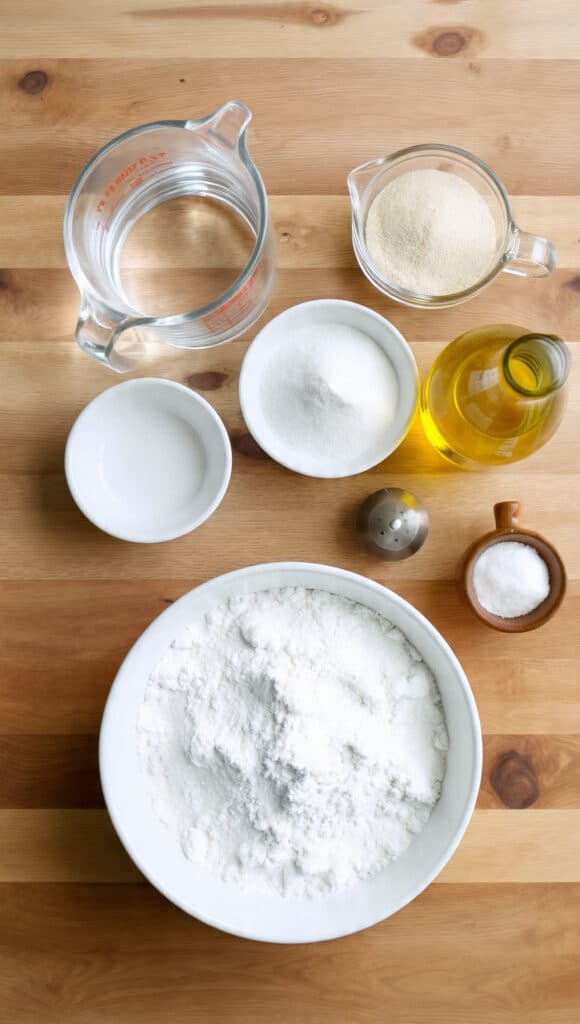
The beauty of this recipe comes from simple ingredients working together in harmony.
- Warm Water: 1 and 1 quarter cups, activates the yeast and brings the dough together.
- Active Dry Yeast: 2 and 1 quarter teaspoons, helps the bread rise and creates structure.
- Granulated Sugar: 1 tablespoon, feeds the yeast and adds subtle balance.
- Olive Oil: 2 tablespoons, adds softness and flavor to the dough.
- Salt: 1 and 1 half teaspoons, enhances flavor throughout the bread.
- All Purpose Flour: 3 and 1 half cups, forms the base and structure of the bowls.
Easy Ingredient Swaps
Sometimes you need flexibility, and this recipe allows for it.
All Purpose Flour: Bread flour can be used for a slightly chewier texture.
Olive Oil: Neutral vegetable oil works if needed.
Granulated Sugar: Honey can be used in the same amount.
Spotlight on Key Ingredients
Active Dry Yeast: This is what gives the bread its lift and airy interior when handled properly.
All Purpose Flour: Creates a balance between softness and structure, perfect for holding soup.
Let’s Get Baking Together
Now let’s dive into the process, this is where the magic really happens and the kitchen starts to smell amazing.
- Preheat Your Equipment: Preheat the oven to 400 degrees Fahrenheit and line a baking sheet with parchment paper.
- Combine Ingredients: In a large bowl, mix warm water, yeast, and sugar. Let it sit until foamy, then stir in olive oil, salt, and flour.
- Prepare Your Cooking Vessel: Turn the dough onto a lightly floured surface and knead until smooth and elastic.
- Assemble the Dish: Divide the dough into equal portions and shape each into a smooth round ball.
- Cook to Perfection: Place on the baking sheet, cover, let rise, then bake until golden and hollow sounding.
- Finishing Touches: Cool slightly, then cut a circle on top and gently hollow out the center.
- Serve and Enjoy: Fill with warm soup and enjoy immediately.
Texture and Flavor You Can Expect
The crust develops a deep golden color with a satisfying crunch, while the inside stays soft and airy. As soup fills the center, the bread absorbs flavor without falling apart, creating that perfect balance of crisp edges and tender bites.
Helpful Tips for Best Results
A few small tips can elevate your bread bowls even more.
- Let the dough rise fully for the best texture.
- Avoid adding too much flour, slightly sticky dough is ideal.
- Bake until deeply golden for a sturdy crust.
Common Mistakes to Avoid
Even simple recipes have a few pitfalls.
- Skipping the rise time, which leads to dense bread.
- Baking at too low a temperature, which prevents proper crust.
- Cutting the top too deep and weakening the bowl.
Nutrition Highlights
Servings: 6 bread bowls
Calories per serving: 310
Note: These values are approximate.
Time Breakdown
Prep Time: 20 minutes
Cook Time: 30 minutes
Total Time: 50 minutes
Make-Ahead and Storage Tips
You can bake the bread bowls earlier in the day and store them at room temperature once cooled. Reheat briefly in the oven before serving. They also freeze well, just thaw and warm before using.
Serving Ideas
Serve these bowls with creamy tomato soup, broccoli cheese soup, or even a thick vegetable stew. A simple side salad makes it feel like a complete meal.
Fun Ways to Use Leftovers
Leftover bread makes excellent garlic toast, croutons, or even mini sandwiches the next day.
Extra Advice for Success
Brush the tops with olive oil before baking for extra color and flavor. A sprinkle of flour on top also adds a rustic bakery look.
Make It Look Incredible
Serve on simple plates and let the bread be the star. A ladle of soup added at the table makes it feel extra special.
Variations to Try
- Add herbs like rosemary to the dough.
- Make smaller bowls for individual portions.
- Sprinkle sesame seeds on top before baking.
- Shape into oval bowls for variety.
FAQ’s
1. Can I make these ahead of time?
Yes, they can be baked earlier and reheated before serving.
2. What soups work best?
Thick and creamy soups are ideal.
3. Can I freeze them?
Yes, freeze once cooled and reheat in the oven.
4. Why is my bread dense?
It likely needed more rising time.
5. Can I use instant yeast?
Yes, adjust according to package instructions.
6. How do I keep them from getting soggy?
Serve immediately after filling.
7. Can I make them smaller?
Absolutely, just adjust baking time slightly.
8. Do I need special flour?
All purpose flour works perfectly.
9. How long do they last?
Up to two days at room temperature.
10. Can I add toppings?
Seeds or herbs work well on top.
Conclusion
Homemade bread bowls turn a simple soup into something memorable and comforting. From the first rise to the final tear of bread, this recipe is worth every bit of effort. Let me tell you, once you try this, it is hard to go back to store bought.
Print
Homemade Bread Bowls
- Prep Time: 20 minutes
- Cook Time: 30 minutes
- Total Time: 50 minutes
- Yield: 6 bread bowls 1x
- Category: Bread
- Method: Baking
- Cuisine: American
- Diet: Vegetarian
Description
Warm, crusty homemade bread bowls that are golden on the outside, soft on the inside, and perfect for holding creamy soups or hearty stews.
Ingredients
- 1 1/4 cups warm water
- 2 1/4 teaspoons active dry yeast
- 1 tablespoon granulated sugar
- 2 tablespoons olive oil
- 1 1/2 teaspoons salt
- 3 1/2 cups all purpose flour
Instructions
- In a large bowl, combine warm water, active dry yeast, and granulated sugar. Let sit for about 5 minutes until foamy.
- Stir in olive oil and salt, then gradually add all purpose flour until a soft dough forms.
- Transfer the dough to a lightly floured surface and knead until smooth and elastic.
- Place the dough in a lightly oiled bowl, cover, and let rise until doubled in size.
- Preheat the oven to 400 degrees Fahrenheit and line a baking sheet with parchment paper.
- Divide the dough into equal portions and shape each into a smooth round ball.
- Place dough balls on the prepared baking sheet, cover, and let rise briefly.
- Bake for about 30 minutes until golden brown and hollow sounding when tapped.
- Cool slightly, then cut a circle from the top and hollow out the center to form bowls.
- Fill with warm soup and serve immediately.
Notes
- Let the dough rise fully for the best texture.
- Do not add too much flour, slightly sticky dough gives softer bread.
- Serve immediately after filling to prevent sogginess.
Nutrition
- Serving Size: 1 bread bowl
- Calories: 310
- Sugar: 3g
- Sodium: 480mg
- Fat: 6g
- Saturated Fat: 1g
- Unsaturated Fat: 5g
- Trans Fat: 0g
- Carbohydrates: 55g
- Fiber: 2g
- Protein: 9g
- Cholesterol: 0mg
Keywords: homemade bread bowls, bread bowl recipe, soup bread bowls, edible bread bowls