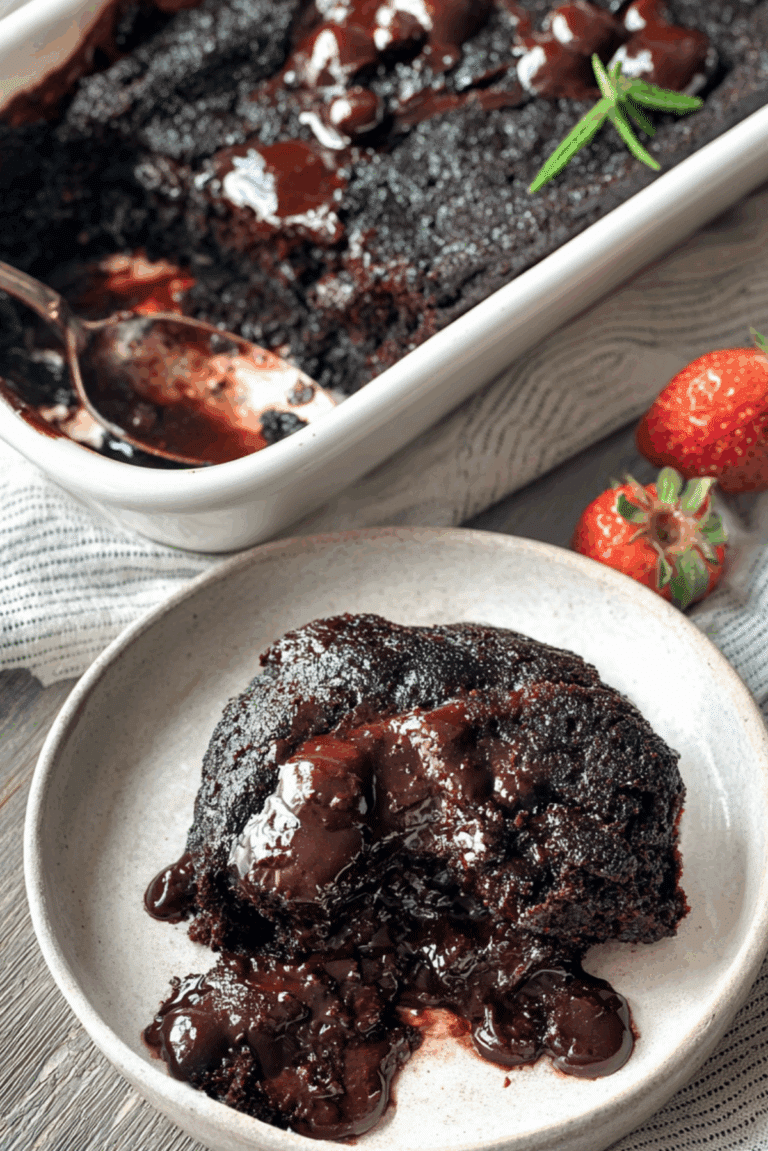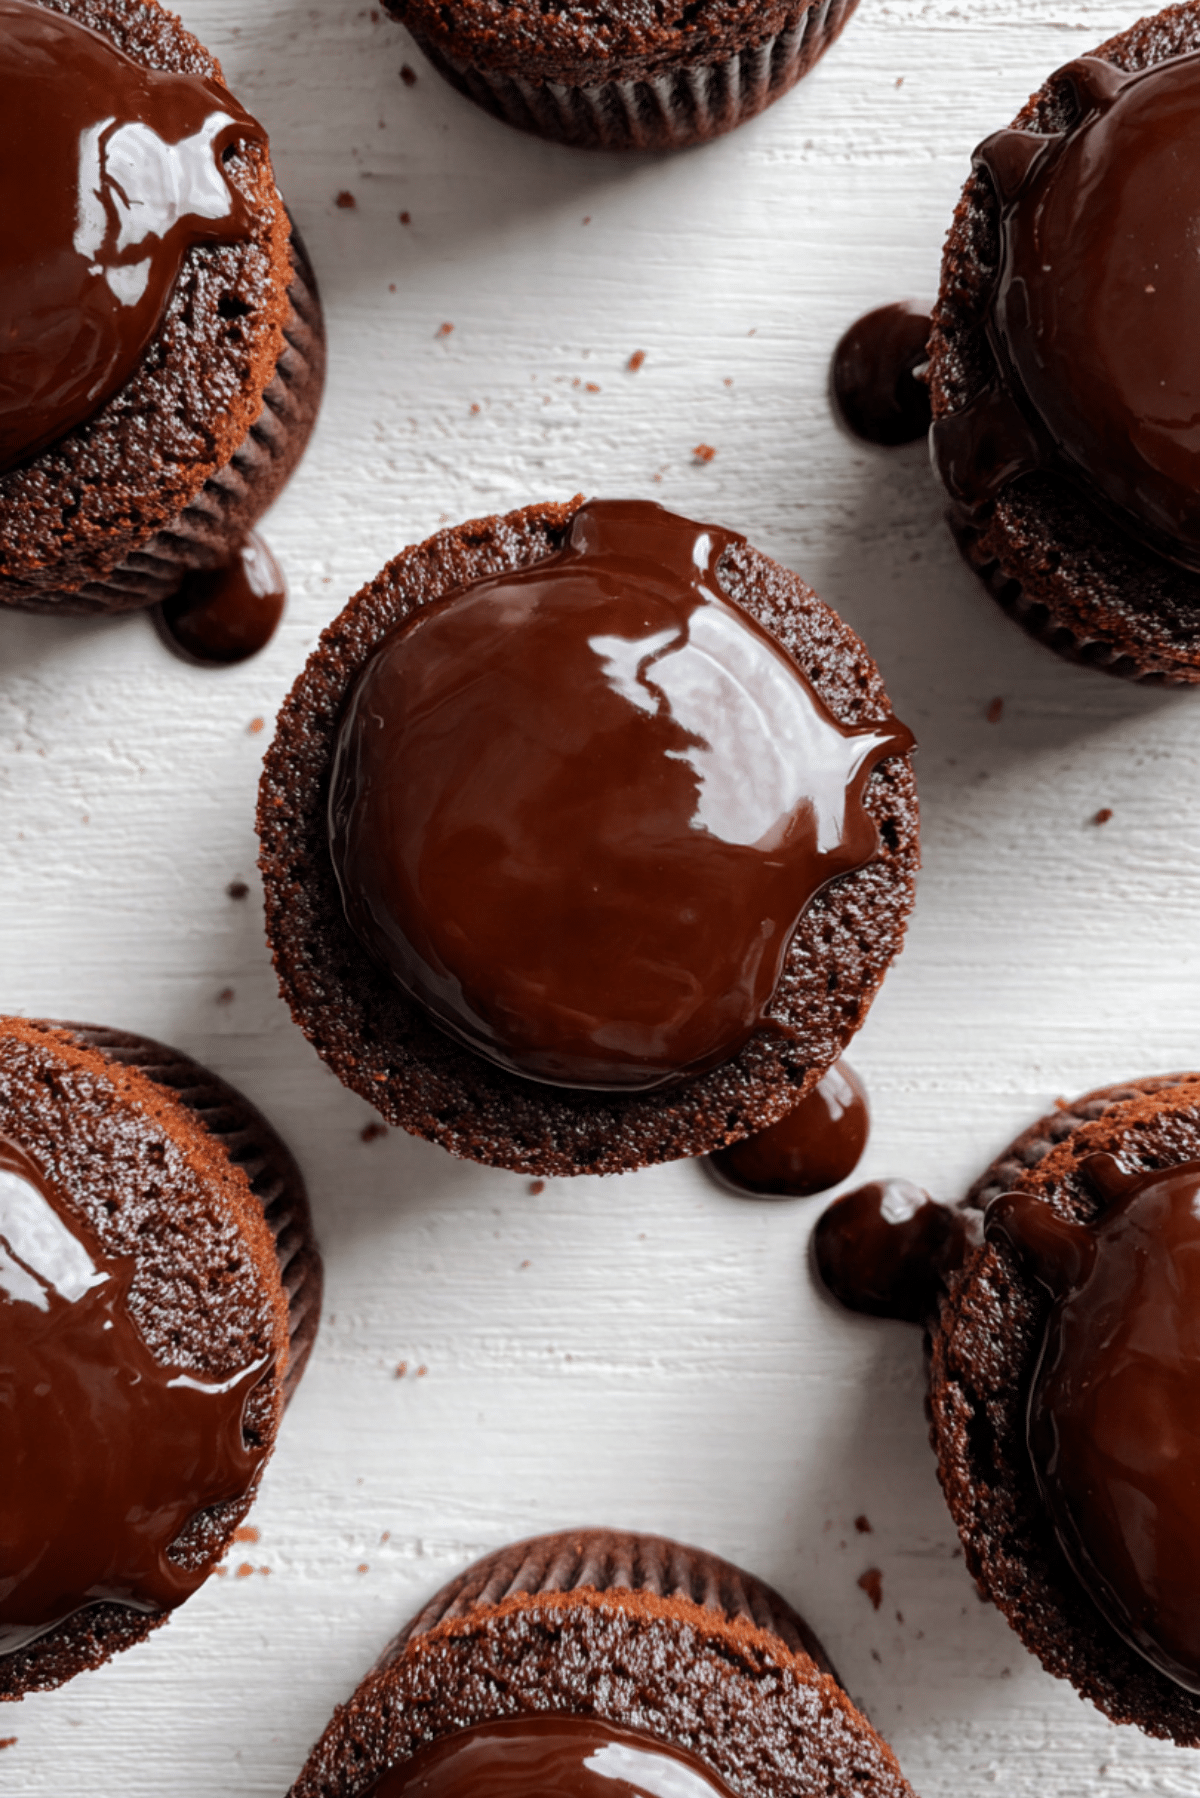
Chocolate-Glazed Brownie Cupcakes
There is something instantly comforting about pulling a tray of chocolate treats out of the oven and knowing something special is about to happen. These chocolate-glazed brownie cupcakes bring together the deep richness of a brownie and the soft charm of a cupcake, all finished with a glossy chocolate topping that makes you pause for a second before taking that first bite. Trust me, you are going to love this. The smell alone feels like a warm hug from the kitchen.
Why These Cupcakes Deserve a Spot in Your Kitchen
If you have ever been torn between baking brownies or cupcakes, this is where that decision happily disappears. These little treats give you the best of both worlds. They bake up with a fudgy center, slightly crisp edges, and a smooth glaze that settles on top like a finishing touch you did not know you needed. Let me tell you, it is worth every bite.
A Little Sweet Background Story
Brownies have long been a classic comfort dessert, loved for their dense texture and deep chocolate flavor. Cupcakes, on the other hand, are known for their light crumb and personal size. Bringing them together feels like a natural evolution, especially for home bakers who want something familiar but just a little more exciting. Over time, these hybrids have become a favorite for bake sales, birthdays, and casual gatherings where chocolate always wins.
What Makes This Recipe a Reliable Favorite
This is the kind of recipe you come back to again and again because it simply works.
Versatile: These cupcakes fit right in at parties, school events, or quiet evenings at home with a cup of coffee.
Budget-Friendly: Simple pantry ingredients come together without anything fancy or hard to find.
Quick and Easy: The batter comes together smoothly, and the glaze takes just minutes.
Customizable: You can dress them up or keep them simple, depending on your mood.
Crowd-Pleasing: Chocolate lovers rarely say no to these.
Make-Ahead Friendly: They store well and taste great even the next day.
Great for Leftovers: If there are any left, they are just as good slightly chilled.
Pro Baker Tips You Will Be Glad You Knew
Before we jump in, here are a few insider notes that make a real difference. Use good quality cocoa powder, because it sets the foundation for flavor. Do not overmix the batter, which keeps the texture tender. And always let the cupcakes cool before glazing, or the glaze will slide right off.
Tools That Make the Process Smooth
You do not need a professional setup, just a few reliable basics.
Mixing Bowls: One for dry ingredients and one for wet keeps things organized.
Whisk: Helps create a smooth, lump-free batter.
Muffin Tin: Gives the cupcakes their perfect shape.
Cooling Rack: Allows air to circulate so the cupcakes cool evenly.
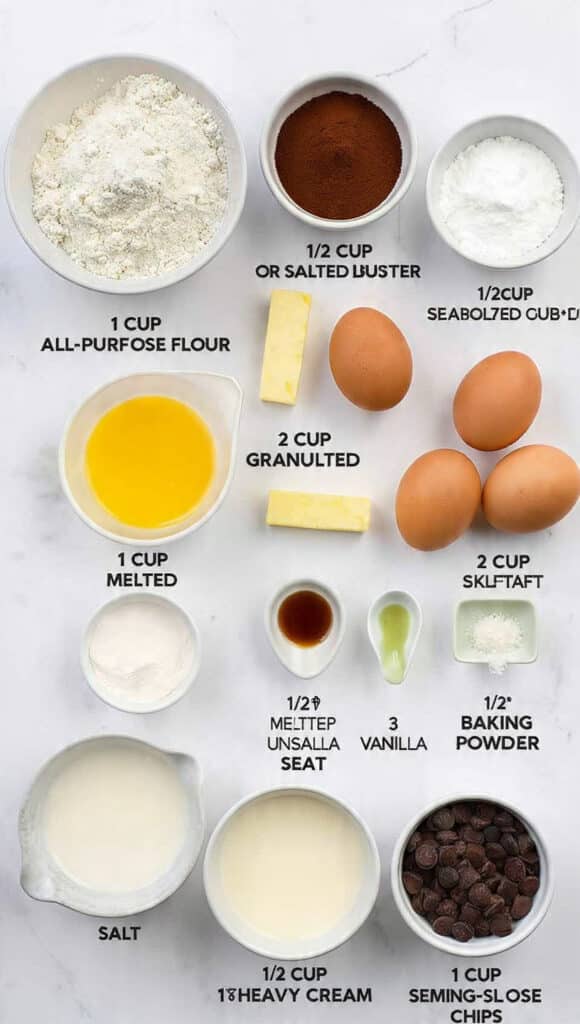
Ingredients You Will Need For This Recipe
Everything here works together to create that rich, bakery-style result.
- All-Purpose Flour: 1 cup, provides structure while keeping the crumb soft.
- Unsweetened Cocoa Powder: 1/3 cup, delivers deep chocolate flavor.
- Granulated Sugar: 1 cup, balances bitterness and adds sweetness.
- Unsalted Butter: 1/2 cup, melted, adds richness and moisture.
- Large Eggs: 2, bring the batter together and add fudgy texture.
- Vanilla Extract: 1 teaspoon, enhances the chocolate notes.
- Baking Powder: 1/2 teaspoon, gives a slight lift.
- Salt: 1/4 teaspoon, sharpens all the flavors.
- Heavy Cream: 1/2 cup, used for a smooth, glossy glaze.
- Semi-Sweet Chocolate Chips: 1 cup, melts into a silky topping.
Smart Ingredient Swaps
If you need to adjust, there is room to play.
All-Purpose Flour: Swap with a gluten-free blend if needed.
Granulated Sugar: Use coconut sugar for a deeper flavor.
Heavy Cream: Full-fat milk works in a pinch, though the glaze will be slightly thinner.
The Stars of the Show
Cocoa Powder: This is where the chocolate intensity starts, so choose one you enjoy.
Semi-Sweet Chocolate Chips: They melt smoothly and keep the glaze from becoming overly sweet.
Let Us Get Baking Together
Now let us dive into the fun part. Take a breath, preheat the oven, and enjoy the process.
- Preheat Your Equipment: Set your oven to 350°F and line a muffin tin with paper liners.
- Combine Ingredients: In a bowl, whisk flour, cocoa powder, baking powder, and salt.
- Prepare Your Cooking Vessel: In another bowl, mix melted butter and sugar until glossy.
- Assemble the Dish: Add eggs and vanilla, then gently fold in dry ingredients.
- Cook to Perfection: Divide batter evenly and bake for 18 to 22 minutes.
- Finishing Touches: Heat cream and pour over chocolate chips, stirring until smooth.
- Serve and Enjoy: Spoon glaze over cooled cupcakes and let it set.
Texture and Flavor in Every Bite
These cupcakes strike a beautiful balance. The base is dense and moist like a brownie, while the glaze adds a smooth, creamy contrast. As they cool, the flavors deepen, making each bite richer than the last.
Helpful Baking Tips You Can Use Anytime
A few small details can elevate the result.
- Use room temperature eggs for smoother batter.
- Fill cupcake liners about three-quarters full for even baking.
- Let the glaze cool slightly before spooning for better control.
Common Mistakes and How to Avoid Them
Everyone has been there, so here is how to stay on track.
- Overbaking leads to dryness, so check early.
- Glazing warm cupcakes causes the topping to run.
- Skipping salt dulls the chocolate flavor.
Nutrition Facts at a Glance
Servings: 12
Calories per serving: 320
Note: These values are approximate and can vary.
Time Breakdown for Easy Planning
Prep Time: 15 minutes
Cook Time: 22 minutes
Total Time: 37 minutes
Make-Ahead and Storage Advice
These cupcakes can be baked a day ahead and stored in an airtight container at room temperature. For longer storage, refrigerate for up to four days. You can also freeze unglazed cupcakes and add the glaze after thawing.
Serving Ideas to Make Them Shine
Serve them on a simple platter, dusted lightly with cocoa powder, or alongside fresh berries. They pair beautifully with coffee or a cold glass of milk.
Creative Ways to Use Leftovers
Crumble leftover cupcakes over ice cream or layer them into a dessert jar with whipped cream for a quick treat.
Extra Tips for Best Results
Always measure ingredients carefully and resist the urge to rush cooling time. Patience pays off here.
Make Them Look Bakery-Worthy
Use a spoon to gently swirl the glaze on top, letting it drip naturally for that polished look that feels special but not fussy.
Fun Variations to Try Next Time
Add a teaspoon of espresso powder to deepen the chocolate flavor. Stir chopped nuts into the batter for crunch. Top with chocolate shavings once glazed for extra flair.
FAQ’s
1. Can I make these without liners?
Yes, just grease the muffin tin well.
2. Are these more like brownies or cupcakes?
They lean toward brownies with a cupcake shape.
3. Can I use milk chocolate instead?
You can, but the glaze will be sweeter.
4. How do I know when they are done?
A toothpick should come out with a few moist crumbs.
5. Can I double the recipe?
Absolutely, just bake in batches.
6. Do they need refrigeration?
Only if storing longer than a day.
7. Can I add frosting instead of glaze?
Yes, though the texture will change.
8. Are these good for kids?
They are always a hit.
9. Can I freeze them glazed?
It is better to freeze without glaze.
10. What cocoa powder works best?
Unsweetened cocoa gives the best balance.
Conclusion
These chocolate-glazed brownie cupcakes are one of those recipes that feel like a small win every time you make them. They are simple, satisfying, and full of chocolate flavor that never gets old. This one is a total game-changer, and once you try it, you will find yourself coming back to it whenever a chocolate craving hits.
Print
Chocolate-Glazed Brownie Cupcakes
- Prep Time: 15 minutes
- Cook Time: 22 minutes
- Total Time: 37 minutes
- Yield: 12 cupcakes 1x
- Category: Dessert
- Method: Baking
- Cuisine: American
- Diet: Vegetarian
Description
Rich, fudgy brownie-style cupcakes topped with a smooth chocolate glaze that set beautifully for a bakery-style finish.
Ingredients
- 1 cup all-purpose flour
- 1/3 cup unsweetened cocoa powder
- 1 cup granulated sugar
- 1/2 cup unsalted butter, melted
- 2 large eggs
- 1 teaspoon vanilla extract
- 1/2 teaspoon baking powder
- 1/4 teaspoon salt
- 1/2 cup heavy cream
- 1 cup semi-sweet chocolate chips
Instructions
- Preheat the oven to 350°F and line a muffin tin with paper liners.
- In a bowl, whisk together flour, cocoa powder, baking powder, and salt.
- In another bowl, mix melted butter and sugar until smooth and glossy.
- Add eggs and vanilla extract to the butter mixture and stir until combined.
- Gently fold the dry ingredients into the wet mixture until just combined.
- Divide the batter evenly among the cupcake liners.
- Bake for 18 to 22 minutes, until a toothpick comes out with moist crumbs.
- Heat the heavy cream until just steaming, then pour over chocolate chips.
- Stir until smooth to create the glaze.
- Spoon the glaze over cooled cupcakes and allow it to set before serving.
Notes
- Allow cupcakes to cool completely before glazing for best results.
- Use good quality cocoa powder for deeper flavor.
- Store in an airtight container for freshness.
Nutrition
- Serving Size: 1 cupcake
- Calories: 320
- Sugar: 24 g
- Sodium: 120 mg
- Fat: 18 g
- Saturated Fat: 10 g
- Unsaturated Fat: 7 g
- Trans Fat: 0 g
- Carbohydrates: 38 g
- Fiber: 2 g
- Protein: 4 g
- Cholesterol: 55 mg
Keywords: brownie cupcakes, chocolate cupcakes, fudgy cupcakes, chocolate glaze dessert