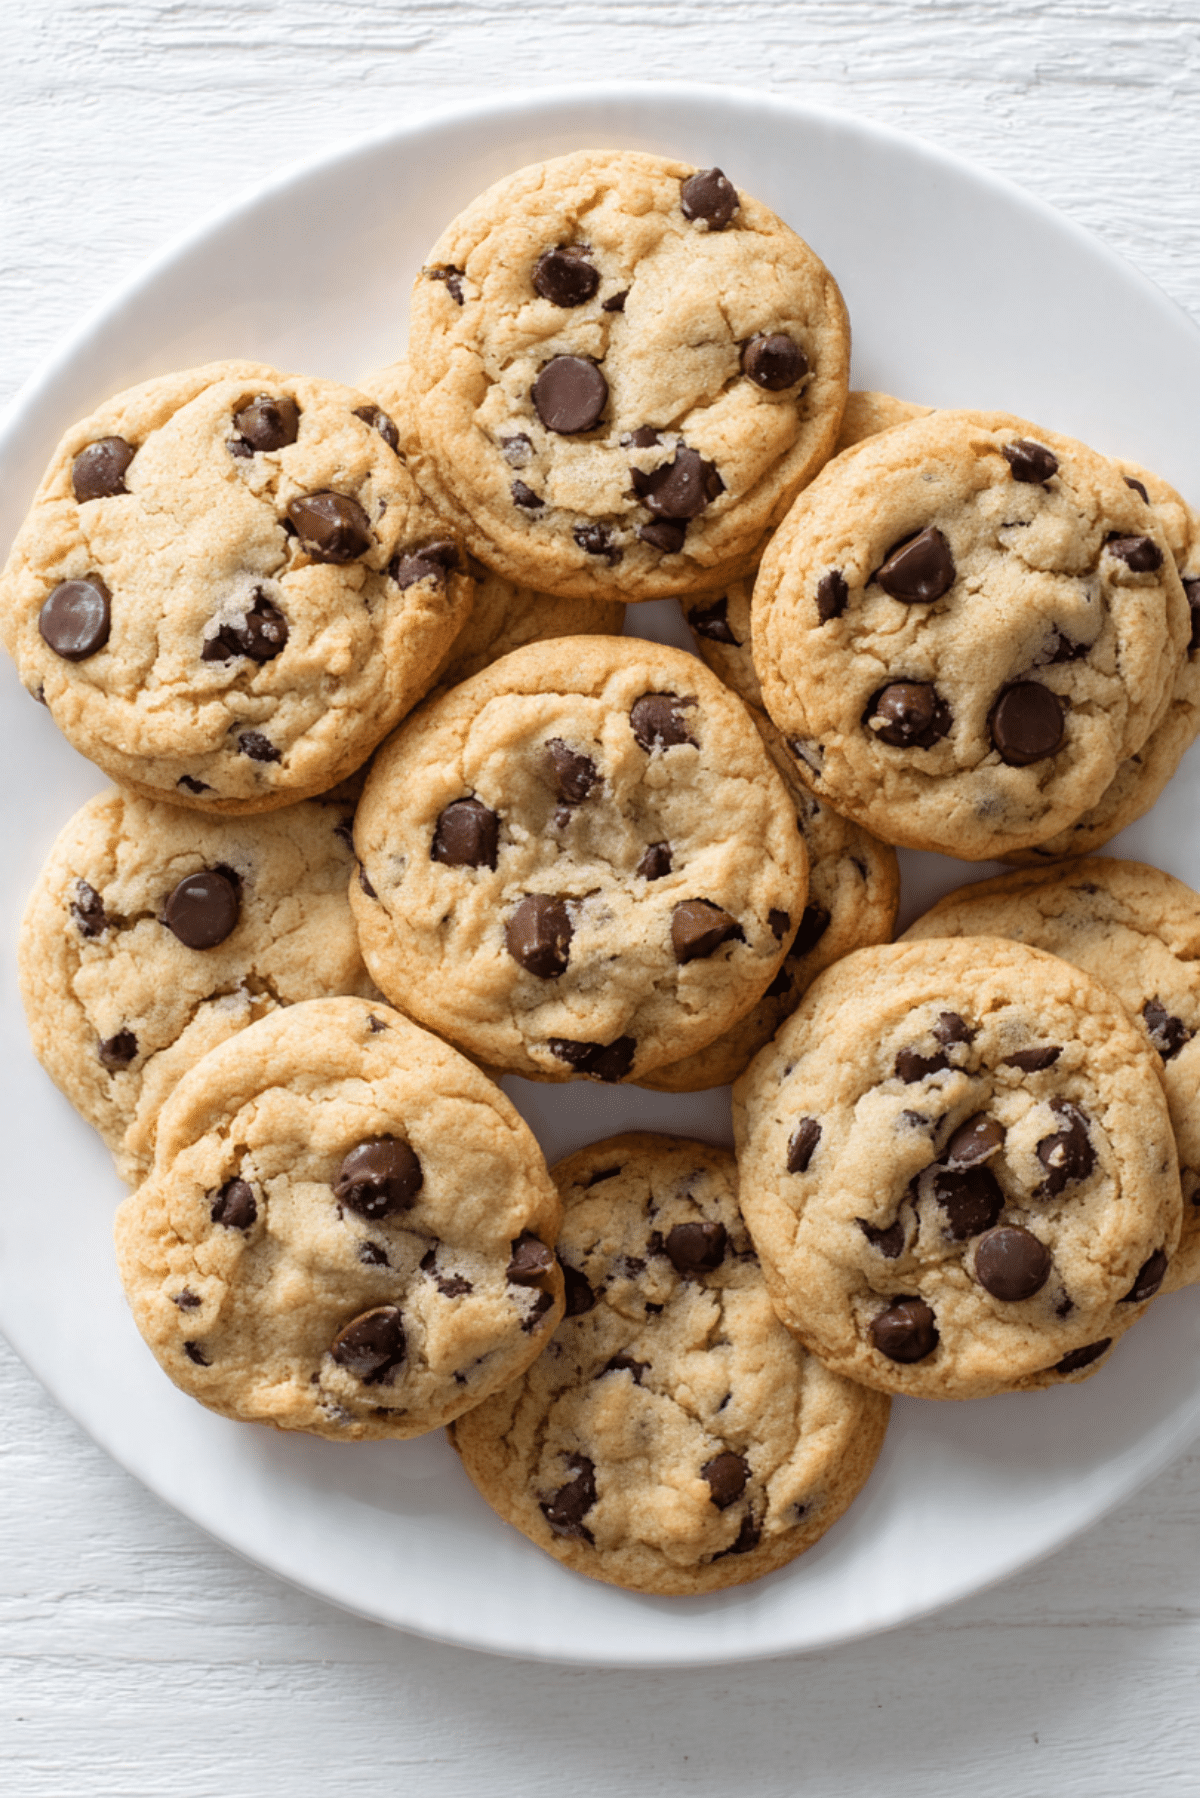
Chocolate Chip Cookies
The moment these cookies slide out of the oven, the kitchen fills with that familiar warm aroma of butter, sugar, and melted chocolate. It is the kind of smell that pulls everyone closer, lingering near the counter, waiting for that first bite that is crisp at the edges and soft right in the center. Trust me, you are going to love this from the very first batch.
Why This Recipe Feels Like Home
There is something deeply comforting about baking cookies that have stood the test of time. This one brings together simple pantry staples and turns them into something magical, warm, chewy, and dotted with pools of chocolate. And now let us dive a little deeper into what makes this bake so special.
A Little Background and Sweet Trivia
Cookies like these became popular in American kitchens in the mid twentieth century, when home baking was all about comfort and sharing. They were made for school lunches, weekend treats, and holiday trays. Over time, every family added their own small twist, which is why this classic still feels personal every time you bake it.
What Makes This Recipe a Keeper
This recipe has been tested and loved, and it works beautifully every single time.
Versatile: You can bake them thick and chewy or slightly thinner with crisp edges, depending on how you shape the dough.
Budget-Friendly: The ingredients are simple, affordable, and likely already sitting in your pantry.
Quick and Easy: From mixing bowl to oven, everything comes together without stress or complicated steps.
Customizable: You can adjust the chocolate, sweetness, or texture to suit your mood.
Crowd-Pleasing: These cookies disappear fast at parties, bake sales, and family gatherings.
Make-Ahead Friendly: The dough can be prepared ahead and baked when you are ready.
Great for Leftovers: Baked cookies store well and taste just as good the next day.
Baker’s Insider Secrets for Perfect Results
A few small details can take your cookies from good to unforgettable. Paying attention to temperature, mixing, and timing makes all the difference, and now let me share a few tricks straight from the kitchen.
Essential Tools You Will Need
Having the right tools makes the process smoother and more enjoyable.
Mixing Bowl: Large enough to combine everything without making a mess.
Electric Mixer or Whisk: Helps cream the butter and sugar properly for the right texture.
Measuring Cups and Spoons: Accurate measurements ensure consistent results.
Baking Sheet: A sturdy sheet helps cookies bake evenly.
Parchment Paper: Prevents sticking and promotes even browning.
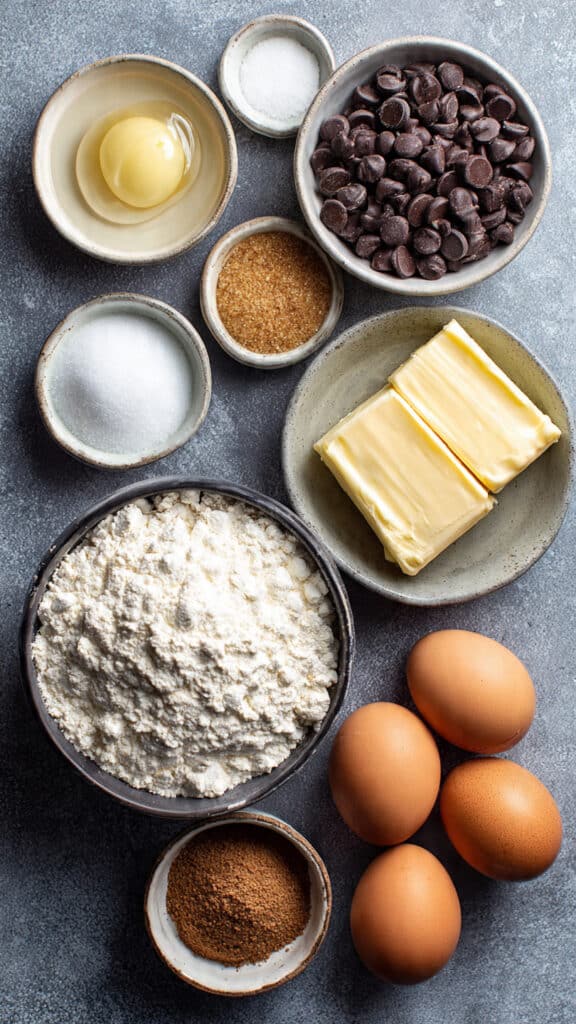
Ingredients You Will Need For This Recipe
Each ingredient plays an important role, working together to create that familiar texture and flavor we all crave.
- All-Purpose Flour: 2 and 1 quarter cups, provides structure and keeps the cookies tender.
- Baking Soda: 1 teaspoon, helps the dough rise slightly and spread just enough.
- Fine Salt: 1 teaspoon, balances sweetness and enhances chocolate flavor.
- Unsalted Butter: 1 cup, softened, adds richness and a buttery base.
- Granulated Sugar: 3 quarters cup, contributes sweetness and crisp edges.
- Brown Sugar: 3 quarters cup, packed, adds moisture and a soft chewy center.
- Large Eggs: 2, bring the dough together and add richness.
- Vanilla Extract: 2 teaspoons, deepens and rounds out the flavor.
- Semi-Sweet Chocolate Chips: 2 cups, provide melty pockets of chocolate throughout.
Easy Ingredient Swaps to Try
Baking should feel flexible and fun, and there is room to adjust.
All-Purpose Flour: Swap half with whole wheat flour for a slightly nuttier taste.
Semi-Sweet Chocolate Chips: Use milk or dark chocolate depending on preference.
Brown Sugar: Light or dark brown sugar both work well here.
Star Ingredients That Make the Difference
Unsalted Butter: Using softened butter helps trap air when creamed with sugar, leading to a lighter texture.
Brown Sugar: Its molasses content keeps the cookies moist and chewy long after baking.
Let’s Bake Together Step by Step
Now that everything is ready, and now let us dive into the heart of the process where the magic really happens.
- Preheat Your Equipment: Preheat the oven to 350 degrees Fahrenheit and line baking sheets with parchment paper.
- Combine Ingredients: In a bowl, whisk together flour, baking soda, and salt until evenly mixed.
- Prepare Your Cooking Vessel: In a separate bowl, cream the softened butter with granulated and brown sugar until light and fluffy.
- Assemble the Dish: Beat in eggs one at a time, then add vanilla extract. Gradually mix in the dry ingredients, then fold in the chocolate chips.
- Cook to Perfection: Scoop dough onto prepared baking sheets, spacing them apart, and bake for 10 to 12 minutes until edges are lightly golden.
- Finishing Touches: Let cookies rest on the baking sheet for a few minutes before transferring to a rack.
- Serve and Enjoy: Enjoy warm or let cool completely for a chewier texture.
Texture and Flavor Notes Worth Noticing
As they bake, the edges set first while the centers stay soft. The sugars caramelize gently, creating depth, while the chocolate melts into pockets that stay gooey even after cooling. Let me tell you, it is worth every bite.
Helpful Baking Tips and Tricks
A few final touches can elevate the final result.
- Chill the dough for thicker cookies.
- Slightly underbake for softer centers.
- Use a cookie scoop for even sizing.
Common Mistakes and How to Avoid Them
Even simple recipes have a few pitfalls, but they are easy to fix.
- Overmixing the dough can make cookies dense, so mix just until combined.
- Overbaking dries them out, so watch closely near the end.
- Using cold butter prevents proper creaming, so let it soften first.
Nutrition Snapshot
Servings: 24 cookies
Calories per serving: Approximately 210
Note: These values are approximate.
Time Breakdown for Planning Ahead
Prep Time: 15 minutes
Cook Time: 12 minutes
Total Time: 27 minutes
Make-Ahead and Storage Tips
The dough can be refrigerated for up to 48 hours before baking. Baked cookies store well in an airtight container at room temperature for up to five days. They can also be frozen and gently reheated to restore softness.
Serving Ideas to Make Them Shine
Serve warm with a glass of milk, alongside coffee, or crumbled over vanilla ice cream for an easy dessert upgrade.
Creative Ways to Use Leftovers
Leftover cookies can be chopped and mixed into ice cream, layered into dessert jars, or used as a base for cookie crusts.
Extra Tips for Best Results
Always rotate baking sheets halfway through baking for even browning. Use fresh baking soda for proper lift and texture.
How to Make Them Look Bakery-Worthy
Press a few extra chocolate chips on top of the dough before baking for a polished finish. Slightly irregular shapes make them look homemade and inviting.
Fun Variations to Explore
Add a pinch of cinnamon for warmth.
Mix in chopped nuts for crunch.
Use a mix of chocolate types for layered flavor.
Sprinkle a tiny bit of flaky salt after baking for contrast.
FAQ’s
1. Can I chill the dough overnight?
Yes, chilling improves flavor and helps control spreading.
2. Why did my cookies spread too much?
Butter may have been too soft or the dough too warm.
3. Can I freeze the dough?
Yes, portion and freeze for up to three months.
4. Should I use light or dark brown sugar?
Both work, dark adds a deeper flavor.
5. Can I make them smaller?
Yes, adjust baking time down slightly.
6. How do I keep them soft?
Store with a slice of bread in the container.
7. Can I double the recipe?
Absolutely, just mix in batches if needed.
8. Do I need parchment paper?
It helps but is not mandatory.
9. Can I use margarine instead of butter?
Butter is recommended for best flavor.
10. How do I know when they are done?
Edges should be set and centers slightly soft.
Conclusion
These cookies bring warmth, nostalgia, and pure comfort to the table. Whether you bake them for family, friends, or just yourself, this recipe delivers every time. This one is a total game-changer, and once you try it, it will become a regular in your kitchen.
Print
Chocolate Chip Cookies
- Prep Time: 15 minutes
- Cook Time: 12 minutes
- Total Time: 27 minutes
- Yield: 24 cookies
- Category: Dessert
- Method: Baking
- Cuisine: American
- Diet: Vegetarian
Description
Soft and chewy cookies with golden edges and melted chocolate chips, baked until just right for a comforting homemade treat.
Ingredients
- All-purpose flour, 2 1/4 cups
- Baking soda, 1 teaspoon
- Fine salt, 1 teaspoon
- Unsalted butter, 1 cup, softened
- Granulated sugar, 3/4 cup
- Brown sugar, 3/4 cup, packed
- Large eggs, 2
- Vanilla extract, 2 teaspoons
- Semi-sweet chocolate chips, 2 cups
Instructions
- Preheat the oven to 350 degrees Fahrenheit and line baking sheets with parchment paper.
- In a bowl, whisk together flour, baking soda, and salt.
- In another bowl, cream the softened butter with granulated sugar and brown sugar until light and fluffy.
- Add eggs one at a time, mixing well, then stir in vanilla extract.
- Gradually mix the dry ingredients into the wet mixture until just combined.
- Fold in the chocolate chips evenly.
- Scoop dough onto prepared baking sheets, spacing them apart.
- Bake for 10 to 12 minutes until the edges are lightly golden.
- Let cookies cool briefly on the baking sheet, then transfer to a rack.
Notes
- For thicker cookies, chill the dough before baking.
- Do not overbake to keep the centers soft.
- Press extra chocolate chips on top before baking for a bakery-style look.
Nutrition
- Serving Size: 1 cookie
- Calories: 210
- Sugar: 18 g
- Sodium: 150 mg
- Fat: 11 g
- Saturated Fat: 6 g
- Unsaturated Fat: 4 g
- Trans Fat: 0 g
- Carbohydrates: 27 g
- Fiber: 1 g
- Protein: 3 g
- Cholesterol: 35 mg
Keywords: classic cookies, homemade cookies, soft cookies, chewy cookies, baked dessert