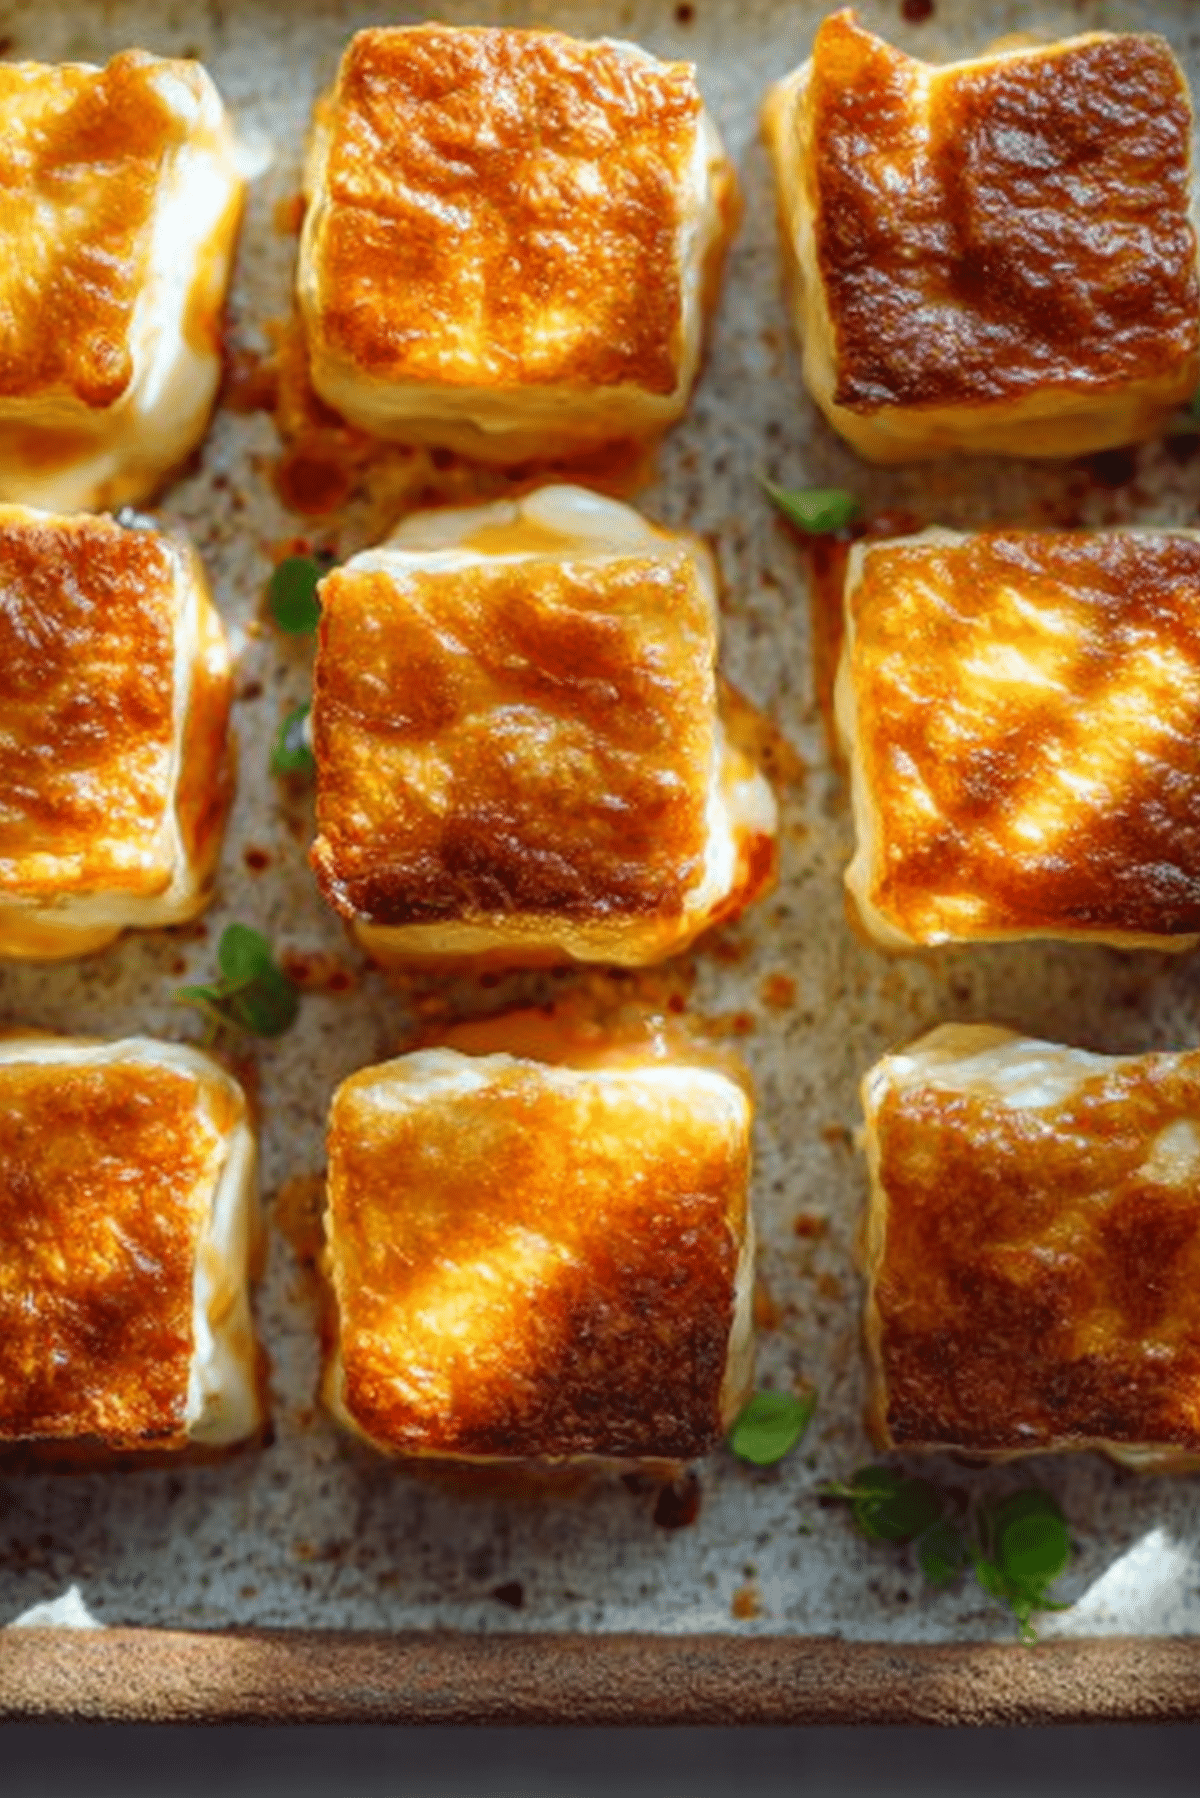
Cheese Dreams
There’s something magical about that first bite of melted cheese on warm, toasty bread. It’s nostalgic, comforting, and irresistibly satisfying. Cheese Dreams take that simple joy and turn it into a golden, bubbling treat that feels both retro and timeless. Whether served as a light lunch, a snack, or even a side dish, these little delights always bring smiles to the table.
Behind the Recipe
Cheese Dreams have a story that feels straight out of a vintage kitchen. They were a favorite during mid-century cocktail parties, when bite-sized canapés and finger foods ruled the evening. They were quick to make, elegantly simple, and deliciously rich, which made them perfect for entertaining. My grandmother used to make them on Sunday afternoons, serving them hot from the oven with a cup of tomato soup. Those lazy afternoons are what inspired me to bring this recipe back to life.
Recipe Origin or Trivia
While Cheese Dreams might sound like a modern snack, their roots stretch back to the 1920s. Originally created as an appetizer, they gained popularity in the 1950s as families looked for quick, affordable comfort food. The combination of crispy toast and melted cheese became a symbol of easy home entertaining. Even today, many southern households include Cheese Dreams as part of their party spreads or brunch tables.
Why You’ll Love Cheese Dreams
Each bite is crispy, melty, and rich, which makes them an instant hit. Here’s why they’ll become your new favorite go-to snack:
Versatile: Perfect for breakfast, brunch, or an afternoon bite, and they pair beautifully with soups or salads.
Budget-Friendly: Made with simple pantry staples that stretch your grocery budget without skimping on flavor.
Quick and Easy: Ready in less than 15 minutes, which makes them perfect for busy days.
Customizable: You can add herbs, spices, or even a bit of tomato for a fun twist.
Crowd-Pleasing: Everyone loves melty cheese and crispy toast—it’s impossible to resist.
Make-Ahead Friendly: You can prepare them earlier and bake just before serving.
Great for Leftovers: Reheat them in the oven for a snack that’s just as good as fresh.
Chef’s Pro Tips for Perfect Results
If you want the ultimate melt and crisp, keep these secrets in mind:
- Use room-temperature butter for easy spreading.
- Grate your cheese freshly—it melts smoother and tastes richer.
- Toast the bread lightly before topping to prevent sogginess.
- Don’t overbake; keep an eye out for bubbling cheese and golden edges.
- Add a pinch of paprika or mustard powder to enhance the cheese flavor.
Kitchen Tools You’ll Need
Before we start, gather these essentials:
Baking Sheet: To toast the bread evenly.
Mixing Bowl: For blending cheese and seasonings.
Spatula or Spoon: To spread the cheese mixture smoothly.
Oven or Toaster Oven: The heart of this recipe.
Cooling Rack: To keep the toast crisp after baking.
Ingredients in Cheese Dreams
There’s a beautiful simplicity to this recipe. Each ingredient plays a part in creating that perfect cheesy harmony.
- Cheddar Cheese: 1 ½ cups shredded, gives that classic sharp flavor and melts beautifully.
- Mayonnaise: 3 tablespoons, adds creaminess and helps the cheese spread evenly.
- Dijon Mustard: 1 teaspoon, gives a gentle tang that balances the richness.
- Worcestershire Sauce: 1 teaspoon, adds depth and savory notes.
- White Bread: 6 slices, lightly toasted, provides the perfect crunchy base.
- Butter: 2 tablespoons softened, used to lightly coat the bread before topping.
- Paprika: ¼ teaspoon, for a subtle smoky finish.
- Salt and Pepper: To taste, for seasoning perfection.
Ingredient Substitutions
Sometimes you have to work with what’s on hand, and that’s totally fine.
Cheddar Cheese: Swap for Colby Jack, Monterey Jack, or mozzarella for a milder taste.
Mayonnaise: You can use Greek yogurt for a lighter option.
White Bread: Try whole grain, rye, or even sourdough for a heartier base.
Dijon Mustard: Regular yellow mustard or a pinch of dry mustard powder works too.
Ingredient Spotlight
Cheddar Cheese: The hero of this recipe, known for its sharp, tangy depth that pairs perfectly with buttery toast.
Worcestershire Sauce: A small splash gives umami richness and that nostalgic savory edge.
Instructions for Making Cheese Dreams
Now let’s get cooking. Here are the steps you’ll follow to create these golden beauties.
- Preheat Your Equipment: Preheat your oven to 400°F (200°C) and line a baking sheet with parchment paper.
- Combine Ingredients: In a mixing bowl, stir together shredded cheddar, mayonnaise, Dijon mustard, Worcestershire sauce, and seasonings until smooth.
- Prepare Your Cooking Vessel: Lightly butter each slice of bread, then place them butter-side down on the baking sheet.
- Assemble the Dish: Spread the cheese mixture evenly over the top of each slice.
- Cook to Perfection: Bake for 8–10 minutes, or until the cheese is bubbly and the edges are golden brown.
- Finishing Touches: Sprinkle a pinch of paprika on top while still hot.
- Serve and Enjoy: Slice each toast into triangles and serve warm.
Texture & Flavor Secrets
The key to the perfect Cheese Dream is contrast. You’ll get crispy edges, soft centers, and gooey cheese that stretches slightly when pulled apart. The Worcestershire and mustard add a slight tang that balances the richness, making every bite full of flavor.
Cooking Tips & Tricks
Here are a few tips that make a big difference:
- Use finely shredded cheese for smoother melting.
- Don’t overload the bread with topping—it can make it soggy.
- For an extra kick, add a touch of cayenne or a sprinkle of herbs.
What to Avoid
A few small mistakes can throw off the texture, so here’s what to watch for:
- Overbaking, which can make the cheese rubbery.
- Using too much mayo—it can cause greasy spots.
- Skipping pre-toasting the bread, which helps prevent sogginess.
Nutrition Facts
Servings: 4
Calories per serving: 260
Note: These are approximate values.
Preparation Time
Prep Time: 5 minutes
Cook Time: 10 minutes
Total Time: 15 minutes
Make-Ahead and Storage Tips
You can mix the cheese topping ahead and keep it refrigerated for up to 2 days. Toast the bread just before serving. Leftovers can be reheated in the oven for a few minutes to restore crispness. Avoid microwaving—they’ll lose their crunch.
How to Serve Cheese Dreams
These are wonderful as a snack with tea, served with soup, or alongside a fresh salad. They also make great appetizers for gatherings—simple yet elegant finger food that always disappears first.
Creative Leftover Transformations
Turn your leftover Cheese Dreams into:
- Mini Croutons: Cut into cubes and bake again for cheesy salad toppings.
- Cheese Melts: Top with tomato slices and reheat for a mini pizza vibe.
- Breakfast Boost: Pair with eggs and fruit for a quick morning meal.
Additional Tips
For an extra flavor twist, mix in chopped chives or caramelized onions into the cheese blend. You can even use cookie cutters to make fun shapes for kids.
Make It a Showstopper
Serve them on a wooden board, drizzle lightly with honey or a sprinkle of fresh herbs, and watch how everyone’s eyes light up. Presentation makes even simple recipes unforgettable.
Variations to Try
- Spicy Cheese Dreams: Add jalapeño slices or crushed red pepper.
- Tomato Lovers: Layer a thin tomato slice beneath the cheese mixture.
- Garlic Twist: Rub toast with a cut garlic clove before adding toppings.
- Herb Delight: Add chopped parsley or thyme for freshness.
- Mini Bites: Use baguette rounds instead of sandwich bread for party-sized snacks.
FAQ’s
Q1: Can I use pre-shredded cheese?
A1: You can, but freshly shredded melts smoother and has better flavor.
Q2: Can I make them gluten-free?
A2: Yes, just use gluten-free bread.
Q3: Can I use a toaster oven?
A3: Absolutely, just adjust cooking time slightly since toaster ovens heat faster.
Q4: Can I add other toppings?
A4: Yes, diced tomatoes, herbs, or a sprinkle of chili flakes all work great.
Q5: How do I keep them warm for serving?
A5: Place them on a wire rack in a warm oven set to 200°F until ready to serve.
Q6: Can I use a different type of cheese?
A6: Yes, try gouda, pepper jack, or mozzarella for variety.
Q7: What pairs best with Cheese Dreams?
A7: Tomato soup, green salad, or fresh fruit make wonderful companions.
Q8: How long will leftovers last?
A8: Store in an airtight container for up to 2 days.
Q9: Can I freeze them?
A9: Yes, freeze before baking and cook from frozen for 2–3 extra minutes.
Q10: Why are they called Cheese Dreams?
A10: The name comes from their dreamy, melty texture and the cozy comfort they bring.
Conclusion
Cheese Dreams are proof that the simplest recipes can be the most satisfying. With their buttery crunch, creamy cheese topping, and golden glow, they feel like a warm hug on a plate. Trust me, once you taste these, you’ll understand why they’ve stayed a classic for generations.
Print
Cheese Dreams
- Prep Time: 5 minutes
- Cook Time: 10 minutes
- Total Time: 15 minutes
- Yield: 4 servings
- Category: Snack, Appetizer
- Method: Baking
- Cuisine: American
- Diet: Vegetarian
Description
Golden, bubbly Cheese Dreams made with melted cheddar, creamy mayo, and a hint of mustard on crisp toast. A nostalgic, comforting snack that’s perfect for brunch, parties, or cozy afternoons.
Ingredients
- Cheddar Cheese: 1 ½ cups shredded, gives a sharp and creamy melt
- Mayonnaise: 3 tablespoons, adds smooth texture and richness
- Dijon Mustard: 1 teaspoon, brings a gentle tang to balance the cheese
- Worcestershire Sauce: 1 teaspoon, adds depth and umami flavor
- White Bread: 6 slices, lightly toasted for a crisp base
- Butter: 2 tablespoons softened, used for spreading on the bread
- Paprika: ¼ teaspoon, adds a touch of color and smoky finish
- Salt and Pepper: To taste, enhances overall flavor
Instructions
- Preheat Your Equipment: Set oven to 400°F (200°C) and line a baking sheet with parchment paper.
- Combine Ingredients: Mix cheddar cheese, mayonnaise, mustard, Worcestershire, salt, and pepper in a bowl.
- Prepare Your Cooking Vessel: Butter bread slices and arrange them butter-side down on the sheet.
- Assemble the Dish: Spread cheese mixture evenly over the bread.
- Cook to Perfection: Bake 8–10 minutes until cheese bubbles and edges turn golden.
- Finishing Touches: Sprinkle paprika on top immediately after baking.
- Serve and Enjoy: Cut into triangles and serve warm.
Notes
- Use freshly shredded cheese for the smoothest melt.
- Pre-toast bread slightly to prevent sogginess.
- Store leftover topping mixture in the fridge for up to 2 days.
- Reheat in the oven, not the microwave, to keep crisp texture.
Nutrition
- Serving Size: 1 portion
- Calories: 260
- Sugar: 1g
- Sodium: 310mg
- Fat: 18g
- Saturated Fat: 9g
- Unsaturated Fat: 7g
- Trans Fat: 0g
- Carbohydrates: 14g
- Fiber: 1g
- Protein: 9g
- Cholesterol: 35mg
Keywords: cheese dreams, vintage snack, baked cheese toast, easy appetizer, cheesy toast