Homemade Cheez-Its
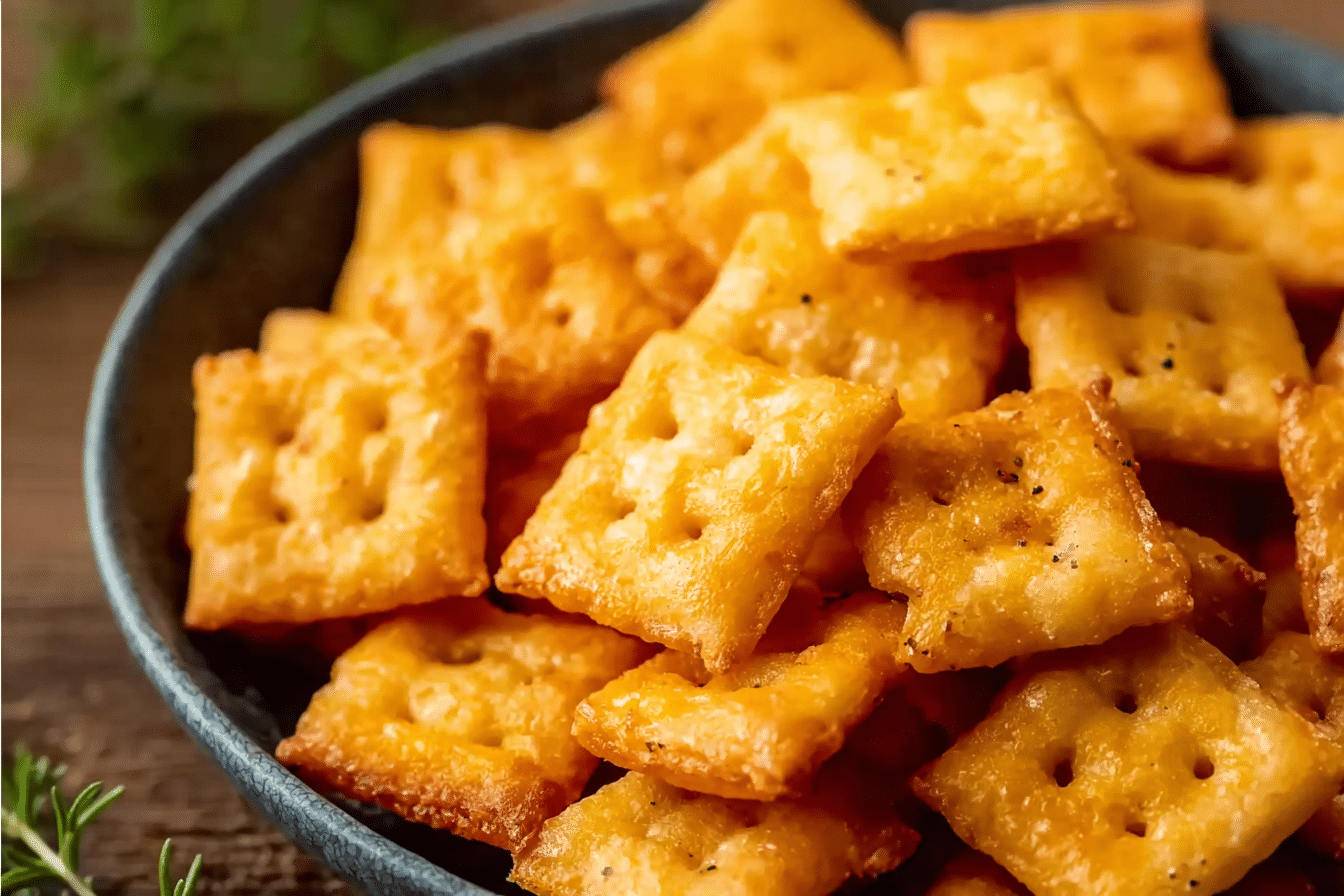
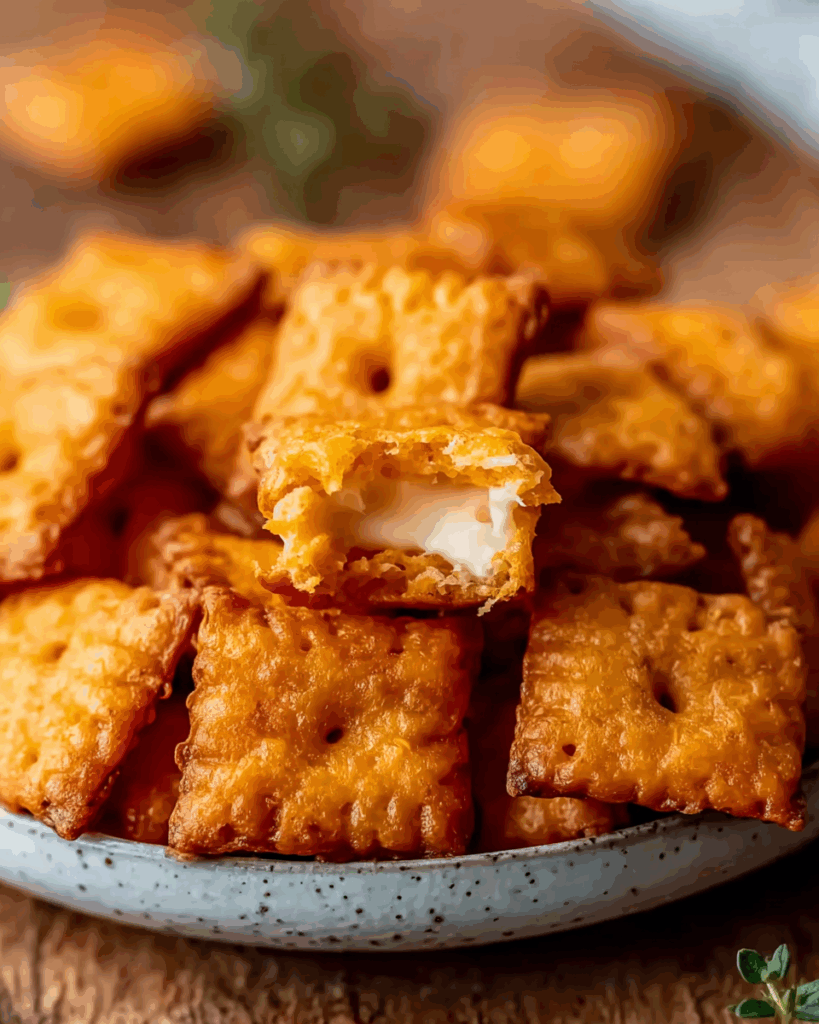
There’s something magical about that first crunchy bite of a Cheez-It, the way the sharp cheddar flavor bursts across your tongue followed by a buttery crispness that makes you instantly reach for another. Making them at home brings a fresh warmth and deeper cheesiness that you just can’t get from the box. Imagine the aroma of toasted cheese wafting through your kitchen, golden crackers lined up on a tray, each one promising a perfectly salty, crispy treat. Trust me, you’re going to love this.
Behind the Recipe
Cheez-Its have always been a snack that sparks a sense of childhood joy. Whether you packed them in lunchboxes or shared them on a road trip, they hold a place in many snack-time memories. The idea of recreating them at home came from wanting a fresher, more indulgent version, one where you can actually taste the cheese, feel the buttery layers, and know exactly what went into every bite.
Recipe Origin or Trivia
Cheez-Its were first introduced in 1921 by the Green & Green Company, later acquired by Sunshine Biscuits, and eventually Kellogg’s. Their signature square shape with a tiny hole in the middle is more than just aesthetic—it helps release steam during baking so the cracker stays crisp. The homemade version gives you the chance to play with flavors while still honoring that nostalgic classic.
Why You’ll Love Homemade Cheez-Its
There’s no doubt these little squares of joy will become a kitchen favorite. Here’s why:
Versatile: Snack them on their own, pack them in lunches, or serve them as part of a cheese board.
Budget-Friendly: A few simple ingredients make a big batch, perfect for saving money compared to store-bought.
Quick and Easy: The dough comes together in minutes, and the baking is fast.
Customizable: Use sharp cheddar, pepper jack, or even parmesan to create your own cheesy twist.
Crowd-Pleasing: Everyone loves a good cheesy snack, from kids to adults.
Make-Ahead Friendly: The dough can be prepped ahead and chilled until you’re ready to bake.
Great for Leftovers: If you manage not to eat them all, they keep well in an airtight container for days.
Print
Homemade Cheez-Its
- Prep Time: 15 minutes
- Cook Time: 15 minutes
- Total Time: 30 minutes
- Yield: 6 servings 1x
- Category: Snack
- Method: Baking
- Cuisine: American
- Diet: Vegetarian
Description
Crunchy, golden homemade Cheez-Its with bold sharp cheddar flavor, a buttery bite, and a perfectly salty finish. Trust me, you’re going to love this.
Ingredients
- 8 ounces sharp cheddar cheese, freshly grated
- 4 tablespoons unsalted butter, cold and cubed
- 1 cup all-purpose flour
- 1 teaspoon fine salt
- 2 to 3 tablespoons ice water
- Flaky sea salt, for sprinkling
Instructions
- Preheat the oven to 375°F, then line a baking sheet with parchment paper.
- Add the grated cheddar, cold cubed butter, flour, and fine salt to a food processor, pulse until the mixture is sandy and evenly crumbly. Drizzle in ice water, one tablespoon at a time, and pulse just until the dough comes together.
- Lightly flour your work surface and gather your baking sheet nearby so everything is ready.
- Roll the dough to about 1/8 inch thick. Use a pastry wheel or pizza cutter to cut small squares. Poke a small hole in the center of each square with a skewer or straw.
- Transfer the squares to the prepared baking sheet, sprinkle lightly with flaky sea salt, and bake for 12 to 15 minutes until puffed and golden at the edges.
- Cool the crackers on the pan until they crisp fully as they cool.
- Serve warm or at room temperature, then store any leftovers in an airtight container.
Notes
- Grate cheese fresh for the best melt and flavor.
- Chill dough briefly if it gets soft while rolling to keep edges neat.
- For extra crunch, bake 1 to 2 minutes longer while watching closely.
- Use the center hole to vent steam so the crackers stay crisp.
Nutrition
- Serving Size: about 1/6 batch, roughly 18 to 20 crackers
- Calories: 190
- Sugar: 0 g
- Sodium: 320 mg
- Fat: 12 g
- Saturated Fat: 7 g
- Unsaturated Fat: 4 g
- Trans Fat: 0 g
- Carbohydrates: 14 g
- Fiber: 0.5 g
- Protein: 6 g
- Cholesterol: 35 mg
Keywords: homemade cheez-its, cheddar crackers, cheese crackers, snack, baked crackers, easy appetizer, kid friendly
Chef’s Pro Tips for Perfect Results
Getting that signature Cheez-It crunch and flavor is all about technique.
- Chill the dough well before rolling to keep it from sticking and to help the crackers hold their shape.
- Use a pastry wheel or pizza cutter for clean, even squares.
- Don’t skip the tiny hole in the center—it helps the crackers bake evenly.
- Grate your cheese fresh instead of buying pre-shredded for the richest flavor.
- Sprinkle with flaky sea salt before baking for that irresistible finish.
Kitchen Tools You’ll Need
To make your homemade Cheez-Its, a few simple tools are all you need:
Food Processor: Quickly blends cheese and butter into a smooth dough.
Rolling Pin: Helps flatten the dough evenly for crisp crackers.
Pastry Wheel or Pizza Cutter: For cutting uniform squares.
Baking Sheet: A flat surface for even baking.
Parchment Paper: Prevents sticking and makes cleanup a breeze.
Ingredients in Homemade Cheez-Its
Every bite of these crackers is a balance of cheese, butter, and just enough flour to hold it together. Here’s what you’ll need:
- Sharp Cheddar Cheese: 8 ounces, freshly grated for bold, tangy flavor.
- Unsalted Butter: 4 tablespoons, cold and cubed for flakiness.
- All-Purpose Flour: 1 cup, provides structure to the crackers.
- Salt: 1 teaspoon, enhances flavor and gives that signature salty bite.
- Ice Water: 2–3 tablespoons, binds the dough together.
- Flaky Sea Salt: For sprinkling on top to boost crunch and taste.
Ingredient Substitutions
Homemade Cheez-Its are flexible and forgiving.
Sharp Cheddar Cheese: Substitute with white cheddar, gouda, or pepper jack for different flavor profiles.
All-Purpose Flour: Whole wheat flour for a nuttier, more rustic cracker.
Unsalted Butter: Margarine or plant-based butter for a dairy-free version.
Ingredient Spotlight
Sharp Cheddar Cheese: The star of the show, bringing that classic tangy bite and vibrant orange color.
Unsalted Butter: Adds richness and a melt-in-your-mouth texture that balances the crispness.
Instructions for Making Homemade Cheez-Its
Rolling up your sleeves is where the fun begins. The process is quick, but the reward lasts far longer than the baking time.
- Preheat Your Equipment: Preheat the oven to 375°F and line a baking sheet with parchment paper.
- Combine Ingredients: In a food processor, pulse together cheese, butter, flour, and salt until crumbly. Add ice water one tablespoon at a time until the dough comes together.
- Prepare Your Cooking Vessel: Gather your baking sheet and lightly flour your work surface.
- Assemble the Dish: Roll the dough into a thin sheet, about 1/8 inch thick. Use a pizza cutter to cut into small squares. Poke a hole in the center of each square with a skewer or straw.
- Cook to Perfection: Transfer squares onto the prepared baking sheet, sprinkle with flaky salt, and bake for 12–15 minutes until puffed and golden.
- Finishing Touches: Allow crackers to cool completely so they crisp up fully.
- Serve and Enjoy: Enjoy them warm out of the oven or store in an airtight container for later snacking.
Texture & Flavor Secrets
The beauty of Homemade Cheez-Its lies in their layers of texture. The crisp, golden edges give way to a tender bite packed with sharp, tangy cheddar. The salt crystals on top add tiny bursts of flavor that keep you reaching for more, while the buttery base balances everything with a rich undertone.
Cooking Tips & Tricks
Here are a few tricks to ensure your crackers turn out bakery-perfect:
- Roll the dough as evenly as possible for uniform baking.
- For extra cheesy flavor, sprinkle grated parmesan on top before baking.
- If you prefer extra crunch, bake for an additional 1–2 minutes but watch closely.
What to Avoid
Even the best snack can go wrong if you’re not careful. Here’s what to watch out for:
- Skipping the chilling step, which can make the dough sticky and difficult to cut.
- Rolling too thick, leading to soft rather than crispy crackers.
- Overbaking, which can make them bitter instead of perfectly toasty.
Nutrition Facts
Servings: 6
Calories per serving: 190
Note: These are approximate values.
Preparation Time
Prep Time: 15 minutes
Cook Time: 15 minutes
Total Time: 30 minutes
Make-Ahead and Storage Tips
Homemade Cheez-Its can be made ahead by preparing the dough and refrigerating it for up to 2 days before rolling and baking. Once baked, store them in an airtight container at room temperature for up to a week. For longer storage, freeze the unbaked dough and thaw before rolling.
How to Serve Homemade Cheez-Its
These crackers shine on their own, but you can take them up a notch by pairing them with dips like hummus, salsa, or even a creamy spinach dip. They’re also a fun addition to soup nights, replacing traditional croutons with a cheesy crunch.
Creative Leftover Transformations
If you somehow end up with leftovers, here’s how to give them new life:
- Crush them and use as a topping for macaroni and cheese.
- Add to a breadcrumb mix for coating chicken or veggies.
- Mix into snack mixes with nuts, pretzels, and dried fruit.
Additional Tips
For the best results, use room temperature cheese before grating. This ensures it blends smoothly with the butter. Also, don’t skip the sprinkling of sea salt—it elevates the flavor more than you’d think.
Make It a Showstopper
Serve your Homemade Cheez-Its in a rustic bowl lined with parchment paper for that cozy homemade look. For parties, stack them neatly in glass jars or small paper bags tied with twine for an irresistible, snackable presentation.
Variations to Try
- Spicy Cheez-Its with cayenne pepper or chili powder in the dough.
- Herb Cheez-Its with rosemary, thyme, or oregano mixed in.
- Double Cheese Cheez-Its by adding parmesan along with cheddar.
- Whole Wheat Cheez-Its for a more wholesome flavor.
- Smoky Cheez-Its with smoked paprika in the mix.
FAQ’s
1. Can I make these without a food processor?
Yes, you can cut the butter into the flour and cheese with a pastry cutter or even your hands until crumbly, then add water to form the dough.
2. Can I use pre-shredded cheese?
It’s possible, but fresh-grated cheese melts and blends better for superior flavor.
3. How do I keep them extra crispy?
Be sure to roll the dough thin and allow them to cool completely before storing.
4. Can I double the recipe?
Absolutely, just be sure to bake in batches so the crackers cook evenly.
5. Can I freeze baked Cheez-Its?
Yes, but they may lose some crispness. Refresh them in a 350°F oven for a few minutes before serving.
6. What flour works best?
All-purpose flour is classic, but whole wheat gives a hearty, nutty flavor.
7. Why is there a hole in the middle?
It helps steam escape, ensuring the cracker stays crisp.
8. Can I make them gluten-free?
Yes, use a gluten-free all-purpose blend and adjust water if needed.
9. Can I use other cheeses?
Yes, experiment with parmesan, gouda, or pepper jack for different flavors.
10. How long do they stay fresh?
Stored properly, they’ll stay crisp and delicious for up to a week.
Conclusion
Homemade Cheez-Its take a classic childhood snack and elevate it into something warm, cheesy, and unforgettable. With just a few simple ingredients, you can create golden squares of joy that rival the boxed version and taste even better. Let me tell you, it’s worth every bite.

